
Heavy Duty Truck Accessories Worth the Spend
November 1, 2026 · Francisco Hornelas

An estimated 528,177 large trucks were involved in police-reported crashes in 2023, according to NHTSA's large-truck crash report. That category is broader than Class 8, but the buying lesson is clear: heavy duty truck accessories deserve more thought than matching the chrome. Buy for secure fit, salt resistance, and repair time first. Pick the shine after that.
For a Peterbilt, Kenworth, Freightliner, or International, the right bumper starts with the truck and the route. A low show bumper, a highway replacement, and a front-end protection system aren't interchangeable.
Table of Contents
- Heavy Duty Truck Accessories by Job
- What the Front Bumper Protects and What It Doesn't
- Fitment Rules That Keep You Legal
- Chrome Steel Versus 304 and 430
- When a Bumper Pays for Itself
- How to Install and Inspect Accessories
- Heavy Duty Truck Accessories FAQs
- Order a Direct Bolt-On Bumper Today
Heavy Duty Truck Accessories by Job
Heavy duty truck accessories fall into eight jobs for owner-operators and fleets. Pick the job that fixes a real problem today, not the accessory that looks best in a parked-truck photo.
Heavy duty truck accessories by job
| Accessory | Main job | Buy first if | Watch-out |
|---|---|---|---|
| Bumper | Takes dock, deer, and lot contact and sets the front look | You need a legal front bumper or a Peterbilt 389, Kenworth W900, or drop-bumper replacement | Loose mount, wrong drop, or blocked lamps |
| Lighting | Night and bad-weather visibility | You run fog, dark lanes, or have a broken OEM lamp | Unsecured or unauthorized flashing lamp |
| Mirrors | Lane view and blind-spot coverage | You run highway miles or have cracked glass | Vibration, wrong arm length, or hidden turn signal |
| Aerodynamics | Cuts wind drag around the nose, roof, or chassis | You run long, steady highway routes | Parts that rub hoses or add repair time |
| Protection | Shields grille, lights, and lower valance | You run deer country, pits, or tight docks | Extra weight and sensor blockage |
| Towing | Provides a rated recovery or pulling point | The truck needs rated pulling or winching equipment | Unrated hooks or improvised frame holes |
| Interior comfort | Improves seat, bunk, and cab livability | Sleeper teams work multi-day runs | Spending that leaves roadworthiness problems unfixed |
| Safety gear | Adds visibility or cab protection | A documented fleet specification calls for it | An accessory with no inspection step |
Bumpers lead the list because their attachment and position affect roadworthiness, while chrome, stainless, and drop styles also shape the truck's appearance. Lighting follows for night work, but a brighter lamp isn't an upgrade if its mount shakes loose.
Buy for the route you actually run
Mirrors and aero fairings deserve attention on long highway days. Check mirror stability from the driver's seat, and make sure replacement fairings leave service access open.
A grille guard changes front clearance and access under the hood. Tow hooks matter only when their rating and attachment match the intended pull. Sleeper comfort matters too, but a new bunk pad won't fix a roadside defect.
Buying rule: Repair the loose, broken, or unsafe part before adding another accessory.
For a fleet, assign each purchase to a defect, route need, or written truck specification. That keeps replacement parts consistent and stops drivers from inheriting wiring and brackets nobody knows how to service.
Lock in one row before spending. For a bumper, that means choosing the style, material, thickness, and exact fitment together.
What the Front Bumper Protects and What It Doesn't
A bumper takes the first contact in some low-speed hits, from a loading-area obstacle to a snowbank in a chain-up lot. A sound bumper and mount may limit damage around the point of impact. The hood, cooling package, and headlights can still be damaged.
Drivers search for a Peterbilt 389 bumper, Kenworth W900 chrome bumper, Freightliner Cascadia wraparound, or 18 inch drop bumper. Each style has a different shape and fitment. Choose for the truck and the route, not the search term alone.
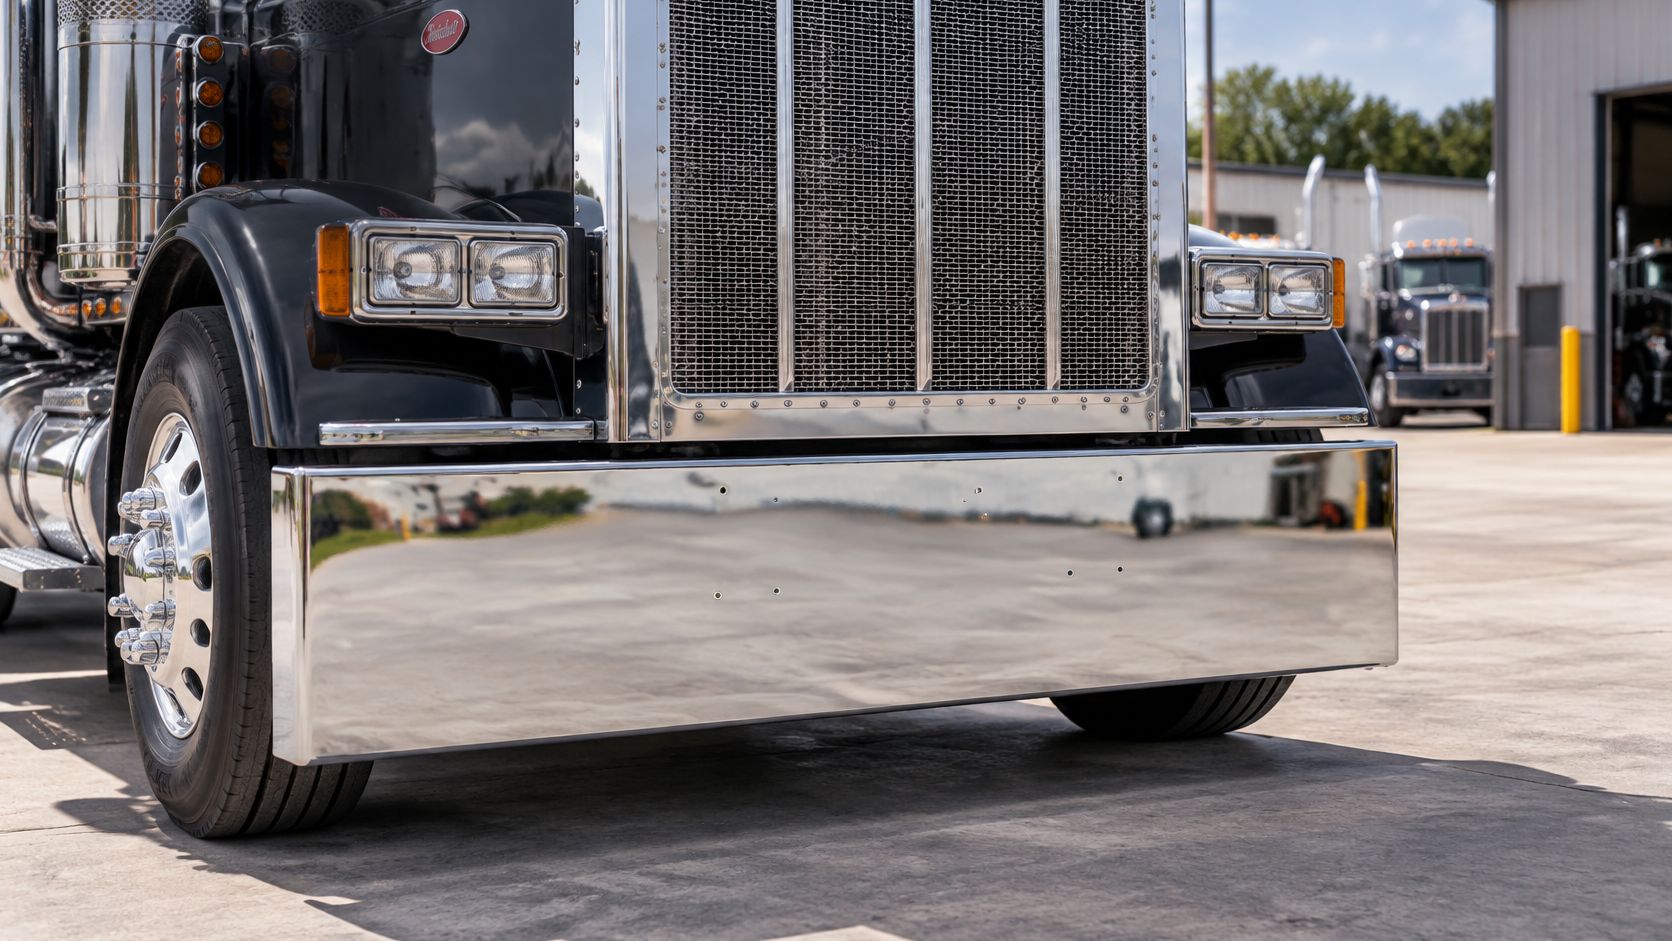
Match the shape before the finish
A flat bumper keeps a straight front line and makes a practical replacement when it matches the chassis. A drop bumper lowers that line, so check clearance on ramps, driveway crowns, and uneven lots before buying.
A wraparound follows the front corners. Use brackets made for that truck, not brackets bent to make the bumper appear level.
- Flat style: Choose it for a straight profile and practical service access.
- Drop style: Check loaded clearance before choosing the deeper look.
- Wraparound style: Confirm corner support, hood clearance, and the correct bracket set.
Thickness helps, but the mounts carry the load
For comparable steel sheet, a lower gauge number means thicker material. 10-gauge steel resists denting more than 11-gauge steel of the same grade and construction. Thickness alone does not establish how the full bumper assembly will perform in a collision.
Impact loads pass through the bumper, fasteners, brackets, and frame attachments. The NHTSA rear-impact protection technical report discusses guard construction and attachment as a system. It covers trailer rear guards, so it does not certify a tractor's front bumper.
A deer strike on a two-lane road can damage the bumper and nearby parts. A thicker flat bumper with sound brackets may limit local damage, but it does not guarantee that headlights will stay aimed.
The Peterbilt 378 / 379 chrome bumper is made from 10-gauge chrome-plated steel with a mirror-polished finish.
Check fog-lamp, tow-hook, and plate cutouts before ordering. Correct openings and sound brackets come before mirror polish.
Fitment Rules That Keep You Legal
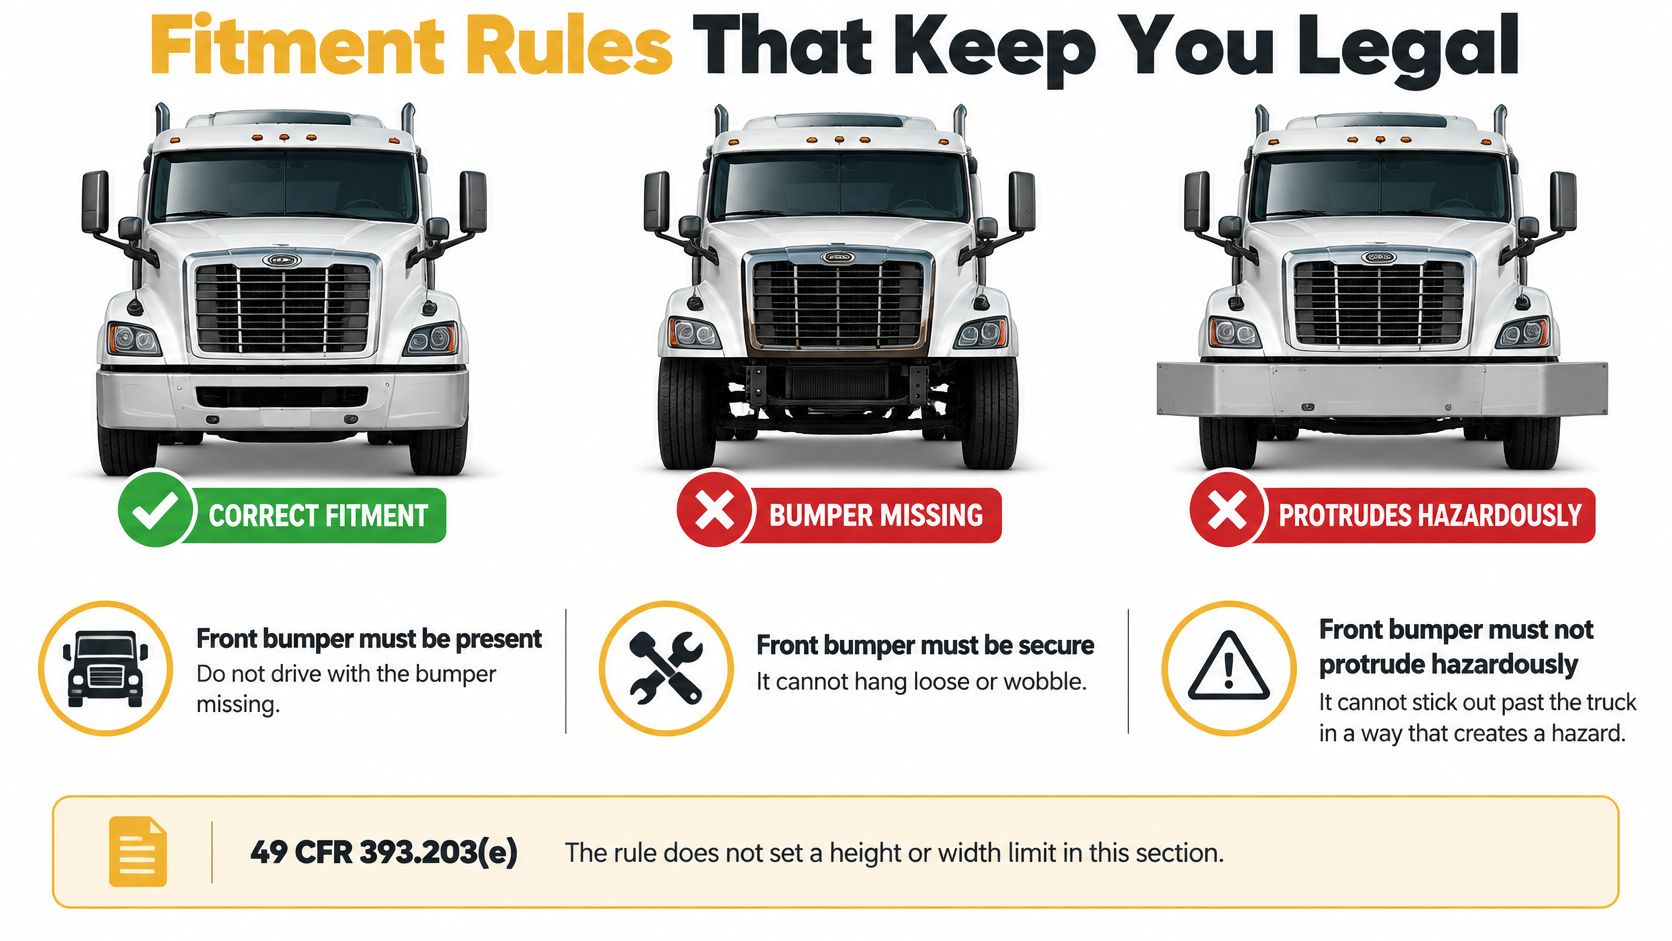
Under 49 CFR § 393.203(e), a truck's front bumper can't be missing, loosely attached, or protrude beyond the vehicle's confines in a way that creates a hazard. In driver language: present, tight, and not sticking out dangerously.
That section doesn't prescribe a universal bumper thickness, finish, or drop height. An 18 inch drop bumper can look right and still be wrong for the truck's clearance or mounting arrangement.
Bumper fitment lookup by truck
| Truck | Common search | Bolt-on check |
|---|---|---|
| Peterbilt 379 and 389 | Peterbilt 389 bumper | Confirm the exact model, year, mounting pattern, and end style |
| Kenworth W900 | Kenworth W900 chrome bumper | Match frame mounting points and hood clearance |
| Kenworth T600 and T680 | Kenworth T600 chrome bumper | Confirm brackets ship with the bumper |
| Freightliner Classic and FLD 120 | Freightliner FLD 120 bumper | Require model-specific direct bolt-on fit without drilling or cutting |
| Freightliner Cascadia | Freightliner Cascadia wraparound | Confirm wraparound brackets and sensor openings |
| International conventionals | International bumper | Identify the exact model and year before matching mounts |
A shared brand name doesn't establish compatibility. Don't assume a bumper listed for one conventional fits another because their fronts look close.
Put these details on the order
- Brand, model, and year: Use the truck's identification records, not a guess from the hood.
- Bumper and end style: Specify flat, drop, or wraparound, plus the end shape.
- Cutouts: Match fog lamps, tow hooks, plate mounting, and relevant lighting.
- Bracket contents: Establish which brackets and hardware are included.
- Direct bolt-on confirmation: The holes must already match the intended mounting points without shop drilling or cutting.
A universal bar that needs cutting adds labor and can change projection. Don't treat an installer's ability to fabricate brackets as proof of safe fitment.
Shipping needs the same attention. Oversized bumpers, including Kenworth T680 and T680 NEXTGEN styles, ship by LTL freight, not a parcel box. Confirm dispatch timing, delivery access, and unloading arrangements before booking the repair.
Use our bumper safety standards guide when preparing the purchase and shop paperwork. State equipment rules may add considerations beyond this federal provision.
The pre-order pass test is simple: the bumper bolts to the intended mounts, sits within the proper truck envelope, and leaves required lamps visible.
Chrome Steel Versus 304 and 430
Salt, moisture, and wash chemicals set the material choice. For northern routes that face regular de-icing salt, 304 stainless is the stronger corrosion-resistance pick. For milder roads, polished 430 can suit a tighter budget. With chrome-plated steel, inspect the coating often and repair chips before rust spreads.
Chrome describes the finish. The substrate underneath may be carbon steel or stainless, so check both the base material and the plating specification.
Bumper steel and chrome compared
Composition figures and corrosion comparisons for 304 and 430 are from Essentra Components' 304 versus 430 stainless steel comparison.
| Material | Makeup | Corrosion | Best routes | Magnet |
|---|---|---|---|---|
| 304 stainless | About 18% chromium and 8 to 10.5% nickel, according to Essentra Components' comparison | Excellent | Salt belt, coast, demanding wash environments | Usually no |
| 430 stainless | About 16 to 18% chromium and typically under 1% nickel, according to Essentra Components' comparison | Moderate to good; it can still rust | Milder roads and polished show trucks | Yes |
| Chrome-plated carbon steel | Carbon steel beneath a plated finish | Protection depends on an intact coating system | Show chrome with regular rinsing and inspection | Yes |
304 is austenitic stainless. Its chromium forms a passive protective surface, making it the better choice where salt and moisture are routine.
430 is ferritic stainless. It costs less and takes a bright polish, but it is more prone to staining and localized corrosion than 304. Polishing helps it reach its best corrosion resistance.
Ryerson's stainless steel family guide explains the magnetic difference between ferritic and austenitic grades. A magnet can help distinguish common stainless families, but it cannot confirm a bumper's exact grade. Ask the supplier for the grade and a mill certificate for the specific batch.
Inspect what the shine hides
Chrome-plated carbon steel delivers the mirror look many drivers want. A rock chip can expose the steel beneath, allowing rust to spread under the surrounding finish.
Inspect the lower face, folded edges, backside, and bolt openings. Shop lighting can hide damage in those areas.
- Rinse salt away: Clean the backside and bracket pockets, too.
- Repair damage early: Address coating breaks before corrosion spreads.
- Protect joints: Use suitable fasteners and approved isolation where dissimilar metals meet.
- Keep drains open: Clear salty water from behind trim and brackets.
A mirror finish shows the surface appearance. Check material grade, mounting details, and any applicable certification separately.
For fleet purchases, specify the route conditions and required material thickness. Compare the full construction, including brackets and welds, before paying more for a stainless label.
When a Bumper Pays for Itself
Parts cost of one unprotected Class 8 front hit
A 2026 Class 8 collision-cost estimate published in an Ex-Guard release carried by Morningstar lists $9,515.68 in replacement parts alone, excluding labor, paint, installation, and downtime.
Selected component costs from the Ex-Guard estimate:
| Item | Parts cost |
|---|---|
| Two headlights | $3,750 |
| Hood with lane-keeping and ACC camera equipment | $2,160.25 |
| Radiator | $1,150 |
| Bumper | $1,048.33 |
| Parts total | $9,515.68 |
| Labor, paint, and downtime | Not included |
These are selected items, not the estimate's complete parts list. The figures are a vendor estimate, not an average repair bill or proof that a replacement bumper prevents those losses.
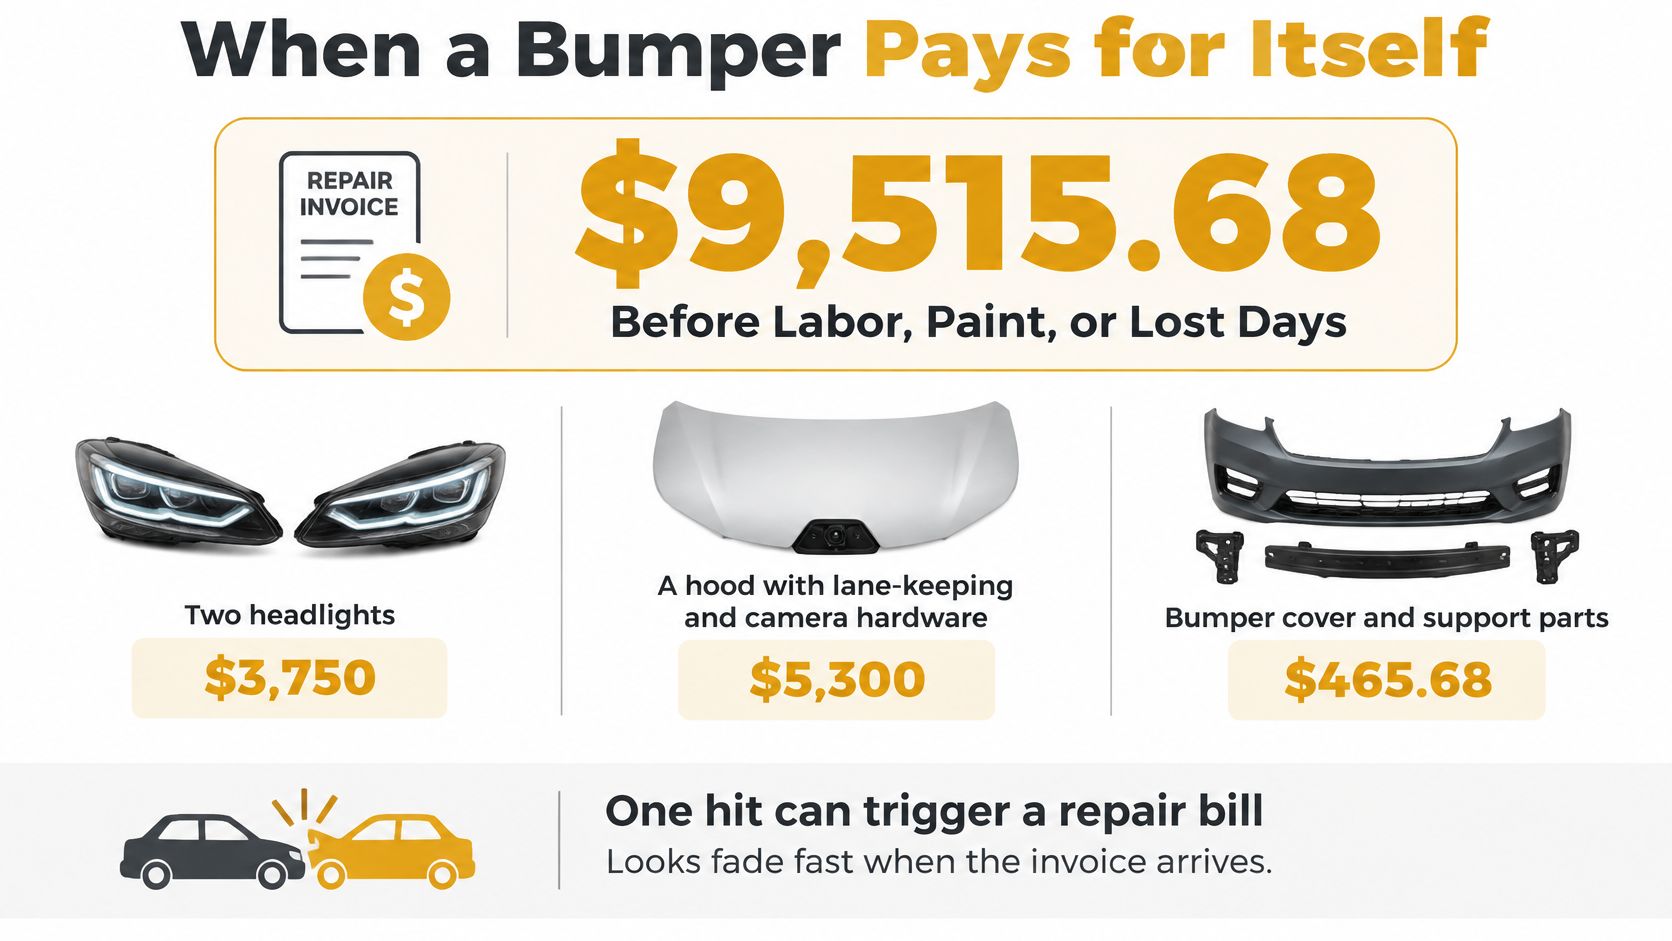
The graphic groups components differently from the detailed estimate. Use the table for the component-level comparison.
Buy avoided downtime, not extra metal
A truck parked for repairs loses working time. Add the repair invoice, freight, shop scheduling, parts lead time, and lost contribution from canceled work to the calculation.
Front-end protection deserves a closer look on deer routes, tight delivery runs, and trucks with hard-to-source replacement parts. A thicker direct-fit bumper may improve durability. Choose a tested deer guard when animal-strike protection is the goal; styling alone does not establish that capability.
Older equipment needs its own calculation. Compare the replacement price with bracket fit and any shop work required for cutouts or installation.
Build the estimate from your records:
- Hit frequency: Separate animal strikes, parking damage, and loading-area contact.
- Repair scope: Include lamps, cooling parts, wiring, sensors, and calibration when applicable.
- Parts lead time: Record the actual wait, not the promised dispatch date.
- Installed cost: Add freight, brackets, labor, and finish work.
- Days down: Use lost contribution after avoided operating costs, not gross freight revenue.
Use a total cost of ownership calculation to compare the purchase and operating costs with realistic repair savings.
When to skip the heavier option
Extra weight can increase fuel demand and reduce payload flexibility. Confirm that a bar clears radar and camera equipment. Count only downtime you can measure from dispatch records, and include the cost of a special-order part if it keeps a working truck parked.
Buy-or-skip test: Buy protection when the damage it can realistically prevent, plus avoided downtime, exceeds its installed and operating cost over your ownership period.
Estimate the share of damage the equipment can credibly prevent, then compare that amount with its cost. For clean highway routes, a straight, secure existing bumper, and no recurring front-end damage, skip unnecessary weight. Spend on an actual defect instead.
How to Install and Inspect Accessories
Use one repeatable shop routine for bumper-mounted lights, sensors, and brackets. Don't let the wiring installer, body shop, and fleet inspector each assume someone else checked clearance.
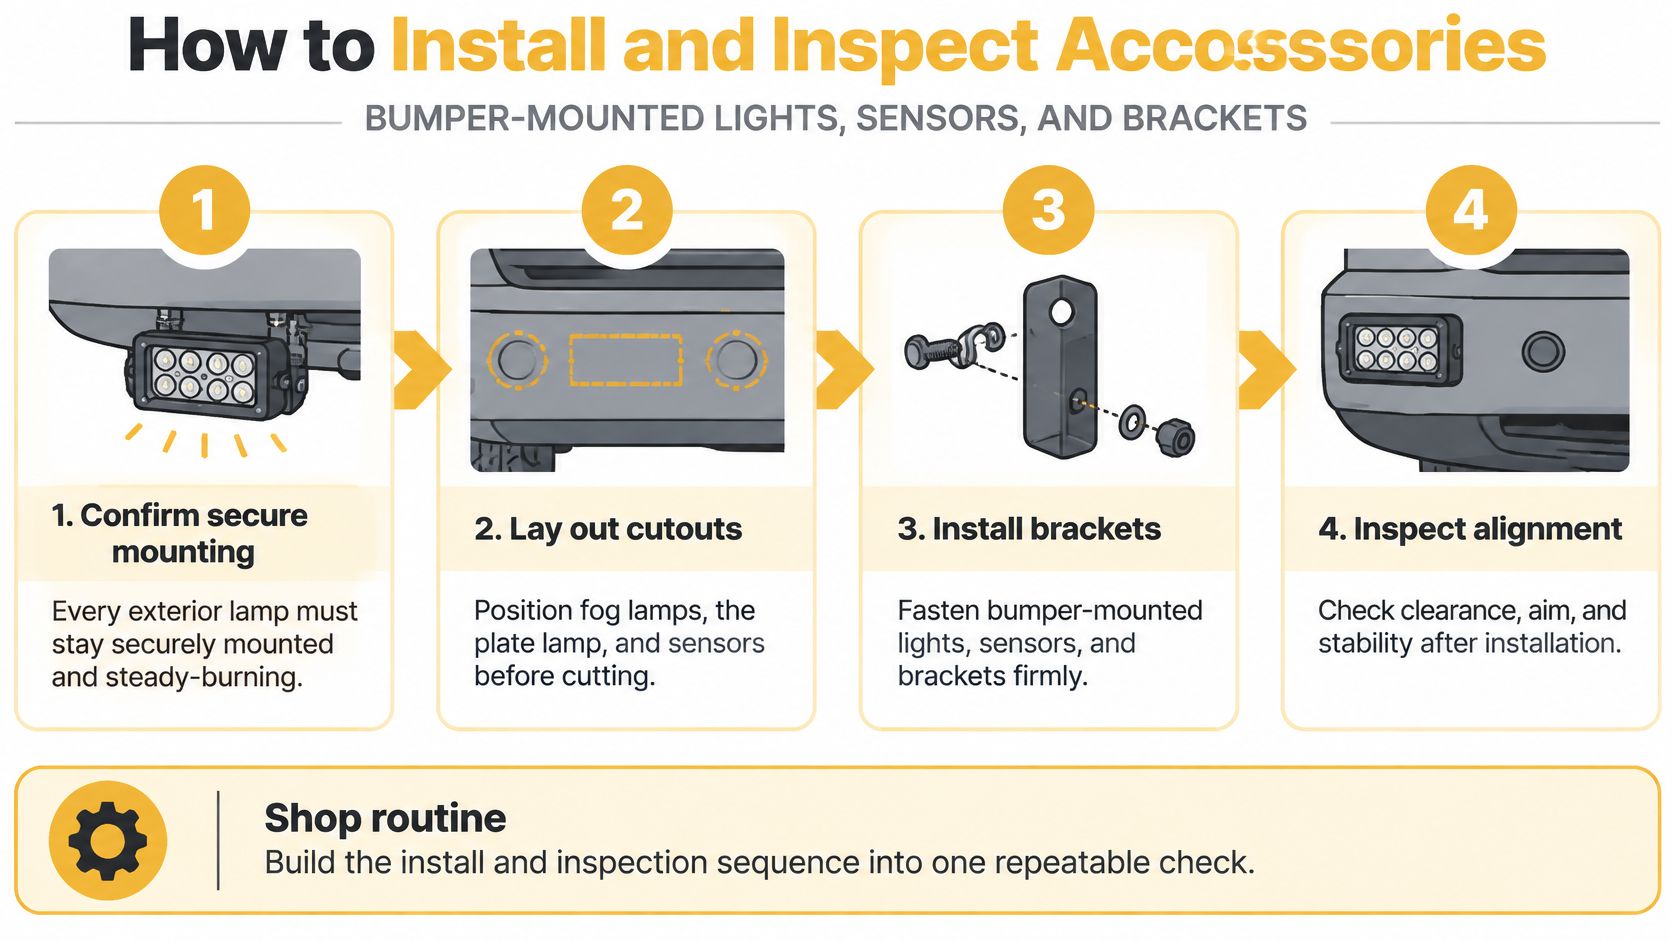
A shop routine that leaves a usable record
- Confirm lamp operation and mounting. Required exterior lamps must remain secure and operate correctly. Treat steady-burning operation as the baseline, with exceptions checked for the specific lamp and application.
- Lay out openings before installation. Position fog lamps, plate lighting where applicable, and sensor equipment before fastening the bumper. Keep cameras and radar within the truck maker's specified position and field of view.
- Use the correct brackets. Support the bumper during installation and inspect the existing mounts for bends, cracks, or corrosion. Don't drill a frame rail to rescue an incorrect order without engineering approval.
- Match hardware and protect interfaces. Use the specified fastener strength, washers, and locking method. Protect dissimilar-metal joints, and route wiring through grommets and loom away from sharp edges.
- Torque and document. Use a calibrated torque wrench and the applicable manufacturer specification. Photograph the installed front, backside brackets, wire routing, and part identification before closing the work order.
- Add it to the pre-trip. Check attachment, cracks, wire chafing, lamp visibility, and obvious movement. After an impact, inspect the brackets and nearby components even when the front face looks acceptable.
Close the defect, not just the ticket
Truck News' coverage of fleet safety accountability highlights the problem of collecting maintenance information without reliably linking reported defects to completed repairs. A photo and a signed repair record help the next technician understand what changed.
Record the complaint, the repair, and the final check together. If a driver reports a shaking fog lamp, the work order should identify the repaired mount and confirm lamp operation, not just say accessory serviced.
Use our truck accessories installation guide to help organize the job. For sensor-equipped trucks, follow the truck maker's service and calibration procedures.
Federal equipment rules establish the baseline, while state requirements and enforcement need checking for the intended use. License-plate lamp provisions and certain auxiliary amber brake-light applications have specific changes or exemptions, so don't copy another truck's setup without checking applicability.
A styling light bar that hides a required lamp is a bad installation, regardless of how bright it is.
Work-order line: Model ___, year ___, material grade ___, thickness ___, direct bolt-on verified, no frame drilling, lamps and sensors clear, torque checked, photos on file.
Heavy Duty Truck Accessories FAQs
Should I fix the bumper or lights first?
Repair the defect that affects roadworthiness before buying cosmetic upgrades. A dark required lamp and a loose bumper both need attention. If both are defective, fix both before returning the truck to service.
Is 304 always better than 430?
Choose 304 for routes with salted highways, coastal moisture, or frequent chemical exposure. Polished 430 can suit milder routes and a tighter budget, provided you maintain it. The right choice depends on the truck's working conditions.
How do I know a stainless bumper is really stainless?
Get the material grade in writing. A magnet cannot confirm the exact alloy, and magnetic stainless is still stainless. Ask for a manufacturer specification or mill certification rather than relying on a verbal claim.
Can I add fog lamps through the bumper?
Use a bumper with suitable cutouts, and make sure the lamps have proper mounts, wiring, aim, and clearance. Keep applicable lighting steady-burning, and leave required lamps and sensors unobstructed. Plan the brackets before cutting.
Who sets the lamp rules?
State authorities enforce applicable state requirements. Check those rules for your truck and intended use before buying a decorative lighting package, especially one with auxiliary amber lighting.
Order a Direct Bolt-On Bumper Today
If you're replacing a bumper on a Freightliner, Peterbilt, Kenworth, or Volvo, choose a model-specific direct bolt-on over a universal bar that needs cutting. A clear specification gives the shop a defined job instead of a fabrication project.
Galhor Inc. processes and supports orders from Magnolia, Texas, and ships directly to owner-operators, fleets, and chrome enthusiasts across the United States and Canada. Bumpers are engineered in-house and manufactured in Mexico, with manufacturing-defect warranty coverage.
Choose the build and shipping window together
Our Freightliner FLD 120 bumper installs with a direct bolt-on fit and needs no modification, drilling, or cutting. Material choices across the range include chrome-plated carbon steel, chrome-plated 430 stainless, and chrome-plated 304 stainless.
The finish uses a triple-layer hexavalent chrome process with 35 microns of nickel. Choose the underlying steel for the route, then select the style and finish for the truck.
- For a fast replacement: In-stock 430 and 304 stainless flat bumpers can ship within 48 hours. Confirm the selected configuration before scheduling the truck.
- For made-to-order carbon steel: Typical shipping is 4 to 6 weeks, with LTL freight delivery.
- For a Kenworth T600: The chrome bumper starts at $1,599.99. Confirm the final configuration and delivered cost before approving the order.
Order the truck's part, not the closest-looking part
Use the configurator to select brand, model, year, style, cutouts, and finish. Keep your mounting and clearance checklist beside you, and resolve any mismatch before payment.
For an International replacement, get an exact model-specific fitment confirmation rather than assuming another conventional's bumper will work. A clean front end isn't worth drilling the wrong part into place.
Order now and upgrade your truck today with a bumper specified for its working life. Match the material, mounts, and delivery window so the shop can get it back on the haul without avoidable rework.
Galhor Inc. offers configurable chrome truck bumpers with route-ready material choices and model-specific bolt-on fitment. Visit Galhor Inc. to configure your replacement, confirm shipping, and order a bumper that looks professional without turning the installation into a fabrication job.