
Kenworth Bumper Lights: How to Choose, Wire and Stay Legal
November 8, 2026 · Francisco Hornelas

You're replacing a bent bumper, adding amber LEDs, or chasing a light that quits whenever the truck hits rough pavement. Kenworth bumper lights look simple until the new bumper pinches the harness, the chrome mount won't carry a ground, or a tow hook blocks a required lamp.
The right setup starts with the lamp's job, not its appearance. Choose the legal layout, match the bumper to the truck, and build the wiring for rain, road salt, vibration, and long hauls. A clean front end matters, but it shouldn't cost you an inspection failure or an unscheduled shop stop.
Table of Contents
- Which Kenworth Bumper Lights Are Legal
- How to Wire Bumper Lights Safely
- Mounting and Aiming for Visibility and Hold
- Why Bumper Lights Fail and How to Fix Them
- Bumper Light Install FAQs
- Pick Your Kenworth Setup and Order Today
Which Kenworth Bumper Lights Are Legal
Kenworth bumper lights are legal when their color, function, placement, visibility, and mounting meet the rules for that truck. Adding an auxiliary lamp isn't automatically illegal. Trouble starts when the installation blocks, replaces, relocates, or confuses required lighting.
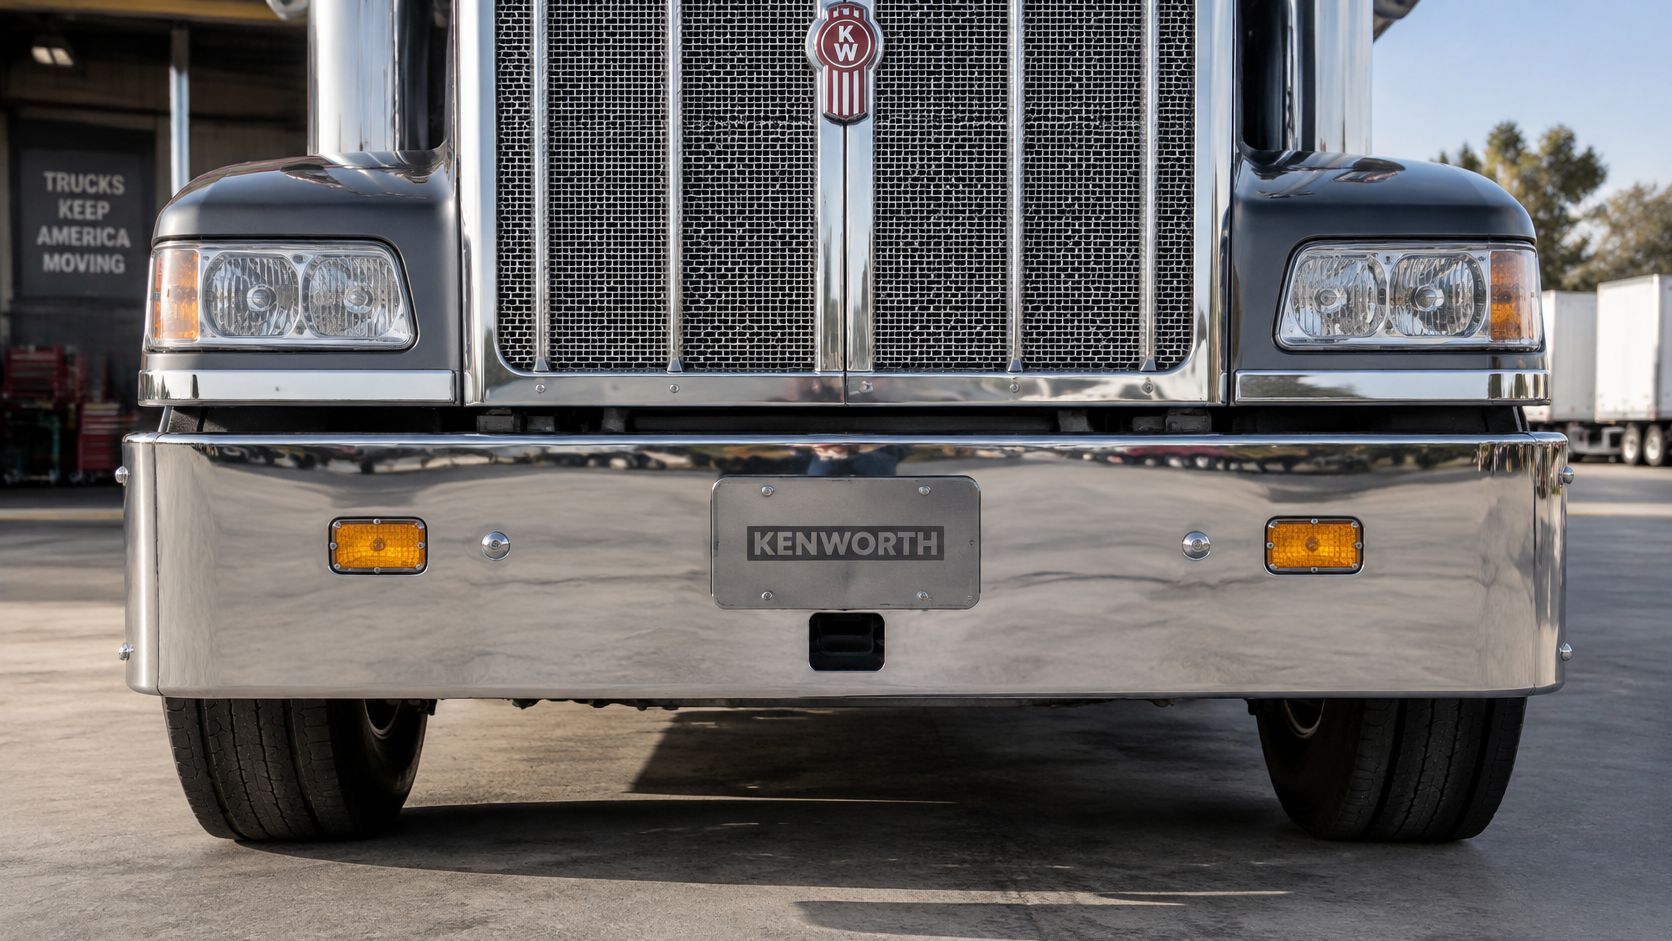
Federal equipment rules set the baseline. For trucks 80 inches wide or wider, federal commercial-vehicle lighting regulations require two amber front clearance lamps, one on each side of the vertical centerline at the same height and as far apart as practical. The same rules call for three amber identification lamps near the centerline, at the same height, with lamp centers 6 to 12 inches apart; the front identification lamps may instead sit near the top of the cab. A decorative row of bumper LEDs doesn't replace either group unless the complete installation meets the applicable requirements, and moving a compliant cab-light arrangement down into a bumper can break it.
Identify the lamp before choosing the opening
An amber lens alone doesn't tell you what a lamp is approved to do. Clearance lamps show width. Identification lamps identify a wide vehicle. Front turn signals communicate a turn. Accent lights and fog lights serve separate purposes and aren't substitutes for those required functions.
Check the lamp manufacturer's stated function and installation requirements before ordering cutouts. A light that fits the hole can still be wrong for the job.
Front Lamp Requirements by Light and Truck Case
| Light or Truck Case | Requirement | What It Means for Bumper Lights |
|---|---|---|
| Amber clearance lamp, width 80 inches or more | Two, one each side of centerline, same height, as far apart as practical | Decorative lamps cannot replace them unless fully compliant |
| Amber identification lamp, width 80 inches or more | Three, near centerline, same height, 6 to 12 inches apart | Check spacing before drilling |
| Front turn signal | Required, must stay visible | Brackets and grille guards cannot block the lens |
| LED accent or fog light | Auxiliary, not required as these front lamp groups | Cannot block or replace a required lamp |
| Built on or after December 25, 1968 | Meet FMVSS No. 108 standard in effect at build | Replacement bumper is judged against that standard |
| Operating on or after March 7, 1989 | Lamps operable and not obscured | Tow hooks and plate brackets cannot block the lens |
| All U.S. operations | Securely mounted on a permanent vehicle part | Loose or flimsy brackets aren't acceptable |
| State inspection | Can be stricter than federal minimums | Verify local rules before installation |
The build-date and operating-date rows come from the federal regulation cited above, which also requires every lamp to stay operable, unobstructed, and mounted on a permanent part of the vehicle. Judge the finished front-end layout, not just the bumper's appearance, when you check clearance around each lens.
Check the whole truck, not a label
A seller's broad DOT claim doesn't establish that your finished truck complies. Compliance lives in the complete system: each lamp keeps its legal function, stays visible at the required angles, and stays solid on its mount through vibration, road salt, and years of wash cycles. A lamp that wiggles loose on a thin bracket or ends up shadowed by a tow hook fails inspection the same as a wrong lens color.
State equipment or inspection rules may add restrictions beyond the federal minimums, so verify the rules where the truck operates, especially before adding unusual colors, flashing effects, or extra forward-facing lights.
Our bumper safety standards guide puts bumper selection in the context of the complete vehicle.
Buying rule: Keep compliant factory lamps in their original positions unless you've confirmed that the replacement arrangement meets every applicable requirement.
Before buying:
- Measure truck width. Don't guess from the cab or bumper alone.
- Inventory the front lamps. Record each lamp's function, position, and wiring connection.
- Check the proposed bumper. Confirm clear space for lenses, connectors, brackets, tow equipment, and required viewing angles.
How to Wire Bumper Lights Safely
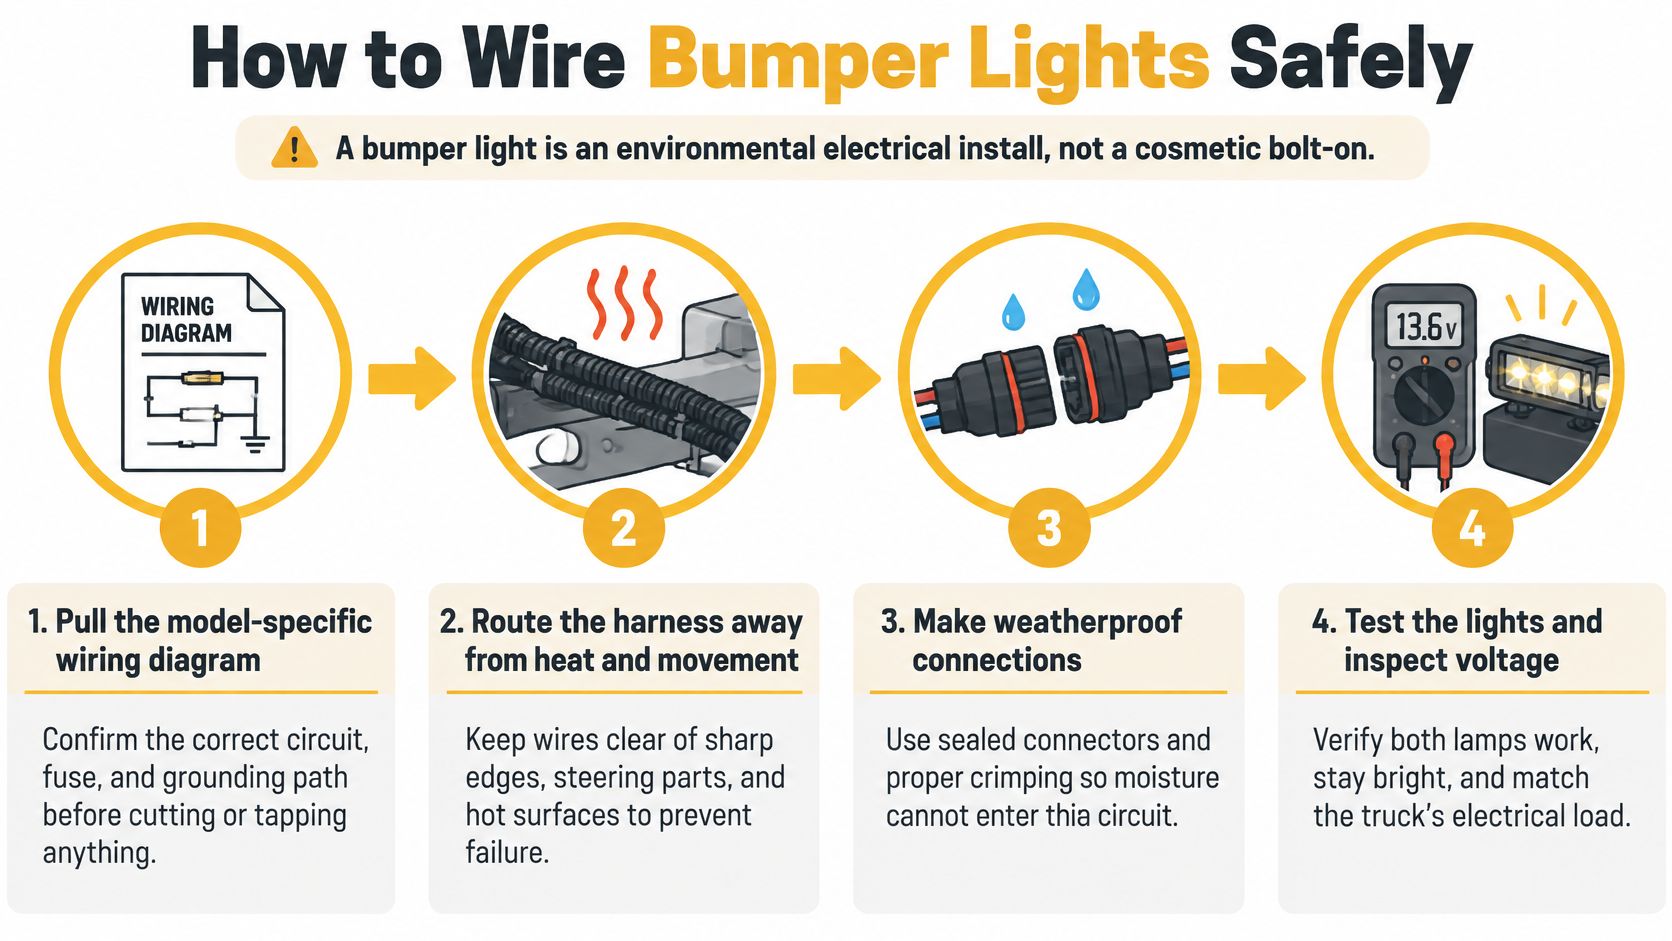
A bumper light is an environmental electrical installation, not a cosmetic bolt-on. Its connections sit near water, salt, grit, and moving hardware, so an exposed crimp isn't a reasonable shortcut.
Use this wiring overview to plan the work before opening the harness.
Build a sealed, supported circuit
- Pull the model-specific wiring diagram. Identify the marker feed, fuse protection, and ground path. Don't choose a wire by insulation color alone or assume the existing circuit can carry added lamps.
- Disconnect battery power using the truck's service procedure before cutting or splicing. A live conductor touching chrome-plated steel can short the circuit and damage the harness.
- Verify the feed and polarity. During controlled testing, use an electronics-safe test light or multimeter to identify the amber marker circuit, then isolate power again. LEDs can remain dark or behave incorrectly when connected backward.
- Make splices with correctly sized, adhesive-lined heat-shrink butt connectors and the proper crimp tool. Pull-test each connection before shrinking it so a weak crimp doesn't disappear under a waterproof-looking sleeve.
- Install grommets at metal pass-throughs. Deburr the opening first. Split loom helps protect a harness, but it doesn't replace a grommet against a sharp bumper edge.
- Use the lamp's designated ground lead and a sound chassis ground point. Where a bolted metal ground is specified, clean the contact to bare metal, use a star washer, then protect the completed connection against corrosion.
- Route above direct splash where practical. Clip the harness clear of bumper brackets, heat, steering parts, and pinch points. Leave service slack without creating a loop that can snag road debris.
For the bumper's removal and fitting sequence, use our bumper installation guide alongside the truck's service information.
Test before closing the harness
Run these checks in order:
- Steady output: Confirm stable amber illumination without flicker.
- Left and right operation: Matching marker lamps should behave together; dual-function turn lamps must follow their intended circuits.
- Combined operation: Switch on headlights and connect the trailer-marker circuit.
- Loaded voltage drop: Measure the supply and ground sides while the lamps operate.
- Harness movement: Gently flex wiring near the bumper and watch for interruption.
Don't close the loom around an unexplained fault. A lamp that works only while the connector sits in one position isn't repaired.
Use the video as a visual reference, not a substitute for model-specific wiring information.
Mounting and Aiming for Visibility and Hold
A lamp needs a stable mount and an unobstructed view. The federal commercial-vehicle lighting rules prohibit required lighting from being obscured by cargo, coverings, dirt, or added equipment.
That matters on a Kenworth W900 chrome bumper just as much as on a working vocational truck. A recessed lamp can look tidy from directly ahead while a nearby bracket blocks it from an angle.
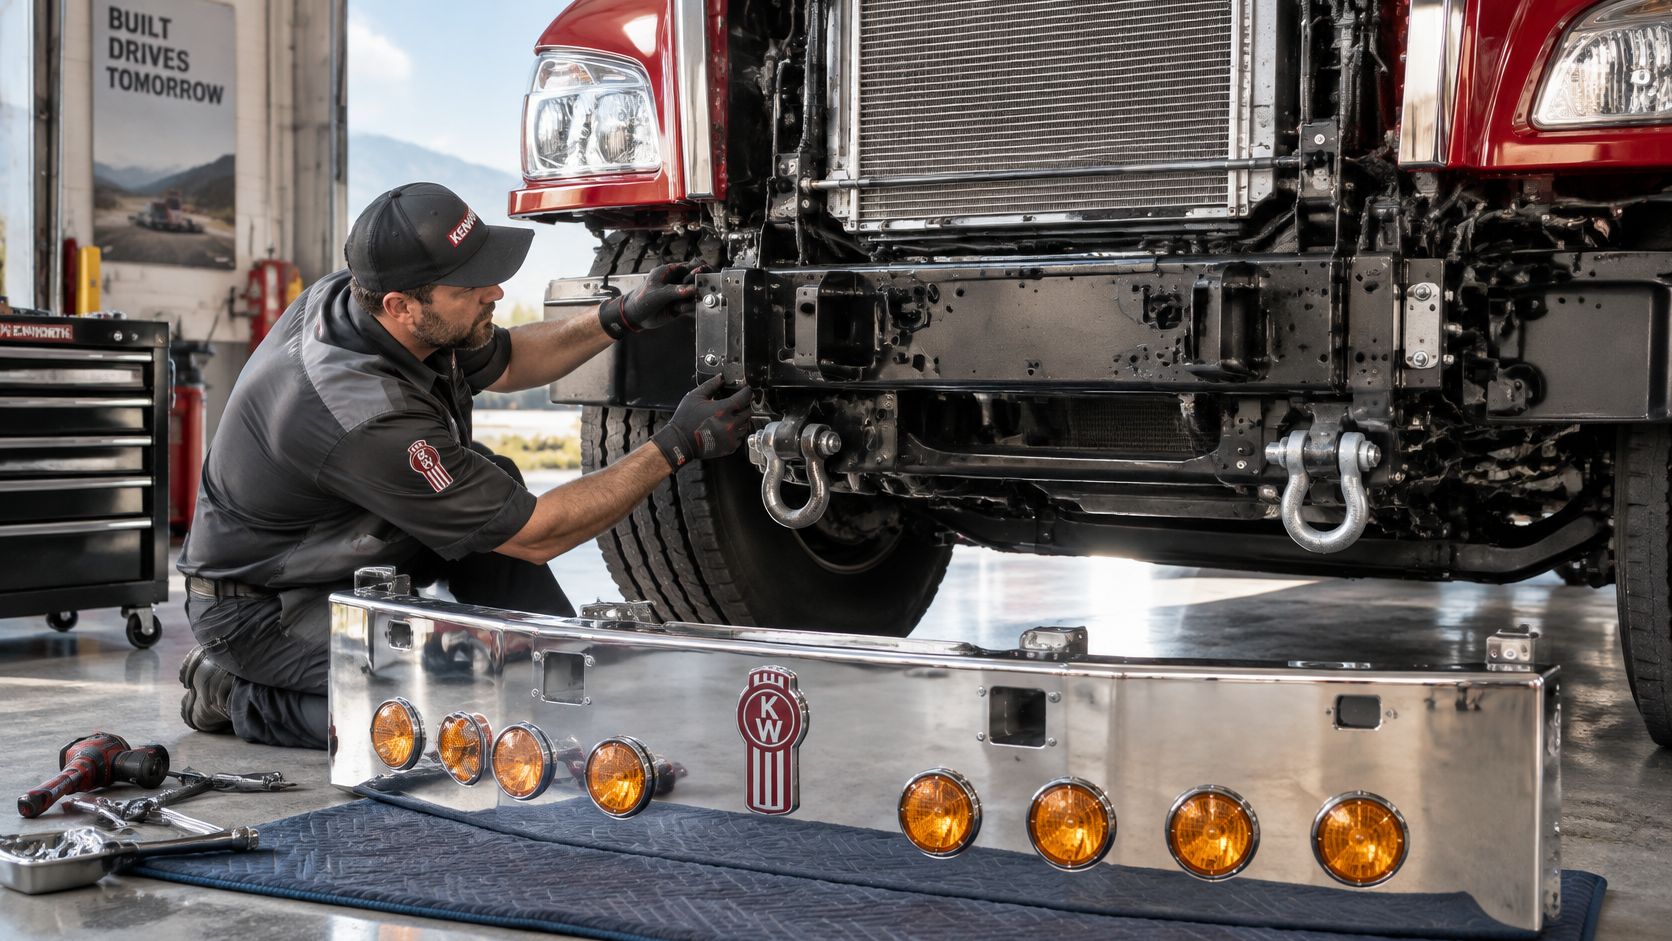
Check the mechanical installation before tightening everything permanently.
Fit, secure, and verify
- Trial-fit the bumper. Check bracket clearance around the frame, radiator, and tow hooks. Stop if the bumper needs force to pull mismatched mounting holes into line.
- Mark lamp centers from a consistent reference on the truck. Check the intended identification-lamp layout before making holes, not after the finish has been cut.
- Inspect from more than straight ahead. Look past tow hooks, license-plate brackets, grille guards, and drop-bumper structures. Keep the lens and its required viewing area clear.
- Use the manufacturer's specified fasteners and torque. Where the bracket design calls for them, use grade 8 hardware, lock washers, and suitable rubber isolators; don't add soft isolators that weaken a rigid structural joint or overtighten a plastic lamp housing.
- Allow for movement. Check harness and bracket clearance through the relevant suspension and steering movement, particularly on air-ride trucks. Secure the assembly so the harness never acts as a travel stop.
- Set the truck on level ground at normal loaded ride height. Aim fog or driving lamps to their manufacturer's procedure; marker lamps need the correct orientation and visibility, not a headlamp-style beam adjustment.
An 18 inch drop bumper needs extra attention around lower light openings and ground clearance. Check the actual truck's approach clearance rather than choosing depth for appearance alone.
A strong bracket doesn't help if it holds the lamp where nobody can see it.
Our truck running lights guide provides additional context for matching lamp function to placement.
Before each trip, check for cracked lenses, dim or mismatched output, water inside the housing, loose fasteners, and exposed copper. Recheck the finished layout with a trailer connected and whenever you add a front accessory.
Why Bumper Lights Fail and How to Fix Them
A light works for months, then flickers after rough pavement or dies during wet weather. Don't condemn the LED assembly before testing the connector, ground, harness, and bracket. A durable lamp can't compensate for a poor installation.
An NHTSA recall report covering certain 2025 Mack Granite trucks tied early LED headlamp failures partly to inadequate bracket design and insufficient harness routing and clipping points. That isn't a Kenworth bumper-light recall, but it demonstrates the same mechanical principle: mounting and wiring affect lamp durability.
Diagnose the symptom before ordering parts
Use the repair windows below as shop-planning allowances, not guaranteed labor times. Parts availability and hidden harness damage can change the schedule.
Bumper Light Symptoms, Causes and Fixes
| Symptom | Likely Cause | Fix |
|---|---|---|
| Flicker or cut-out on rough roads | Loose connector or chafed harness at bracket | Re-route, clip, and reseal the connector, plan for same-day work if damage is local |
| Dim or uneven output | Poor ground through painted or plated mount | Clean the ground contact and add a proper ground wire, plan for same-day work |
| One side dead | Reversed polarity or open splice | Check polarity and re-splice with a sealed butt connector, plan for same-day work |
| Water inside the lens | Failed gasket or cracked lens | Replace the serviceable lens or seal and check the designed drain path, allow one day with parts available |
| Fading after a few months | Possible bracket vibration or heat buildup | Test the circuit, improve the mount and strain relief, allow about one week if replacement hardware must be sourced |
Fading isn't proof of vibration damage. Check voltage under load and inspect for overheating before deciding which part to replace.
Don't drill a drain hole into a sealed lamp as a quick fix. If the housing isn't serviceable, replace the assembly and correct the entry path that let water reach its connector.
Give fleet inspections a deeper job
A driver's walk-around won't reveal every developing fault. At scheduled service, have the technician:
- Test the ground: Use a meter and a loaded voltage-drop check, not appearance alone.
- Audit every support: Inspect clips, bracket crossings, unsupported runs, and hidden pinch points.
- Check fasteners: Verify specified torque and inspect for cracked or distorted brackets.
- Review movement clearance: Confirm air-ride and frame movement haven't pulled the harness tight.
Repair priority: Fix the cause before fitting another lamp. Repeated replacement without correcting the mount or harness buys the same downtime again.
A direct-fit bumper can reduce fabrication-related alignment problems. It still needs a complete electrical and mechanical check after installation.
Bumper Light Install FAQs
What tools do I need?
Bring an electronics-safe test light, a multimeter, wire strippers, a proper crimp tool, and a heat gun. Stock adhesive-lined heat-shrink butt connectors, grommets, star washers, and harness clips.
Have grade 8 hardware, lock washers, and rubber isolators available where the mounting design specifies them. Use a torque wrench rather than judging tightness by feel.
Can a driver install bumper lights?
Yes, if you can read the truck's wiring diagram, identify polarity, and seal each splice correctly. You also need to judge circuit capacity and route the harness safely.
If you can't complete the functional and loaded electrical tests, have a heavy-duty truck shop do the work. A bad splice may pass a driveway check and fail during a wet overnight run.
How do I know a ground is good?
For a housing-grounded lamp, check continuity between the housing and its specified ground point with power isolated. For a wired-ground lamp, test the designated ground lead instead; a plastic housing tells you nothing about circuit continuity.
Then check voltage drop on the ground side while the lamp operates. Continuity alone isn't enough because a weak connection can pass a meter's small test current but struggle under load.
Does fresh chrome protect the wiring?
No. Chrome protects the finished metal surface, not the conductor inside a damaged jacket or an unsealed connector.
It also doesn't guarantee a dependable electrical ground. Treat the finish, wiring seals, and ground connection as separate maintenance items.
Pick Your Kenworth Setup and Order Today
Choose the required light groups first, then choose a bumper with room for the lamps, connectors, and mounting hardware. After that, select material and finish for the truck's working conditions. That order prevents an expensive appearance upgrade from becoming a fabrication job.
Match the material to the route
Chrome-plated carbon steel suits a budget-focused build when the owner will maintain the finish and address chips promptly. Stainless steel is a practical choice for frequent washing, road salt, and harsh winters, but it still needs cleaning and sound installation.
Thickness matters, but gauge alone doesn't establish durability. Bracket design, unsupported spans, cutout placement, and fastener alignment also matter. Don't assume a bumper fits because it shares a truck brand with another model.
At Galhor Inc., our Kenworth T600 chrome bumper uses 10-gauge chrome-plated steel with a mirror-polished finish and is also available in 11-gauge 430 stainless steel. The T600 bumper is a direct bolt-on fit with no drilling or cutting required; confirm the fit specification and configured openings against the product sheet before ordering.
Bumper Material Comparison for Kenworth Builds
| Material | Thickness | Finish | Ship Time | Best For |
|---|---|---|---|---|
| Chrome-plated carbon steel | 10-gauge | Mirror polish | Made to order, typically 4 to 6 weeks | Budget builds |
| 430 stainless steel | 11-gauge | Chrome-plated, mirror-polished | Eligible in-stock flat bumpers can ship within 48 hours | Salt, washing, and harsh winters |
Schedule around shipment, not a guess
We offer fast shipping across the United States for eligible in-stock stainless flat bumpers. Shipping time isn't delivery time, so book the installation around the confirmed shipment and freight arrival rather than assuming immediate arrival.
Before placing the order, confirm:
- Truck identity: Model, build year, and mounting arrangement.
- Light layout: Required functions and clear space around each opening.
- Work schedule: Correct parts, available shop time, and a realistic delivery window.
Order your Kenworth T600 bumper today and plan the installation around the confirmed ship date.
Galhor Inc. offers model-specific chrome bumpers and configurable light openings so your bumper choice supports a serviceable lighting installation. Visit Galhor Inc. to select your Kenworth setup, confirm fitment and availability, and order a bumper that matches the way your truck works.