
10 Trucks Maintenance Checklist Items for U.S. Drivers
October 18, 2026 · Francisco Hornelas

A long-haul driver starts a pre-trip walk-around and spots a tire wearing unevenly, an air leak at a brake chamber, and corrosion around a bumper bracket. Those aren't three small annoyances. They're warnings that can turn into a roadside failure, a delayed load, or a truck held out of service. A practical truck maintenance checklist helps protect the load, reduce breakdown risk, support better fuel economy, and keep a Class 8 truck earning.
Use these 10 checks across daily inspections, scheduled preventive maintenance, mileage-based service, seasonal preparation, and severe-duty work. Whether you drive a Peterbilt, Kenworth, Freightliner, or International, follow the manufacturer's service schedule, federal requirements, and warranty terms. Federal rules require carriers to inspect, repair, and maintain vehicles under their control, with parts kept in safe operating condition (FMCSA's maintenance requirements).
Jump to a check: Tires · Brakes · Lights and wiring · Bumper and grille · Steering · Suspension · Fluids and leaks · Air system · Fifth wheel · Cab safety and visibility
Table of Contents
- 1. Tire Tread Depth and Condition Check
- 2. Brake System and Pushrod Stroke Inspection
- 3. Lights, Reflectors, and Electrical Wiring Check
- 4. Front-End Bumper, Mounting Brackets, and Grille Inspection
- 5. Steering System Play and Linkage Inspection
- 6. Suspension, Springs, and U-Bolt Inspection
- 7. Engine Oil, Coolant, and Fluid Leak Check
- 8. Air System, Compressor, and Air Dryer Maintenance
- 9. Fifth Wheel and Coupling Inspection
- 10. Cab Safety Equipment, Mirrors, and Windshield Check
- 10-Point Truck Maintenance Checklist Comparison
- Build a Checklist That Keeps Every Haul Moving
1. Tire Tread Depth and Condition Check
Uneven tire wear deserves attention before the next loaded run. It can signal alignment trouble, worn suspension parts, or a brake issue, so don't treat the tire as the only possible cause. Check tread, sidewalls, and inflation, then note each tire's position and condition.
Federal minimum tread depth is 4/32 inch on steer tires and 2/32 inch on other tires, under 49 CFR 393.75. Many fleets replace steer tires sooner to preserve handling and avoid running close to the legal limit. Use a tread-depth gauge, not a visual guess.
At every pre-trip: Check for cuts, bulges, cracks, exposed cord, embedded debris, and uneven wear. On a long run, check again at fuel stops.
Record tread depth by wheel position so you can spot a tire losing tread faster than its axle mates. After wheel service, mark lug nuts with paint so movement is easy to see during a walk-around. Check inflation using a reliable gauge and follow the truck or tire maker's guidance. This guide to tractor-trailer tire pressure can help you build a consistent pressure-check routine.
If a tire has a safety-critical defect, keep the truck parked until it's repaired or replaced. The cost of a tire is easier to plan for than a roadside failure, lost time, or damage to nearby components.

2. Brake System and Pushrod Stroke Inspection
A brake defect can sideline a truck at a roadside inspection or leave the driver short of control on a descent. Check air chambers, hoses, slack adjusters, linings or pads, and drums or rotors for damage, loose connections, leaks, and overheating.
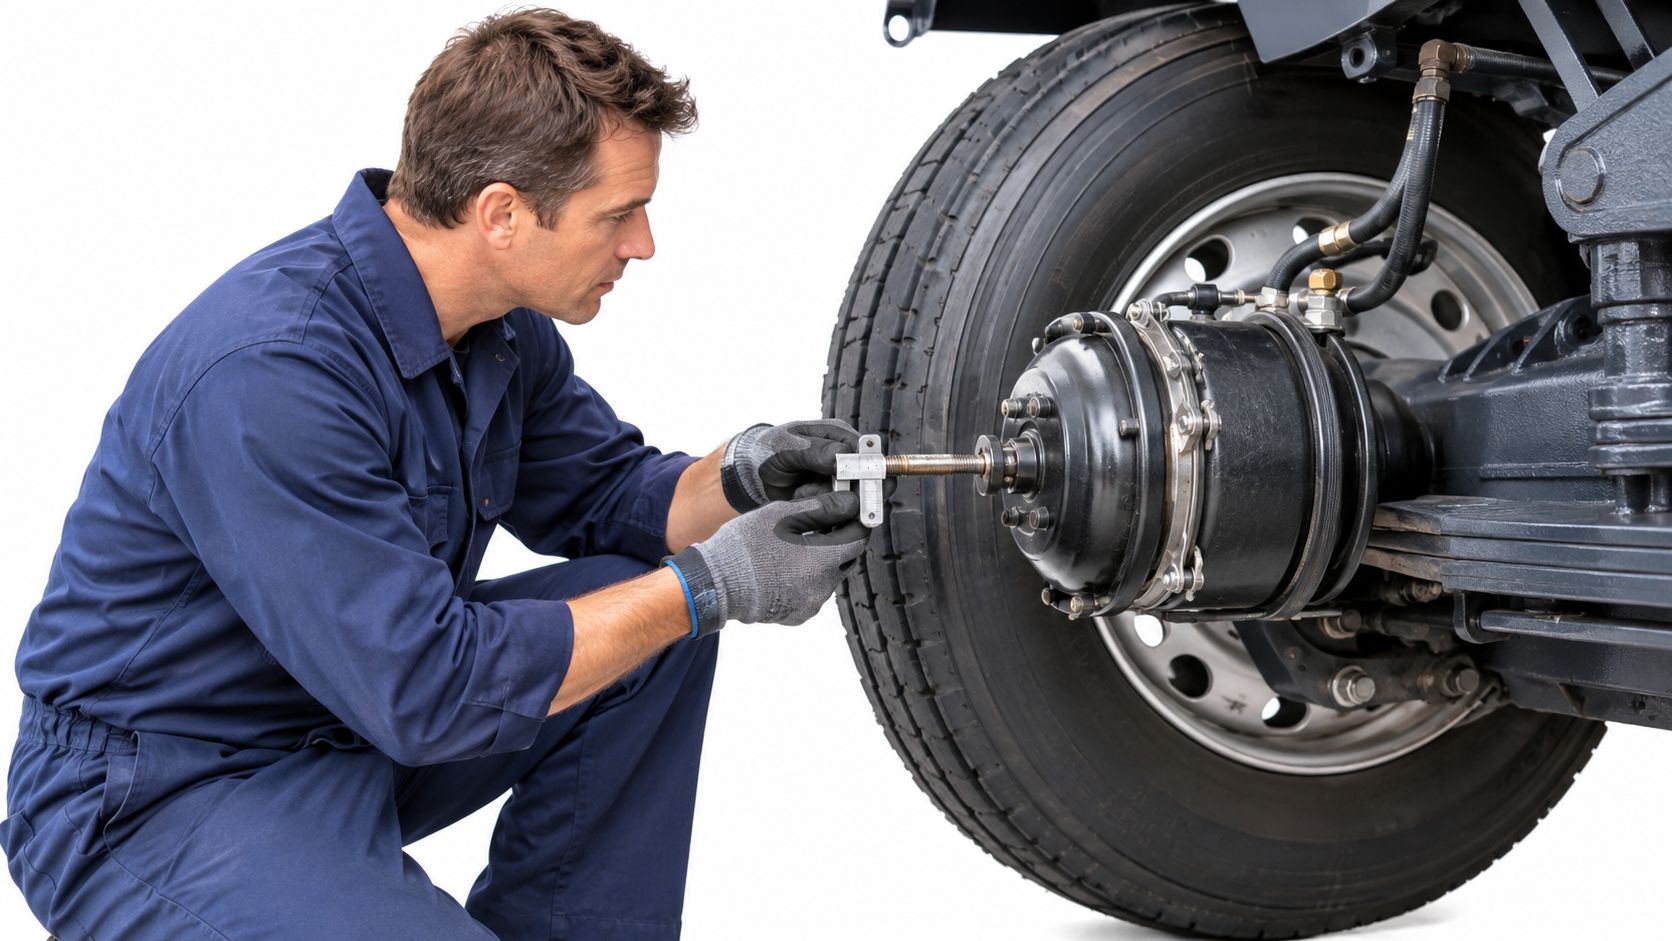
Measure pushrod stroke at each wheel end and compare it with the limit for that brake chamber. Excessive stroke means the truck should stay parked until a qualified technician inspects and repairs the brake. A drifting adjuster may not make noise, so listening for air leaks is not enough.
Work safely: Park on level ground, secure the wheels, and follow the proper procedure before inspecting or measuring. Listen for hissing around chambers and hoses during the air-pressure check. Record measurements, defects, and repairs in the vehicle's maintenance file.
Track repeat brake defects by truck and axle. Fleet managers can use those records to catch recurring problems before they cause roadside downtime. Owner-operators should document adjustments and repairs too, preserving a useful maintenance history for inspections and resale. This brake inspection video shows how to check brake components.
Brake defects remain a frequent roadside risk. The Roadcheck results provide a report on CVSA inspection findings, but the linked article does not substantiate a specific brake-defect percentage. Give brake checks priority in the daily routine, and hold the truck for repair when a defect could affect safe operation.
3. Lights, Reflectors, and Electrical Wiring Check
A dead marker light is easy to miss from the cab and easy for another driver or inspector to notice. Check headlights, high and low beams, turn signals, brake lights, marker and clearance lights, and reflectors on both tractor and trailer. Test the lights rather than assuming they work because the dashboard shows no warning.

Inspect wiring and connectors for chafing, loose plugs, corrosion, or damage from water and road vibration. Trailer connections need special attention after every hook-up. Dirty connector pins or a damaged cable can leave the trailer dark even when the tractor lights are working.
Make the check practical:
- Walk the full combination: Test each required lamp and confirm reflectors are clean and secure.
- Check the harness: Look for rubbing, pinched sections, loose connectors, and corrosion.
- Keep basic spares: Carry suitable fuses and bulbs for your vehicle, along with tools for permitted roadside repairs.
- Clean the lenses: Remove grime that blocks light output, especially after wet or dirty roads.
Federal inspection rules include lighting equipment among the safety items that must be maintained. FMCSA's vehicle-inspection data identify inoperative lamps as a maintenance-related finding, so fix a failed lamp before dispatch rather than waiting for the next service visit (FMCSA large truck and bus statistics).
4. Front-End Bumper, Mounting Brackets, and Grille Inspection
A bumper that's loose or corroded can put more than appearance at risk. Check the bumper, grille, bolts, mounting brackets, and attachment points for cracks, movement, bending, sharp edges, and rust. A damaged bracket can let the bumper shift after a hard bump or repeated vibration.
This matters on long-haul trucks that face road debris, harsh weather, and frequent washdowns. Road salt and grime can wear down a finish, while trapped moisture can speed corrosion around mounts. Clean the area so you can see the metal and fasteners clearly.
Treat loose or damaged mounting hardware as a safety issue. Don't wait for the bumper to sag farther or interfere with lights and nearby components.
If you're replacing a bumper, match the part to the truck's make, model, year, mounting style, and cutouts. For example, the Chrome bumper for Peterbilt 378 / 379 is a direct bolt-on option with standard or blind mount configurations. It's made from 10-gauge chrome-plated steel, with a mirror-polished finish, and is also available in 3 mm chrome-plated 304 or 430 stainless steel. The triple-layer chrome finish uses 35 microns of nickel. Confirm the exact configuration before ordering because the bumper is sold individually and cutouts depend on configuration.
After a new installation, follow the maker's instructions for fastener checks. Clean chrome with mild soap and water, then dry it to limit water spots and grime buildup. A bumper should protect the front end and support the truck's appearance, not create another loose part to inspect on the shoulder.
5. Steering System Play and Linkage Inspection
If the truck wanders, pulls to one side, or suddenly feels loose in a lane change, don't wait for the next scheduled service. Check steering wheel play and look for looseness or damage around tie rod ends, drag links, the steering gear, and kingpins. Report a change in steering feel as soon as it appears.
A driver hauling through crosswinds may blame the trailer or road crown. Those can affect handling, but they don't explain away a new clunk, excess play, or a truck that no longer tracks straight. A technician should inspect the steering system before the truck returns to service if the driver finds a safety concern.
- Note the symptom: Record when the truck pulls or wanders, and whether the issue changes with load or road conditions.
- Follow the lubrication schedule: Grease kingpins and tie rods as directed by the manufacturer.
- Check alignment after repairs: Steering work can change how the truck tracks. Confirm alignment to help prevent uneven tire wear.
Steering defects can become roadside violations and can put the driver and load at risk. FMCSA requires carriers to keep steering parts and other vehicle components in safe operating condition under its maintenance rules. Don't dispatch a truck with loose or damaged steering components. Have a qualified technician assess the defect and document the repair.
6. Suspension, Springs, and U-Bolt Inspection
A truck sitting lower on one side or wearing tires unevenly may have a suspension problem. Check leaf springs for cracks, broken leaves, or shifted packs. Inspect U-bolts, spring hangers, shocks, and air bags for damage, leaks, loose fasteners, or signs that components have moved.
A loaded truck puts the suspension under steady strain. A cracked hanger or leaking air bag can affect ride height and stability, and may lead to more damage if the truck keeps running. Check both sides of the vehicle and compare ride height rather than judging one side by itself.
Look for a pattern, not just a broken part. Uneven tire wear, a crooked stance, and repeat suspension repairs may point to a shared cause that needs a full inspection.
During a walk-around, look for shifted spring packs and fresh marks around fasteners. At scheduled service, have a technician inspect mounting points and measure or assess wear as appropriate. Follow the manufacturer's procedure for fastener torque after suspension work. Don't guess at torque values.
A heavy-load operator may notice a truck leaning at a dock or a change in ride height before a suspension part fails outright. Report the change and keep the truck out of service if a broken spring, loose U-bolt, or damaged mount threatens safe operation. Recording the affected axle and position helps the shop find repeat failures and compare them with tire wear.
7. Engine Oil, Coolant, and Fluid Leak Check
A small leak can become a major repair if it goes unnoticed through repeated runs. Before departure, check engine oil, coolant, transmission fluid, power steering fluid, and DEF where applicable. Look beneath the truck for fresh drips and inspect hoses, seals, and connections for wet areas.
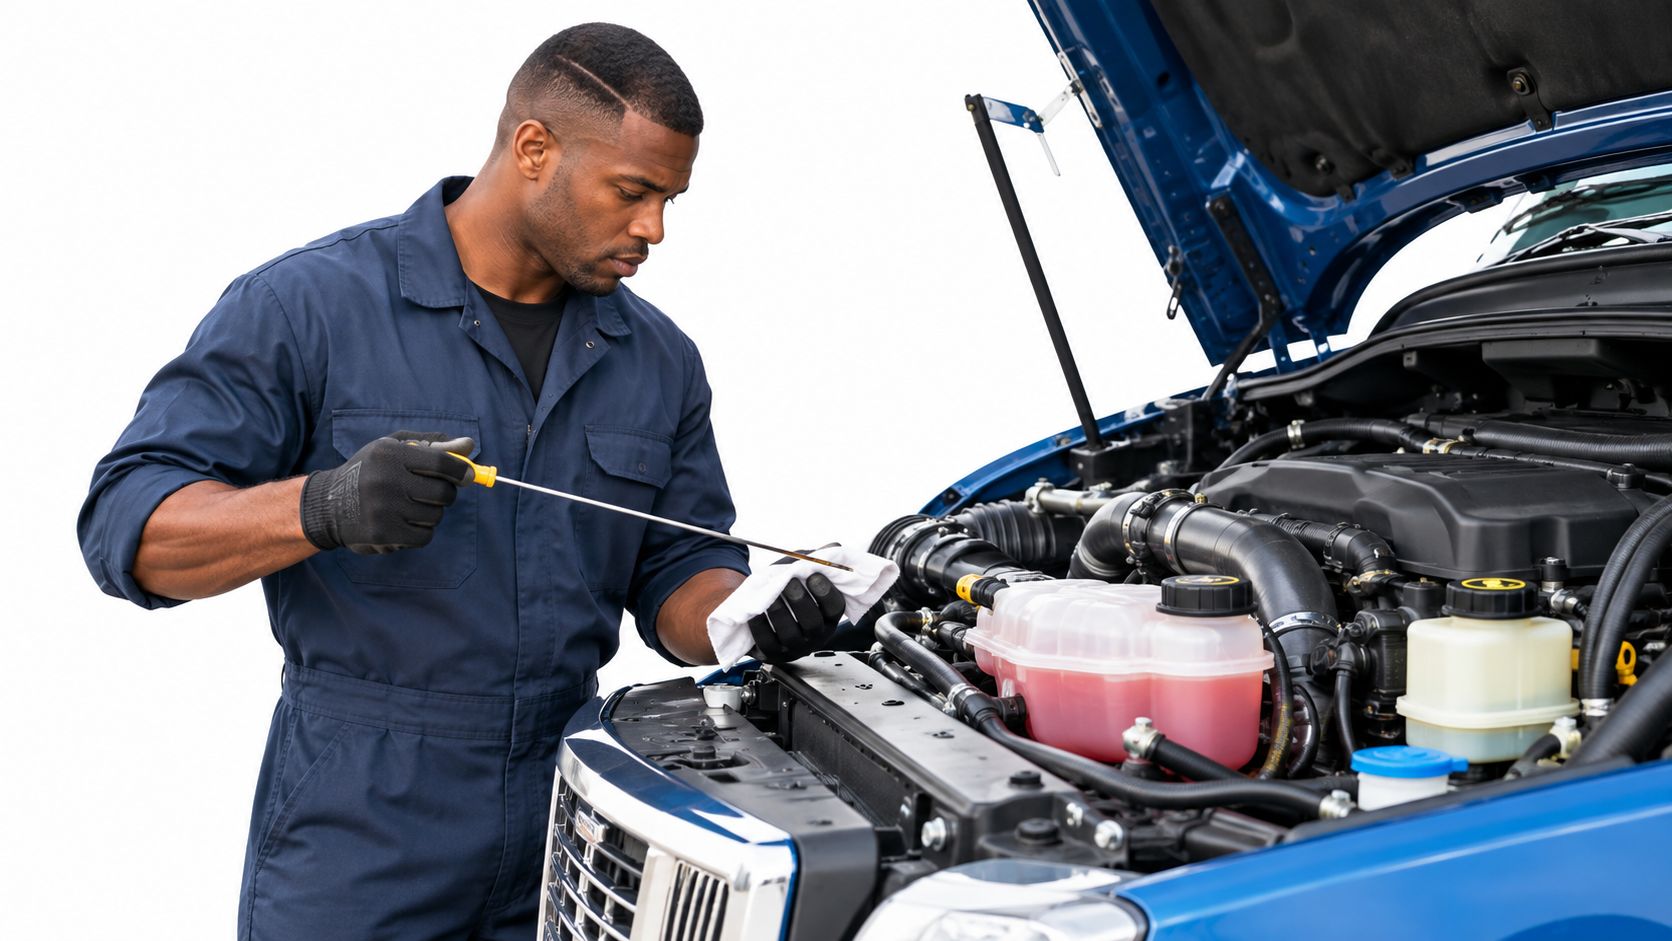
Use the fluid type specified in the owner's manual. Don't top off with an unsuitable product just because it's available at a truck stop. Clean the dipstick and cap area before opening the system, so dirt doesn't enter the engine.
Track oil added between scheduled changes. A growing need for top-ups deserves attention from a technician, even if the truck still runs normally. The same goes for coolant loss, a fluid spot that returns after cleanup, or a hose that feels damaged.
Check the system, not just the level. Look for loose caps, cracked hoses, stains around fittings, and signs of coolant or oil contacting hot components. If a fluid leak could affect safe operation or cause a breakdown, report it and get it assessed before continuing.
8. Air System, Compressor, and Air Dryer Maintenance
Water in the air system can cause trouble when temperatures drop, and leaks can reduce brake-system performance. Inspect the compressor, governor, air dryer, tanks, valves, hoses, and fittings. Listen for leaks during the air-pressure check and confirm the low-air warning works.
Drain the tanks according to the system and manufacturer's instructions. In cold weather, follow the required drain routine so moisture doesn't build up and freeze in the lines. Check the air dryer service interval in the manual, and replace its cartridge when due rather than waiting for it to look dirty.
A small leak can be hard to hear over a running engine. Use an approved leak-check method, such as soapy water on accessible fittings, and report bubbles or damaged hoses for repair. Don't treat a repeated pressure loss as normal.
The air dryer is part of the system that keeps moisture under control. Use this Freightliner air dryer maintenance guide as a reference when building a truck-specific service routine, then confirm the correct parts and interval for the unit in your truck.
9. Fifth Wheel and Coupling Inspection
A fifth-wheel failure can separate the tractor and trailer, so verify the connection every time you couple. Inspect the locking jaws, release handle, mounting bolts, slide rails, and kingpin for damage or abnormal wear. Make sure the plate is properly lubricated with the grease recommended by the fifth-wheel manufacturer.
After coupling, perform a gentle pull test with the trailer brakes set, then confirm that the jaws are locked around the kingpin. Don't rely on the sound of coupling alone. Check the release handle position and inspect the connection from a safe position.
A driver who rushes a hook-up can miss a poor connection, an obstructed jaw, or a damaged kingpin. Check kingpin height and condition when coupling and uncoupling, and look for movement or loose mounting hardware. If the lock doesn't engage as it should, stop and correct the problem before moving.
For a fuller inspection routine, review this guide to the fifth-wheel plate. Keep the coupling area clean enough to see cracks, damage, and misplaced parts. Grease helps limit wear, but it doesn't replace checking that the jaws lock securely.
10. Cab Safety Equipment, Mirrors, and Windshield Check
Clear visibility and working safety equipment matter in rain, sleet, road spray, and night driving. Check mirrors, windshield, wipers, washer fluid, horn, seat belt, and gauges before rolling. Adjust the mirrors whenever another driver takes the truck.
A cracked mirror or damaged wiper blade can turn a routine run into a visibility problem. Inspect the windshield for damage in the driver's view and make sure wipers clear water across the glass. Keep washer fluid available, especially in winter or during wet-weather routes.
- Mirrors: Confirm they're secure, clean, and positioned to show the road around the truck.
- Windshield and wipers: Look for cracks, worn blades, and streaking that blocks the driver's view.
- Cab safety items: Test the horn, check the seat belt, and confirm gauges and warning lights are working as expected.
- Washer fluid: Keep the reservoir filled with fluid suitable for the weather.
Federal rules require drivers to inspect before operating and to be satisfied that the vehicle is in safe operating condition. If the previous inspection report lists defects, review it, confirm repairs were completed, and sign the report as required (FMCSA Safety Planner guidance). Don't leave a known visibility or safety defect for the next driver.
10-Point Truck Maintenance Checklist Comparison
| Maintenance Check | 🔄 Implementation Complexity | ⚡ Resources Required | 📊 Expected Outcome | ⭐ Key Advantage / Ideal Use |
|---|---|---|---|---|
| Tire Tread Depth and Condition | Low; repeatable walk-around check | Tread-depth gauge, pressure gauge, inspection log | Helps prevent blowouts, reduce fuel use, and identify alignment or brake issues | Ideal for pre-trip checks and fuel stops; catches wear and damage early |
| Brake System and Pushrod Stroke | High; requires measurements and brake-system knowledge | Measuring tool, chamber chart, wheel chocks; shop support for some repairs | Helps maintain stopping performance and reduce brake violations and component wear | Essential for safety-critical inspections, especially before demanding routes |
| Lights, Reflectors, and Electrical Wiring | Low; quick functional and visual check | Driver or assistant; spare bulbs and fuses for minor repairs | Improves visibility and helps avoid lighting-related citations | Ideal for walk-arounds and every trailer hookup |
| Front-End Bumper, Brackets, and Grille | Low to moderate; inspect fasteners, brackets, and surfaces | Basic inspection tools; torque wrench for bolt checks | Helps protect front-end components and identify corrosion or mounting damage | Useful during periodic maintenance, especially in salty or debris-heavy conditions |
| Steering System Play and Linkage | Moderate to high; some checks require experience or a lift | Inspection tools; qualified technician for detailed checks or repairs | Supports vehicle control and helps prevent uneven tire wear and roadside failures | Prioritize when steering feels loose, wanders, or pulls to one side |
| Suspension, Springs, and U-Bolts | Moderate; visual checks plus fastener and ride-height assessment | Inspection tools; leak-testing kit for air suspension | Helps maintain stability, protect axles and frame, and reduce tire wear | Valuable for trucks carrying heavy loads or operating on rough roads |
| Engine Oil, Coolant, and Fluid Leaks | Low; routine level and leak checks | Dipstick, suitable fluids, clean cloth, maintenance log | Helps prevent overheating, engine wear, and breakdowns | Ideal for every pre-trip inspection and tracking fluid consumption |
| Air System, Compressor, and Air Dryer | Moderate; includes system tests and leak detection | Soap solution or leak detector; replacement air-dryer cartridge as scheduled | Helps keep air brakes responsive and reduce moisture-related corrosion or freezing | Especially important in cold weather and for trucks with air-brake systems |
| Fifth Wheel and Coupling | Moderate; requires coupling and locking checks | Visual inspection; manufacturer-specified grease | Helps prevent trailer separation and reduces coupling wear | Essential every time the tractor connects to a trailer; include a pull test |
| Cab Safety Equipment, Mirrors, and Windshield | Low; functional and visual check | Washer fluid; replacement wipers or basic repair items | Improves visibility, driver safety, and inspection compliance | Ideal for daily pre-trip checks and before bad-weather driving |
Build a Checklist That Keeps Every Haul Moving
A checklist only helps if drivers and technicians complete it, record defects, and close the repair loop. Start with a walk-around before every shift. During long hauls, use fuel stops to look for new tire damage, loose hardware, fresh leaks, and changes in ride height. Schedule deeper inspections around the truck's duty cycle and follow manufacturer limits for fluids, brakes, steering, suspension, tires, and air-system service.
Seasonal checks deserve their own place in the routine. Before winter, check air tanks and inspect exposed chrome and mounting points for corrosion. Before severe storms, inspect wiring, lights, and fluid levels. After construction-zone or off-road work, look for debris damage under the truck and around the bumper, tires, and exposed lines.
Fleet managers should record the vehicle identification or unit number, mileage or engine hours, defect, repair, parts, and person responsible. Track repairs by axle or system so repeat tire, brake, electrical, or mounting problems don't disappear into a stack of work orders. FMCSA requires systematic inspection, repair, and maintenance records, and driver vehicle inspection reports for non-passenger commercial vehicles must be retained with repair and review certifications for three months (FMCSA Part 396 guidance). Keep the required records organized and ready to show.
A commercial vehicle also needs a periodic inspection at least once every 12 months, with the required proof available on the vehicle. The carrier must retain the periodic inspection report for 14 months (49 CFR 396.17 and FMCSA Safety Planner record guidance). Schedule each tractor, trailer, and converter dolly as applicable, and check that current proof remains in the truck.
Frequently asked questions
How often should I inspect brakes? Check for visible defects and air leaks during daily inspections. Measure brake wear and perform deeper checks at scheduled maintenance intervals, and have a qualified technician assess any defect before dispatch.
When should I rotate tires? Follow the tire and vehicle maker's guidance and base service on tread wear, tire position, and the truck's operating conditions. Record tread depth by position so you can identify uneven wear and make timely service decisions.
How should I store maintenance records? Keep inspection reports, defect notes, repair details, and proof of periodic inspection organized by vehicle. Ensure drivers have required proof in the truck and the carrier retains records for the applicable period.
Is a daily checklist enough? No. Daily checks catch visible and immediate problems, but scheduled technician inspections, mileage-based service, seasonal checks, and repairs are also essential. A checklist doesn't replace qualified service.
Owner-operators should resolve safety-critical defects before departure and never use a checklist as a substitute for qualified repair. Fleet managers should make the same rule clear across every shift: identify the defect, document it, authorize the repair, verify the fix, and release the truck only when it's safe.
When a bumper needs replacement, choose one that fits the truck and the way it works. Compare Galhor's direct bolt-on Class 8 options by make, model, year, style, cutouts, thickness, and finish in the 3D configurator. Galhor offers U.S.-sourced steel, chrome-plated carbon steel, and 304 and 430 stainless steel options, with triple-layer chrome and 35 microns of nickel. The company states that its products are manufactured in Mexico under quality control, provides warranty coverage for manufacturing defects, and offers fast U.S. shipping for in-stock stainless models. Choose a bumper that supports protection, appearance, and long-term value on harsh roads.
Galhor Inc. makes configurable, direct bolt-on bumpers for Peterbilt, Kenworth, Freightliner, and other Class 8 trucks, with chrome-plated carbon steel and 304 or 430 stainless steel options. Compare the fit, style, cutouts, and finish in the 3D configurator, then visit Galhor Inc. to upgrade your truck's protection and appearance.