
Freightliner Bumper Parts: Names, Fitment and Buying Guide
November 7, 2026 · Francisco Hornelas

Does a new bumper fix the damage, or just cover up bent brackets? Buying Freightliner bumper parts starts with that question, not with chrome, price, or a deeper drop.
A bumper that looks right can still have the wrong mounts, blocked tow points, or poor sensor clearance. For U.S. owner-operators and fleets, the right purchase restores safe fit, holds up on the route, and gets the truck back to work without another round of shop labor.
Table of Contents
- Freightliner Bumper Parts Quick-Reference Glossary
- Know Which Part You Need
- Bumper Styles and Mounting Types Explained
- Fitment by Freightliner Model and Year
- How to Confirm Fit Before You Order
- Materials and Finishes Compared
- Choosing the Right Part
- Wear Items, Warning Signs and When to Stop
- Confirm Your Fit and Order the Right Bumper
Freightliner Bumper Parts Quick-Reference Glossary
Freightliner bumper parts include the visible shell, mounting brackets, fasteners, and openings needed for the truck's equipment. A bumper assembly isn't always a complete installation kit. Using the exact part name at the parts counter helps you avoid ordering a shell when the truck also needs brackets or hardware.
Freightliner bumper components at a glance
| Component | Function | Location | Replace When |
|---|---|---|---|
| Bumper shell | Front impact face and visible style | Front of frame, below grille | Cracked, bent or pitted beyond repair |
| Mounting brackets | Carry impact load to the frame | Behind shell, bolted to frame rails | Bent, cracked or corroded |
| Mounting hardware | Holds shell and brackets together | Bolt holes and nut plates | Stripped threads, rust or wrong grade |
| Tow-hook cutout | Access to tow points | Center of shell | Edges torn or cracked |
| Fog and light cutouts | Keep lamps visible and aimed | Lower corners of shell | Misaligned or cracked edges |
| Sensor or grille clearance | Space for radar, camera or grille parts | Upper center of shell | Shell contacts sensor housing |
| Chrome or polished finish | Surface protection and appearance | Entire exposed surface | Peeling, blistering or deep pitting |
The shell is only the visible part of the repair. If an impact pushed a bracket rearward, a replacement shell can sit crooked even when its bolt holes line up. Don't pull it into place by tightening the bolts harder.
Cutouts also need careful naming. A tow-hook opening provides access to a recovery point; the opening itself isn't a recovery point. Never attach recovery equipment to the bumper shell unless the complete system is specifically designed for that use.
What to tell the parts counter
Start with the failed component, then describe the condition. “Passenger-side mounting bracket bent at the frame connection” gives the counterperson more useful information than “front bumper damaged.”
Send clear photos of:
- The complete front end, showing the grille, headlights, bumper profile, and lamps.
- Both rear mounting areas, including brackets, bolt heads, and frame connections.
- Existing openings, especially tow points, fog lamps, and sensor housings.
- Any labels or stamped numbers, before cleaning or refinishing removes them.
Ask whether the quoted part includes the shell, brackets, and hardware. Don't assume a product photo shows everything in the box.
Part numbers change with model, year, cab configuration, and installed equipment. The glossary identifies what you're replacing; the truck's build information determines which version fits.
Know Which Part You Need
Start with the part class, because a tractor front bumper and a trailer rear underride guard solve different problems. The front bumper bolts to the truck's frame, sets the front-end line, and may carry lamp or tow openings; the rear guard is crash hardware at the back of a covered trailer. A parts counter can quote “a bumper” for a trailer guard when the failed piece is a tractor front shell, so name the vehicle position before price. The cheapest-part trap is paying for the lowest line item that matches the word “bumper” while missing duty, fit, and compliance.
Truck tractors are excluded from that rear-guard requirement. For trailers and semitrailers covered by 49 CFR 393.86, the horizontal member must reach within 4 inches of each side without extending past the edge, sit no more than 22 inches above ground across its width, have at least 3.94 inches of vertical height, and remain within 12 inches of the rear extremity at the specified height.
Front bumper versus regulated rear guard checks
| Check | Front Bumper | Regulated Rear Guard |
|---|---|---|
| Governing rule | Vehicle fit and inspection rules | 49 CFR 393.86 and FMVSS No. 223 |
| Applies to | Tractors and straight trucks | Trailers and semitrailers covered by the applicable provisions |
| Side reach | Match truck width and listed application | Within 4 inches of each side, no farther out than the edge |
| Bottom edge height | Check truck-specific ground and operating clearance | No more than 22 inches above ground across full width |
| Rear position | Set by the bumper design and installed position | Within 12 inches of rear extremity at 22 inches or higher |
| Vertical member height | Match the specified bumper profile | At least 3.94 inches |
A decorative bar can look correct on a trailer and still fail the required geometry. Older equipment and exempt vehicle types also need careful classification, rather than a blanket application of one table.
Compliance needs more than matching dimensions. FMVSS No. 223 sets rear-impact-guard performance requirements. A replacement should carry a compliance claim only when the complete guard, mounting structure, hardware, labeling, and test evidence support it.
Before ordering, identify the part type and applicable vehicle requirements. Then confirm model and year, frame-rail spacing, bracket geometry, fastener grade, and installation position.
A stronger-looking bar doesn't compensate for an untested mounting system.
Changing brackets or moving a rear guard can change the tested load path. Treat fabrication as an engineering and compliance job, with the same care as choosing the correct shell.
Bumper Styles and Mounting Types Explained
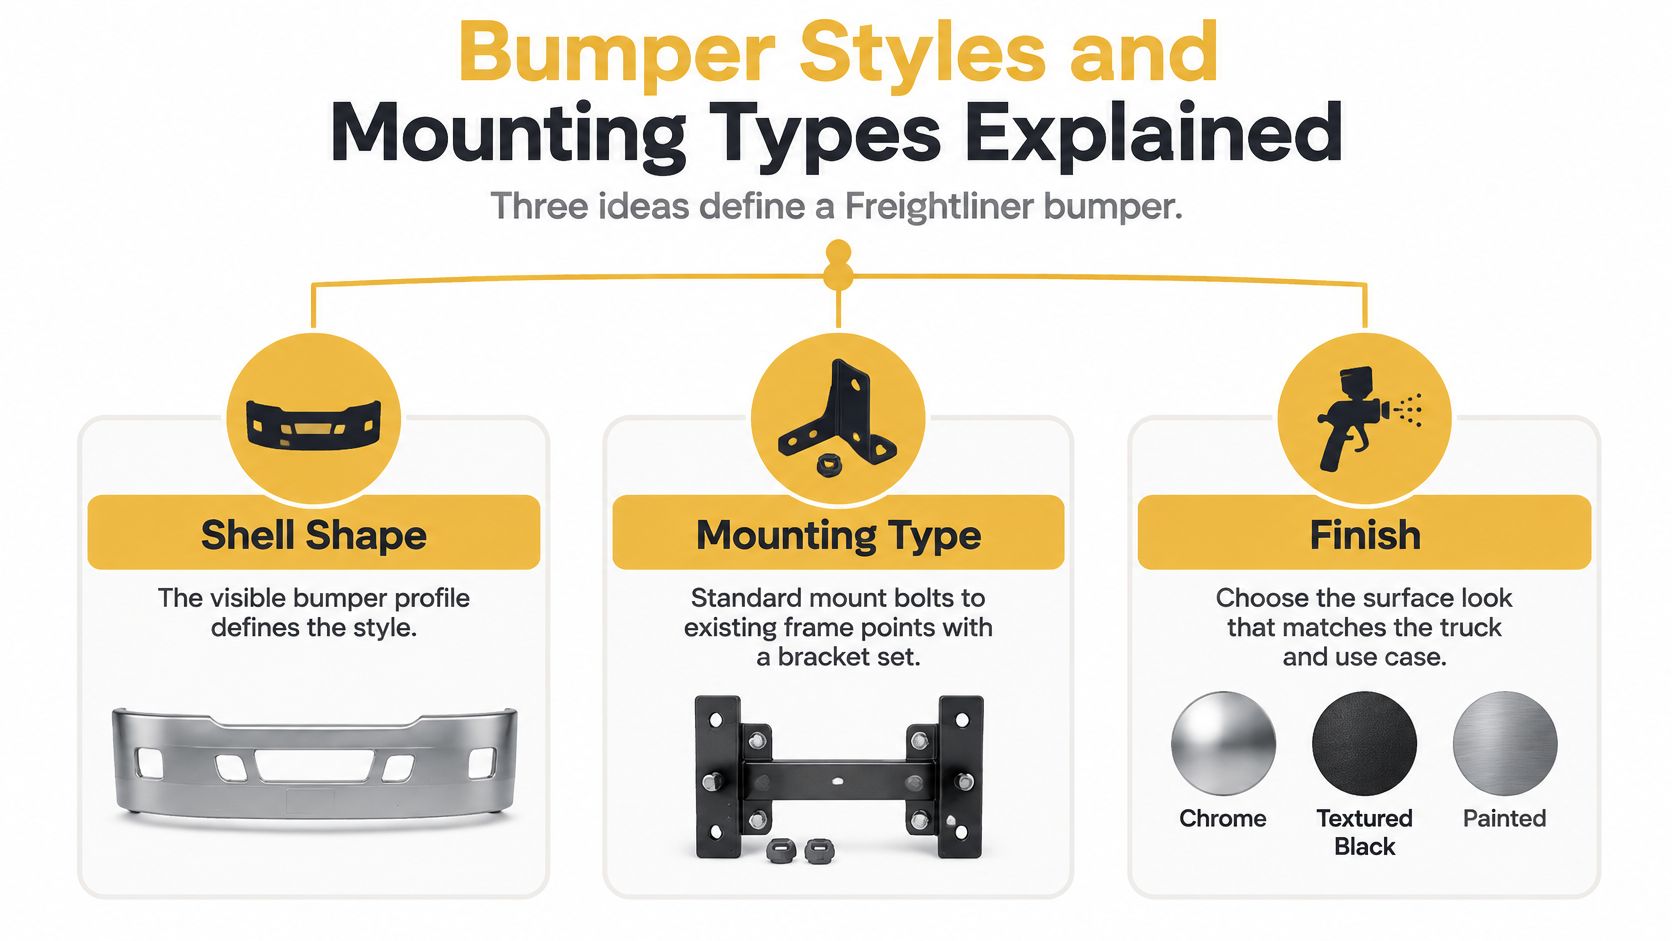
A Freightliner bumper has separate choices for shell shape, mounting type, and finish. Start with the mounting system. A clean-looking shell isn't useful if its brackets don't match the truck.
Bumper styles and what each one needs
| Style or Mount | Mount Type | Typical Use | Verify Before Ordering |
|---|---|---|---|
| Standard mount | Bolts to existing frame points | Most highway tractors | Frame-rail spacing and bracket set |
| Blind mount | Hidden fasteners behind shell | Clean-look and show trucks | Bracket and hardware kit included |
| Wraparound | Full bracket set around front corners | Trucks with wraparound factory line | Full bracket set and cutouts |
| Straight or flat shell | Standard bracket set | Work and highway duty | Cutout layout for lamps and tow hooks |
| Tapered or box end | Standard bracket set for the listed application | Custom and appearance builds | End styling alone doesn't establish mount compatibility |
Standard mounting uses accessible fasteners and a bracket set aligned with the truck's frame connections. It's straightforward to inspect, but you still need the correct bracket offset and hole pattern.
Blind mounting hides the fasteners behind the shell. That gives the front a cleaner appearance, but it can make access tighter during installation. Confirm how you'll reach each fastener before positioning the bumper.
Shape doesn't establish strength
Wraparound shells follow the front corners and need support at the intended mounting locations. Don't leave an end unsupported because the center bolts fit.
Straight, tapered, and box-end shells change the truck's appearance. An end profile doesn't prove greater strength, and a style name doesn't guarantee the same brackets across manufacturers. Use the mounting drawing, not the name alone.
For bracket identification and mounting layouts, use the bumper mounting brackets guide alongside the application details.
Say an owner-operator runs dry western lanes and wants a polished front end with low-mounted fog lights. The useful purchase is a shell with matching lamp openings and service access, not the most dramatic profile.
A drop bumper also needs a route check. Look at driveway transitions, loading yards, and uneven entrances before choosing a deeper shell. A professional appearance shouldn't require scraping the bumper every time the truck enters a customer's lot.
Fitment by Freightliner Model and Year
Bumper fitment follows model, year, and cab configuration, not the Freightliner badge alone. Pull the build sheet before comparing listings, then work from the truck's exact configuration.
The Cascadia generation milestones below come from Daimler Truck's Cascadia production history: the original debuted in 2007 with the DD15 platform, Evolution followed in 2012, the next generation in 2017, and the fourth generation with automated-driving capabilities in 2019. Those are platform milestones, not universal bumper interchange ranges.
Freightliner bumper fitment by model and year
| Model | Years | Mounting Notes | Confirm Before Ordering |
|---|---|---|---|
| Cascadia, fourth generation | 2019 debut | Match brackets to the exact build | Driver-assist sensor clearance and grille |
| Cascadia, third generation | 2017 debut | Verify application-specific bracket set | Sensor housings and bracket set |
| Cascadia, second generation, Evolution | 2012 debut | Confirm factory mounting layout | Grille, headlamp and mount points |
| Cascadia, first generation | 2007 debut | Verify shell and bracket compatibility | Grille and headlamp geometry |
| Freightliner FLD 120 | Verify model year from build sheet | Direct bolt-on with gauge-7 bracket for the listed application | Model year on the truck |
| Freightliner Classic | Verify model year from build sheet | Standard or blind mount for the listed application | Mount type and cutout layout |
| Freightliner Columbia | 2008 and later for the listed application | Direct bolt-on with gauge-7 bracket | Cab style, cutouts and build sheet |
For newer Cascadias, inspect the actual sensor housings and front-end equipment. Don't assume every truck within a generation has the same electronics, grille arrangement, or openings.
For the FLD 120, a direct-fit description still needs a confirmed application range. Match the year on the truck to the listing rather than treating the model name as enough information.
Cab and equipment details matter
On a Classic, standard mount versus blind mount determines the hardware arrangement. A shell intended for one system shouldn't be converted to the other with improvised brackets.
On a Columbia, verify cab style and every selected opening. A correct basic shell with the wrong fog-lamp layout still creates installation work.
Record the wheelbase and cab configuration even if the bumper listing doesn't ask for both. Those details help the parts counter identify the truck accurately when build records contain several chassis configurations.
Match the VIN or build sheet before comparing prices. If the application range isn't confirmed, resolve it with the parts counter instead of guessing.
How to Confirm Fit Before You Order
Use measurements and build information together. An old bumper can help identify the layout, but collision damage makes it a poor dimensional template.
Complete the fit check
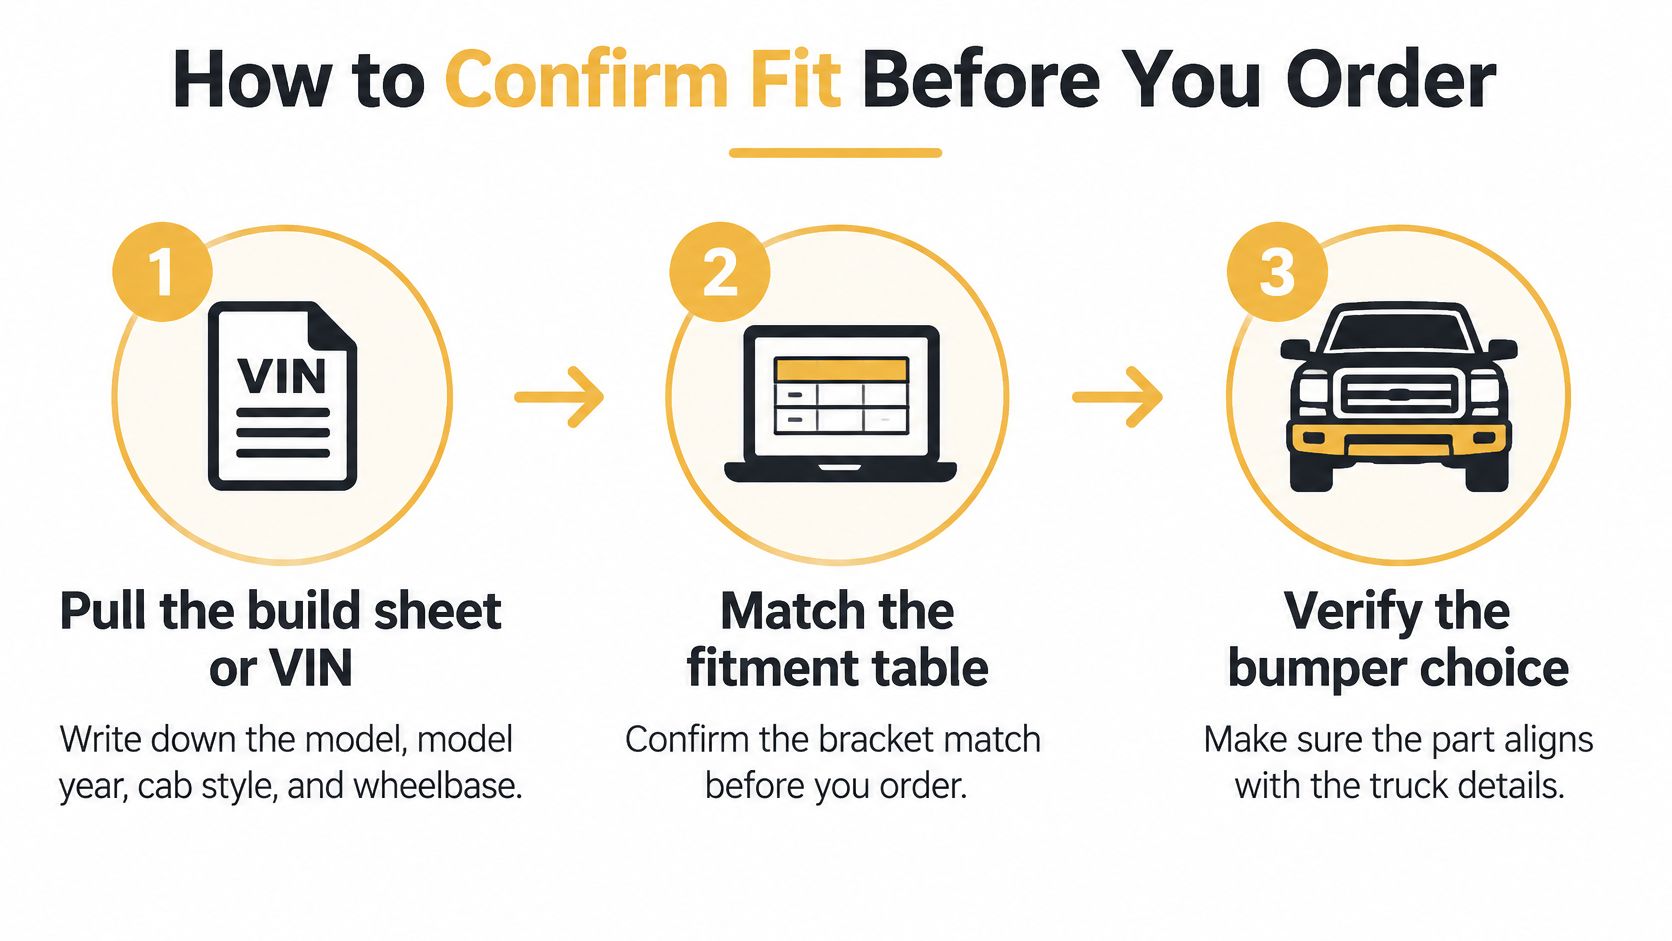
- Pull the build sheet or VIN. Write down model, model year, cab style, and wheelbase. Use the truck's records, not the registration description alone.
- Confirm the bracket set. Match the application to the shell and brackets as a system. Similar-looking brackets can place the bumper at a different height or distance from the frame.
- Measure the body gap. Freightliner's body-builder guidance specifies a 60-millimeter gap, about 2.36 inches, between the bumper or bullbar and the body. Confirm that this guidance applies to your U.S. truck's configuration rather than treating the dimension as a universal specification.
- Measure the mounting layout. Use a tape measure and straightedge to check frame-rail spacing, hole centers, and bracket offsets against the drawing. Measure undamaged reference points.
- Check every cutout. Confirm tow-hook access, fog-lamp openings, and sensor clearance against the equipment on the truck. A lamp opening needs room for the housing and adjustment, not just the lens.
- Check moving clearances. Open and close the hood while watching the grille, bumper corners, and tow-hook areas. Keep wiring clear of hinges and pinch points.
- Verify the fasteners. Confirm bolt grade, thread size, washers, nuts, and any spacers against the installation requirements. Don't reuse stretched, badly corroded, or damaged hardware.
- Test-fit before final installation. Support the bumper securely and start the fasteners without forcing alignment. Mark contact points before paint, final tightening, or accessory installation.
Fitment rule: Bolts should secure a correctly aligned assembly, not bend it into position.
Use a torque wrench and the specified tightening sequence for the supplied hardware. Don't substitute an impact wrench setting for a torque specification.
A bumper chosen by brand name alone often needs rework. A fit check costs less than discovering a blocked tow point after the truck is ready for dispatch.
Materials and Finishes Compared
Start with thickness, then compare corrosion protection. Gauge numbers are not a universal thickness scale across different metals, so compare the actual material specification, not just the number in the product title. A 10-gauge chrome-plated steel shell and an 11-gauge stainless shell can sit side by side in a catalog while behaving very differently at the edges.
A heavy shell also needs sound brackets and properly treated edges. Extra metal in the front face won't correct a weak mounting connection or a poorly finished cutout, and that is where a cheap part ends up costing more: a thin edge that rusts or a cutout that chips puts the truck back in the bay.
Bumper material and finish comparison
| Material | Thickness | Corrosion notes |
|---|---|---|
| Chrome-plated carbon steel | 10-gauge in the listed steel options | Plated surface protects the substrate; check exposed edges, chips and cutouts more often |
| Chrome-plated 430 stainless steel | 11-gauge in the Columbia and FLD 120 options | Offered for maximum corrosion resistance; confirm the salt-fog test record for the specific part |
| Chrome-plated 304 stainless steel | Confirm the listed gauge for the specific application | Stainless substrate suited to harsh routes; weigh the test records rather than the grade name alone |
These thicknesses describe specific listed options, not every replacement bumper sold for Freightliner trucks. Verify the substrate on the order confirmation, especially when the same shell style comes in more than one material. The Columbia (2008+) bumper, for instance, is offered in 10-gauge chrome-plated steel or 11-gauge 430 stainless steel.
Chrome-plated carbon steel pairs a steel shell with a plated surface; chrome-plated stainless puts a corrosion-resistant substrate under the finish. Polished stainless and chrome-plated stainless are two different finishes, so don't treat the terms as interchangeable on a purchase order.
The listed chrome process is a triple-layer hexavalent finish with 35 microns of nickel. That coating protects the substrate, but exposed edges, stone chips and damaged mounting holes still need attention. The comparison of stainless steel and carbon steel helps separate substrate choice from surface appearance.
Compare test records, not promises
ASTM B117 defines a controlled salt-fog exposure used to compare coatings and metal products. A salt-fog hour count alone does not predict field service life.
Ask for records identifying:
- The substrate and coating, including thickness and surface preparation.
- The tested edges and cutouts, not just a smooth sample panel.
- The failure criteria, such as red rust, peeling, blistering or adhesion loss.
- The test conditions, so competing results can be compared fairly.
For dry routes with careful washing, plated carbon steel is a sensible choice. For salt-belt, coastal and winter-treatment routes, the stainless options are built for corrosion resistance, and the test records show which one held up under the same exposure.
Appearance and structural condition remain separate checks. A mirror finish doesn't prove that the edges, brackets or mounting holes are sound.
Choosing the Right Part
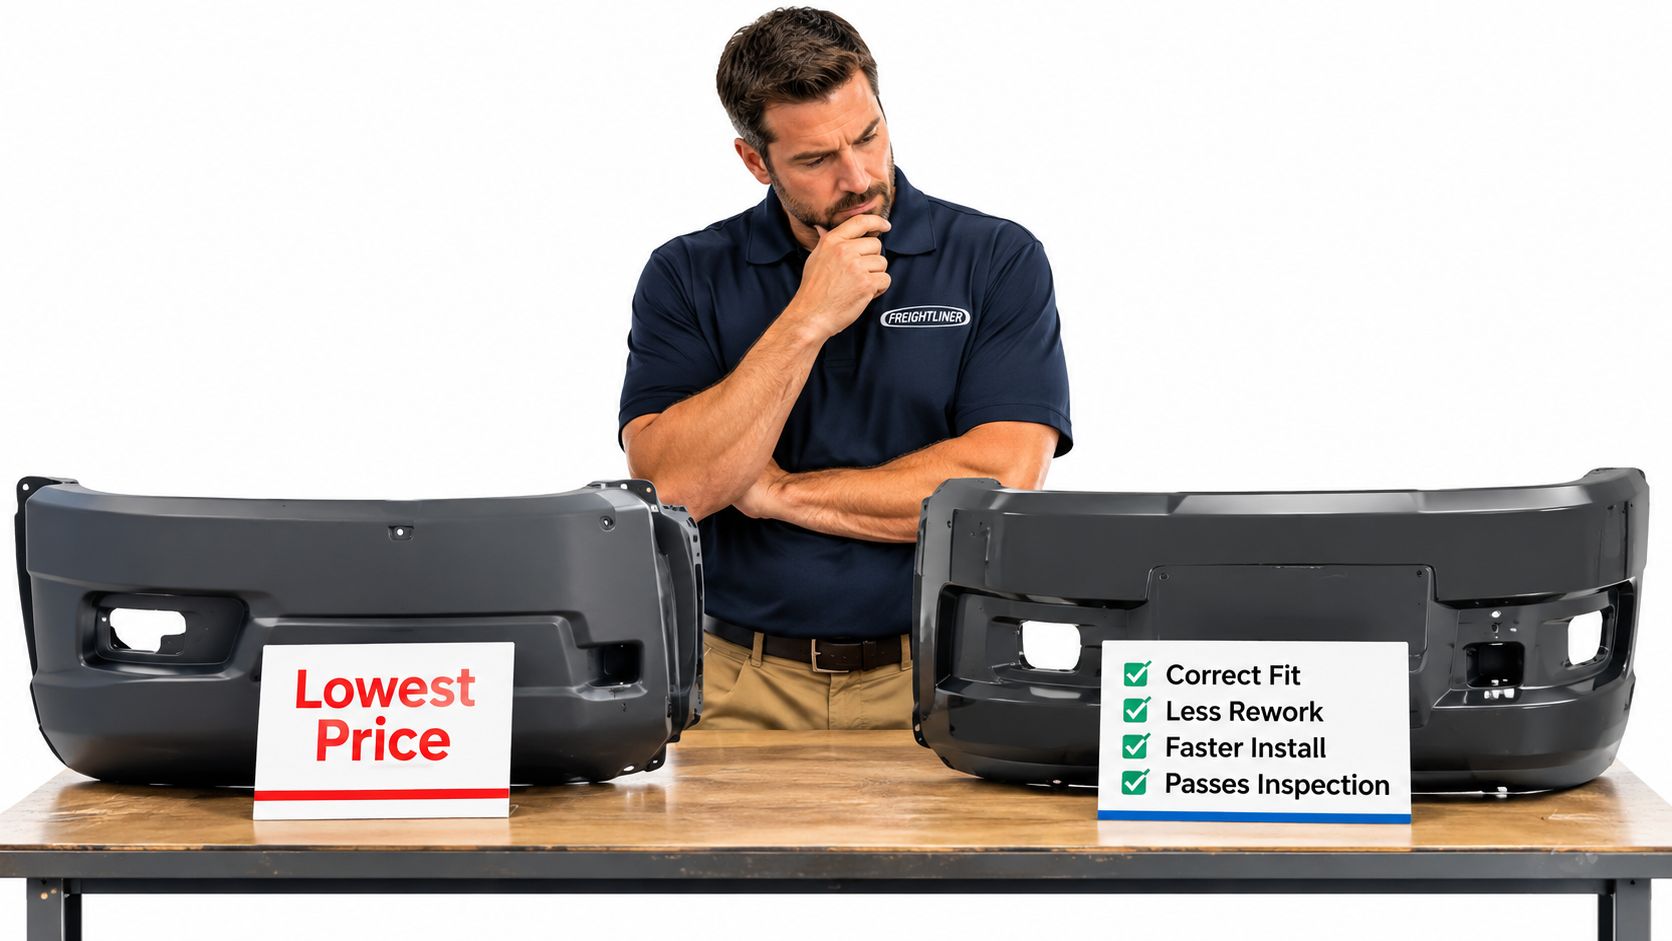
A salt-route fleet can order the cheaper bumper and still pay more. A made-to-order shell saves money at checkout, then leaves a truck idle for three weeks while it is built and shipped. When the lost contribution and extra handling exceed the purchase savings, the low price stops being low. That gap is the cheapest-part trap, so price the decision as installed cost: part, freight, labor, and days out of service.
Replacement or upgrade decision guide
| Situation | Best Choice | Why |
|---|---|---|
| Collision replacement | Direct-fit bumper matched to build sheet | Restores intended mount points and clearance when supporting parts are sound |
| Appearance upgrade | Chrome or polished stainless with matched brackets | Changes appearance without improvised mounts |
| Salt-belt or coastal routes | Application-matched 430 or 304 stainless | Better corrosion resistance than plated carbon |
| Dry routes with careful washing | Chrome-plated carbon steel | Practical cost choice for lighter exposure |
| Fleet standardization | Commonly stocked configuration | Can shorten downtime compared with a made-to-order part |
| Unknown part type or rear-guard use | Identify part type first | Avoids wrong dimensions and compliance assumptions |
For collision work, restore the mounting system before choosing a different profile; the direct-fit row assumes frame ends and lamp positions are still where they should be.
For an appearance upgrade, choose the finish and end style after confirming fit. Buyers familiar with a Peterbilt 389 bumper or Kenworth W900 chrome bumper still need Freightliner-specific brackets and openings. An International application doesn't transfer either.
Put delivery and installation on the quote
Compare the complete installed cost:
- Freight and handling, including how the shell reaches the shop. Oversized wraparound bumpers often ship by freight, so confirm dock access, a liftgate, or a delivery appointment early.
- Installation labor, with damaged mounts priced separately. A direct bolt-on replacement needs no drilling or cutting, so a padded labor estimate deserves a second question.
- Actual dispatch timing, meaning whether the exact configuration sits in stock or gets built to order. A short transit time on an unbuilt part still leaves the truck down.
Fleet standardization works best when the trucks share verified configurations. Keep the replacement part number with its compatible VINs so a stocked shell doesn't become an expensive wrong-fit spare.
I treat stock status and material as one question. The right bumper bolts on, holds up on the route it runs, and returns the truck to service on a schedule the shop can plan around.
Wear Items, Warning Signs and When to Stop
Bumper wear usually starts where road debris, moisture, and movement meet. Check the visible finish, then get behind the shell. A bright front face can hide rusted fasteners and cracked brackets.
Use a flashlight, inspection mirror, gloves, and a camera. Park on level ground, secure the truck, and let hot components cool before reaching behind the bumper.
Finish damage and exposed edges
Chrome damage often begins with stone chips, bubbling near welds, or pitting along folded edges. Wash away road film before judging the surface. Dirt and dried salt can hide the edge of a peeling area.
Touch up exposed steel early with a repair coating compatible with the substrate and finish. Touch-up won't restore the original plated appearance, but it can protect a small damaged area while you plan a permanent repair. Don't polish over active rust and call it repaired.
Cutouts need a closer look. Inspect tow-hook and fog-lamp openings for hairline cracks, torn corners, and sharp edges. Look from behind as well as from the front.
A minor burr may be dressed by a qualified technician when that work won't weaken the part or interfere with the finish. A crack reaching a mounting area calls for replacement assessment, not cosmetic smoothing.
Brackets and hardware
Rust streaks below a bolt hole can indicate moisture, coating damage, or movement at the connection. Loose nuts, elongated holes, cracked welds, and shifted washers need investigation before tightening the assembly.
Use these actions to separate a loose fastener from a damaged joint:
- Inspect the bolt and nut, checking threads, seating surfaces, and corrosion.
- Check the hole shape, looking for elongation or torn metal.
- Inspect the complete bracket, including folds, welds, and hidden faces.
- Verify alignment, so tightening doesn't preload a bent assembly.
A stainless shell against a carbon-steel bracket can corrode at a wet, salt-filled interface. Clean and inspect that contact area during winter service. Use compatible isolation materials only where the assembly design allows them; don't add soft spacers that compromise clamping.
Sort cosmetic findings from unsafe defects
Scuffs and minor surface marks can usually be scheduled for normal finish work when the mounting system remains sound. Chips that expose steel deserve prompt protection, even if they don't require taking the truck out of service.
Stop and inspect before dispatch when you find:
- Loose or missing hardware, especially at a bracket-to-frame connection.
- Bent or cracked brackets, or a shell that moves against the body.
- Sharp exposed edges, protruding parts, or a partially detached shell.
- Displaced lamps or damaged wiring, including lights that can't be aimed correctly.
- Possible frame or crossmember damage, particularly after a collision.
FMCSA records missing, loose, or protruding bumpers as cab-and-body violations in its vehicle-maintenance inspection data. Federal maintenance requirements also require safe operating condition and disposition of reported safety defects before dispatch, so don't treat an unresolved mounting problem as a finish complaint.
Dispatch decision: If the bumper can detach, interfere with equipment, or expose someone to a sharp projection, keep the truck parked until the condition is assessed and corrected.
Document the impact, not just the replacement
After an impact, inspect every bracket bolt, frame-rail contact point, lamp mount, and nearby crossmember. Check whether one side moved rearward or upward. Replacing the shell alone won't correct a mounting system pushed out of alignment.
Take photos that make the repair traceable:
- A full front view, showing bumper position relative to the grille and headlights.
- A side view from each corner, showing body clearance and any rearward movement.
- Close-ups of each connection, including damaged threads, holes, and welds.
- Final repair photos, showing the completed assembly and restored equipment clearance.
Use the bumper repair versus replacement guide to evaluate whether the damage is limited to a repairable surface or affects the shell and mounting system.
Record what was replaced, the hardware used, and the final inspection. Before releasing the truck, verify hood operation, lamp function, tow-point access, and secure mounting. The repair is complete when the assembly works correctly, not when the new chrome looks straight.
Confirm Your Fit and Order the Right Bumper
Check your build sheet, then order the bumper that matches it. A shell priced well below the market usually gets there through thinner steel, a missing bracket, or cutouts that never matched your lamps, and the savings come back as rework in the bay.
One check a work order rarely spells out: "bumper" can mean the front assembly or the rear underride guard. Confirm which part the inspection flagged before you pick a part number.
Before checkout, confirm:
- Model and year, matched to the actual build information.
- Part location, front bumper versus rear guard.
- Material and finish, chosen for the truck's weather and road conditions.
- Clearance and openings, checked against lamps, tow points, sensors, and hood travel.
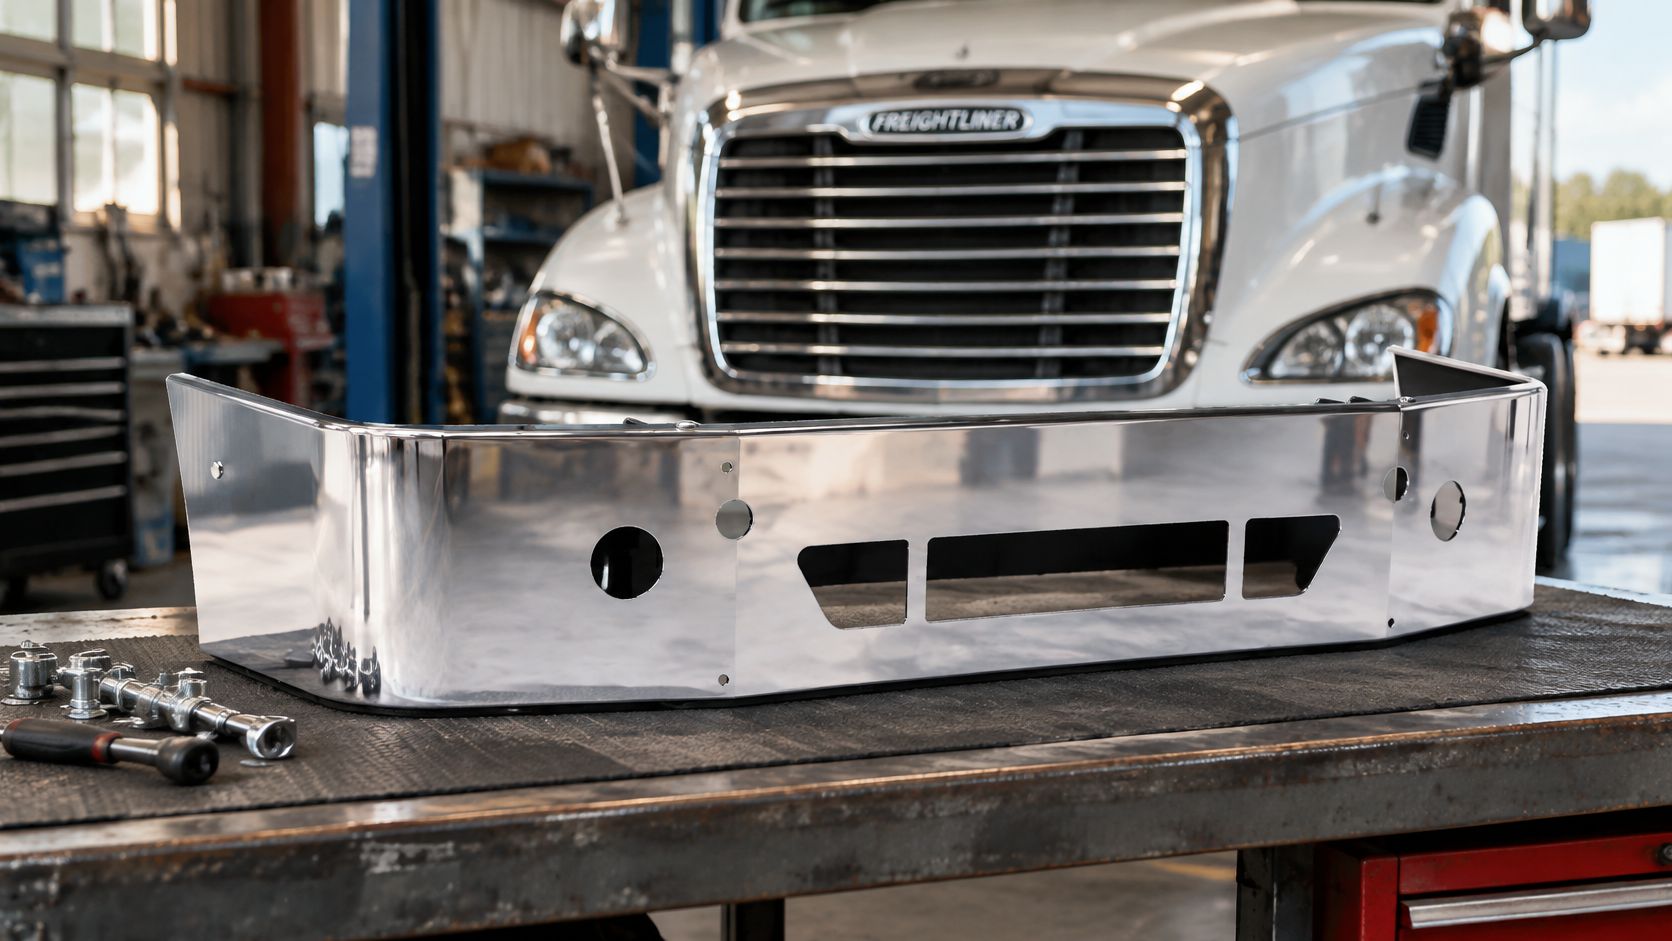
Galhor Inc. is a Texas-based manufacturer and online retailer of configurable chrome bumpers for Freightliner, Peterbilt, Kenworth, and Volvo Class 8 trucks, each engineered for a listed application. The Chrome bumper for Freightliner Columbia (2008+) is listed from $1,669.99, with size, material, and end-style options reaching $1,909.99. Sold individually, it includes a gauge-7 mounting bracket and uses 10-gauge chrome-plated steel with a mirror-polished finish. An 11-gauge 430 stainless steel option is available.
Check the complete order
For the listed Columbia application, installation is direct bolt-on with no drilling or cutting. Match the tow, fog-lamp, and light openings to the truck as built. Coverage includes defects in workmanship and materials.
Timing matters as much as part number. In-stock stainless steel 430 and 304 flat bumpers can ship within 48 hours, while made-to-order carbon steel units typically ship in 4 to 6 weeks. Confirm stock status for your configuration before you schedule the repair bay.
Keep the final steps simple:
- Confirm the part type.
- Verify fitment against the build sheet.
- Choose the material for your route.
- Order the matched configuration and retain the details with the truck's records.
Bring your model, year, and cutout requirements to Galhor Inc. and order the bumper that fits your truck and working conditions.