
Freightliner Century Bumper Guide: Fit, Steel and Cost
November 4, 2026 · Francisco Hornelas

Your bumper is bent, the truck needs to get back on the road, and several listings say they fit a Century. Before you order a Freightliner Century bumper, check what those listings include. A complete replacement, a corner cap, and a bumper built for a different axle setup aren't the same purchase.
The right choice starts with the truck's identity and mounting layout, not its chrome finish. Treat Century-compatible as a claim to verify, then compare materials, repair options, and delivered cost. That's how you avoid paying freight on a bumper your shop can't install.
Table of Contents
- Century Bumper Fitment by Year and Configuration
- How to Verify Fitment Before You Order
- Stainless 304, 430 and Chrome Steel Compared
- Pre-1997 Trucks and Bracket Preparation
- Crate Size, Weight and Freight Handling
- Repair the End Cap or Replace the Whole Bumper
- What a Century Bumper Costs Over Its Life
- Order Your Century Bumper With Confirmed Fitment
Century Bumper Fitment by Year and Configuration
The Freightliner Century Class arrived in 1995 for the 1996 model year, according to the Century Class model history. Its 120-inch bumper-to-back-of-cab dimension matched the FLD120, but that shared dimension doesn't establish bumper interchangeability.
Fit follows the actual model and front-end configuration. A day cab or sleeper description alone won't settle the question, and neither will a seller's broad Freightliner category.
Century bumper fitment by model years and configuration
These published application ranges help narrow the search. Where a listing doesn't establish size, measure the truck rather than filling the gap with an assumption.
| Model years | Configuration | Listed bumper size | Check before ordering |
|---|---|---|---|
| 1996–2003 | Century chrome-steel listing | 16-inch | Tow-pin and step holes, bracket condition |
| 1996–2004 | Century chrome-steel listing | Size not published | Width and cutouts against your old bumper |
| Pre-1997 | Century stainless-clad aluminum assembly | Confirm assembly dimensions | Bracket-hole preparation and spacers |
| 2004–2007 | Set-back axle | 15-inch closed-end | Single recessed step cutout, dual removable tow cutouts |
| 2005–2007 | Century 112 | Confirm application dimensions | Separate application from Century 120 |
| 2005–2007 | Century 120 | Confirm application dimensions | Separate application from Century 112 |
| 2005 and later | Century and Columbia replacement | Confirm replacement dimensions | Axle position and mounting hardware |
For a specific example, Jones Performance's Century application identifies 2004–2007 set-back-axle trucks and a 15-inch closed-end bumper with a single recessed step cutout and dual removable tow cutouts. Those details matter more than the Century name at the top of a listing.
Match the truck before the style
A swept bumper and a flat chrome replacement may give the truck very different front profiles. Don't assume that matching overall width means the ends will clear the hood or that the step will remain usable.
Keep these distinctions separate:
- Model designation: Confirm the actual cab and model family, not just the badge.
- Axle configuration: Establish set-back or set-forward axle before comparing mounting layouts.
- Assembly type: Determine whether you're buying a complete bumper, a center section, or a side component.
- Front-end equipment: Account for tow access, lights, steps, and existing trim.
Find the production information on the door data plate and confirm it against the VIN record. Select the closest application row, then verify the physical truck before treating that match as an order-ready part.
How to Verify Fitment Before You Order
Use a tape measure, straightedge, flashlight, and phone camera. Start with the likely catalog match, but don't let a model dropdown replace a mounting-point check. The 4 State Trucks application listing distinguishes Century applications and advises comparing dimensions, mounting points, and the old bumper before installation.
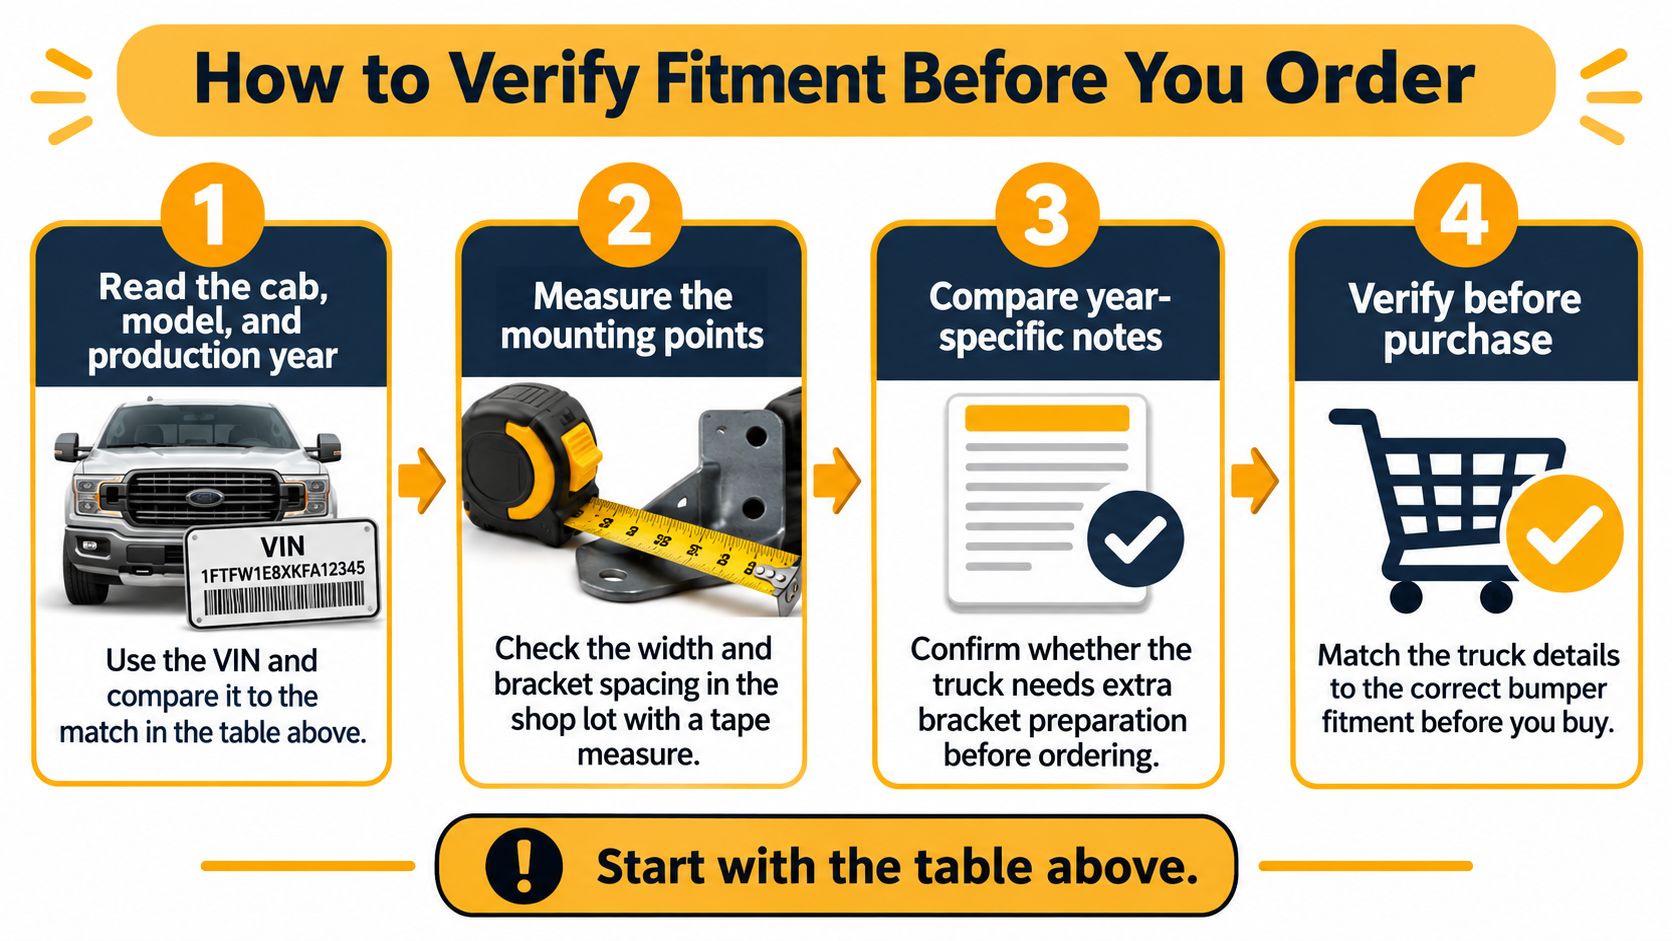
Run the shop-lot check
- Read the truck identification. Record the cab designation, model, and production information. The common slip is ordering by registration year without checking the actual application.
- Confirm axle position. Photograph the front axle's position relative to the hood and frame. Don't select set-back axle just because the bumper looks swept.
- Measure the bumper. Record overall width, vertical height, and mounting-hole spacing, center to center. Note whether it's flat, swept, or sectional. A catalog photo can hide those differences.
- Inspect the frame and brackets. Look for wrinkles, cracked paint, elongated holes, and mismatched brackets. An old collision repair can leave a nominally correct bumper sitting crooked.
- Locate every opening. Measure tow access and fog-light or marker-light cutouts from a consistent reference point. Matching the bumper outline won't fix a blocked tow opening.
- Check the step and hardware. Confirm usable step access and inspect fasteners for corrosion or damage. Don't assume old hardware is reusable because it came off intact.
- Get written confirmation. Send the seller your measurements and clear bracket photos. Ask them to identify the proposed assembly and confirm fit before shipment.
Practical rule: A catalog match is a hypothesis until the dimensions, brackets, and openings agree with the truck.
If the old bumper is bent, don't use its distorted shape as the only template. Measure sound mounting points and have a collision shop check questionable frame alignment.
Stainless 304, 430 and Chrome Steel Compared
Finish tells you how a bumper looks; the metal underneath determines how it responds to corrosion. For a truck regularly exposed to road salt or coastal air, that distinction matters more than the shine.
The Alro stainless steel guide identifies Type 304 as an austenitic stainless grade and Type 430 as a ferritic grade containing roughly 16% to 17% chromium. Type 430 resists atmospheric and fresh-water exposure well. Type 304 is the stronger choice for chloride exposure, including road salt and coastal conditions.
Bumper material by corrosion exposure
| Material | Corrosion resistance | Best for | Finish |
|---|---|---|---|
| Chrome-plated carbon steel | Coating protects the steel; chips can expose areas that rust | Mild climates and tight budgets | Mirror chrome when new |
| Type 430 stainless steel | Good atmospheric and fresh-water resistance; less resistant to chloride pitting | Mild conditions and a polished look | Bright polished stainless |
| Type 304 stainless steel | Stronger resistance to chloride pitting | Winter road salt, coastal air and wet yards | Bright polished stainless |
Chrome-plated carbon steel can suit buyers focused on purchase cost and appearance. If the plating chips, exposed steel can rust beneath the surrounding finish. Polishing the chrome nearby will not address corrosion under the damaged area.
Stainless also needs care in salt and moisture. Rinse salt deposits from the bumper face, rear surface, seams and brackets, then let trapped areas dry. Pay particular attention to crevices around hardware, where moisture can linger.
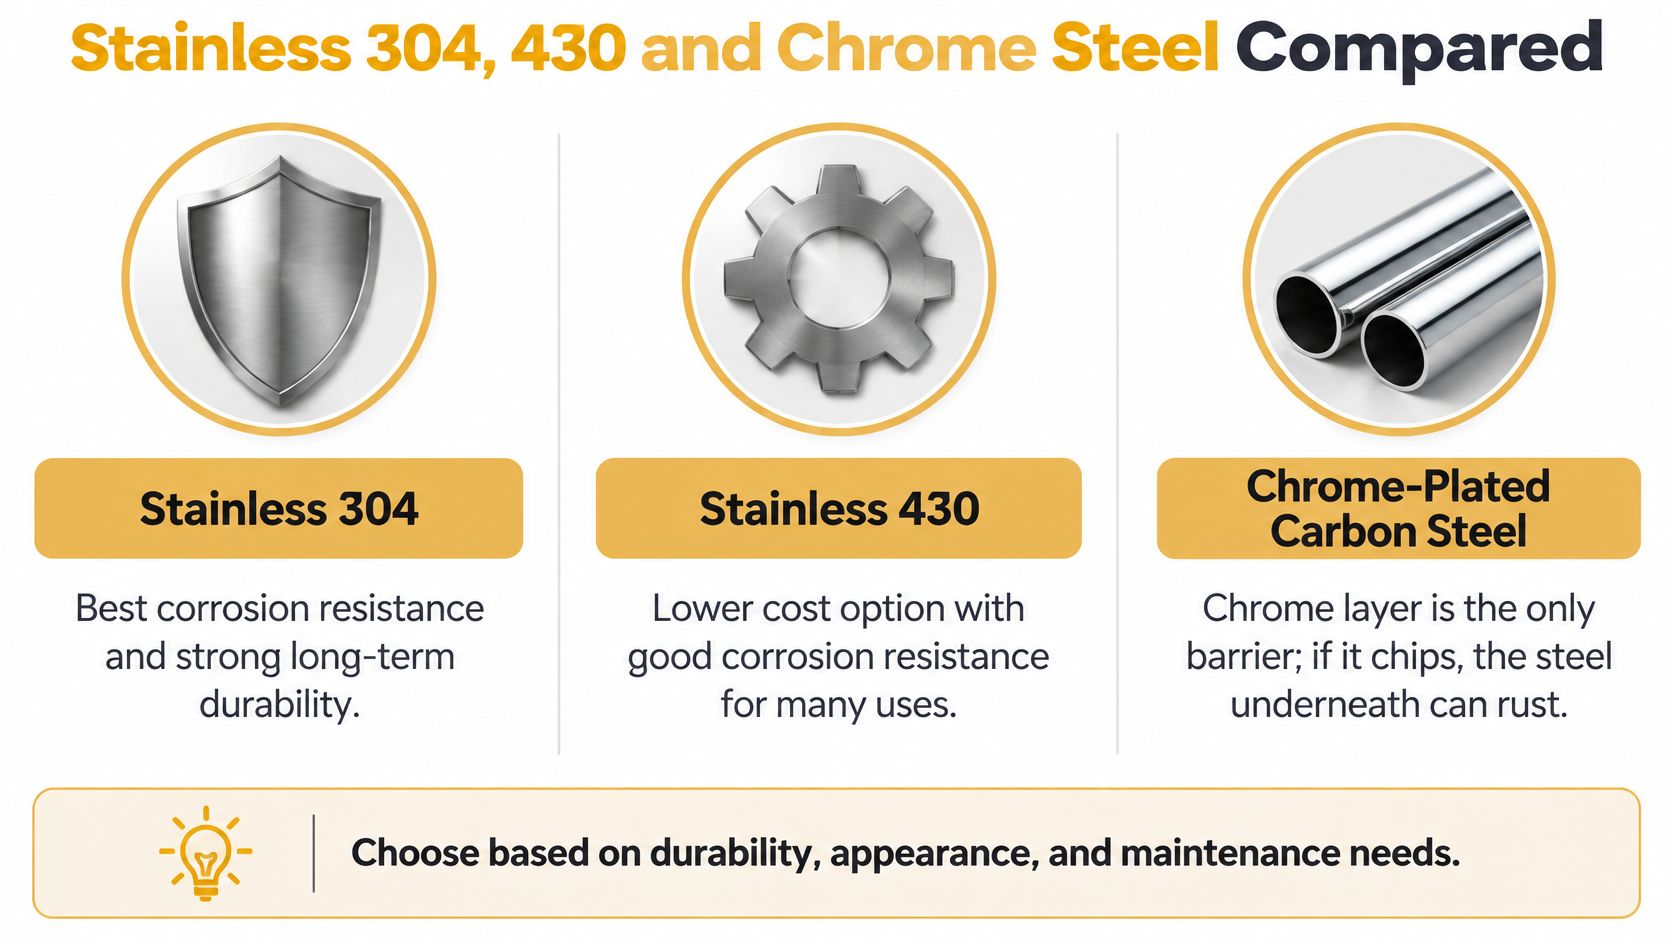
Compare thickness separately from grade
Ask for the gauge and actual material thickness on the specification sheet. A lower gauge number alone does not establish overall durability, and gauge numbers should not be compared across different metals without checking thickness.
Grade describes corrosion behavior. Thickness, formed edges, mounting support and bracket condition affect how the assembly handles service loads. A thick bumper on weak mounts is still a poor installation.
For Gulf Coast humidity and coastal exposure, 304 is the stronger corrosion-resistance choice. On mild routes in a dry climate, 430 can provide a polished stainless appearance without paying for chloride resistance the truck may not need.
Pre-1997 Trucks and Bracket Preparation
The bumper arrives, the width looks right, and the holes won't line up. Say the shop then loses a workday arranging brackets and fabrication. That's an avoidable scheduling problem when the installation requirements were available before ordering.
For a specific stainless-steel-clad-aluminum Century assembly, the industry bumper catalog hosted by NHTSA requires a 14 mm hole in the top mounting bracket on pre-1997 trucks, along with left-hand bracket A21-25693-000, right-hand bracket A21-25693-001, and two spacers, part 23-11427-038. This is a configuration-specific requirement, not permission to drill every early Century installation.
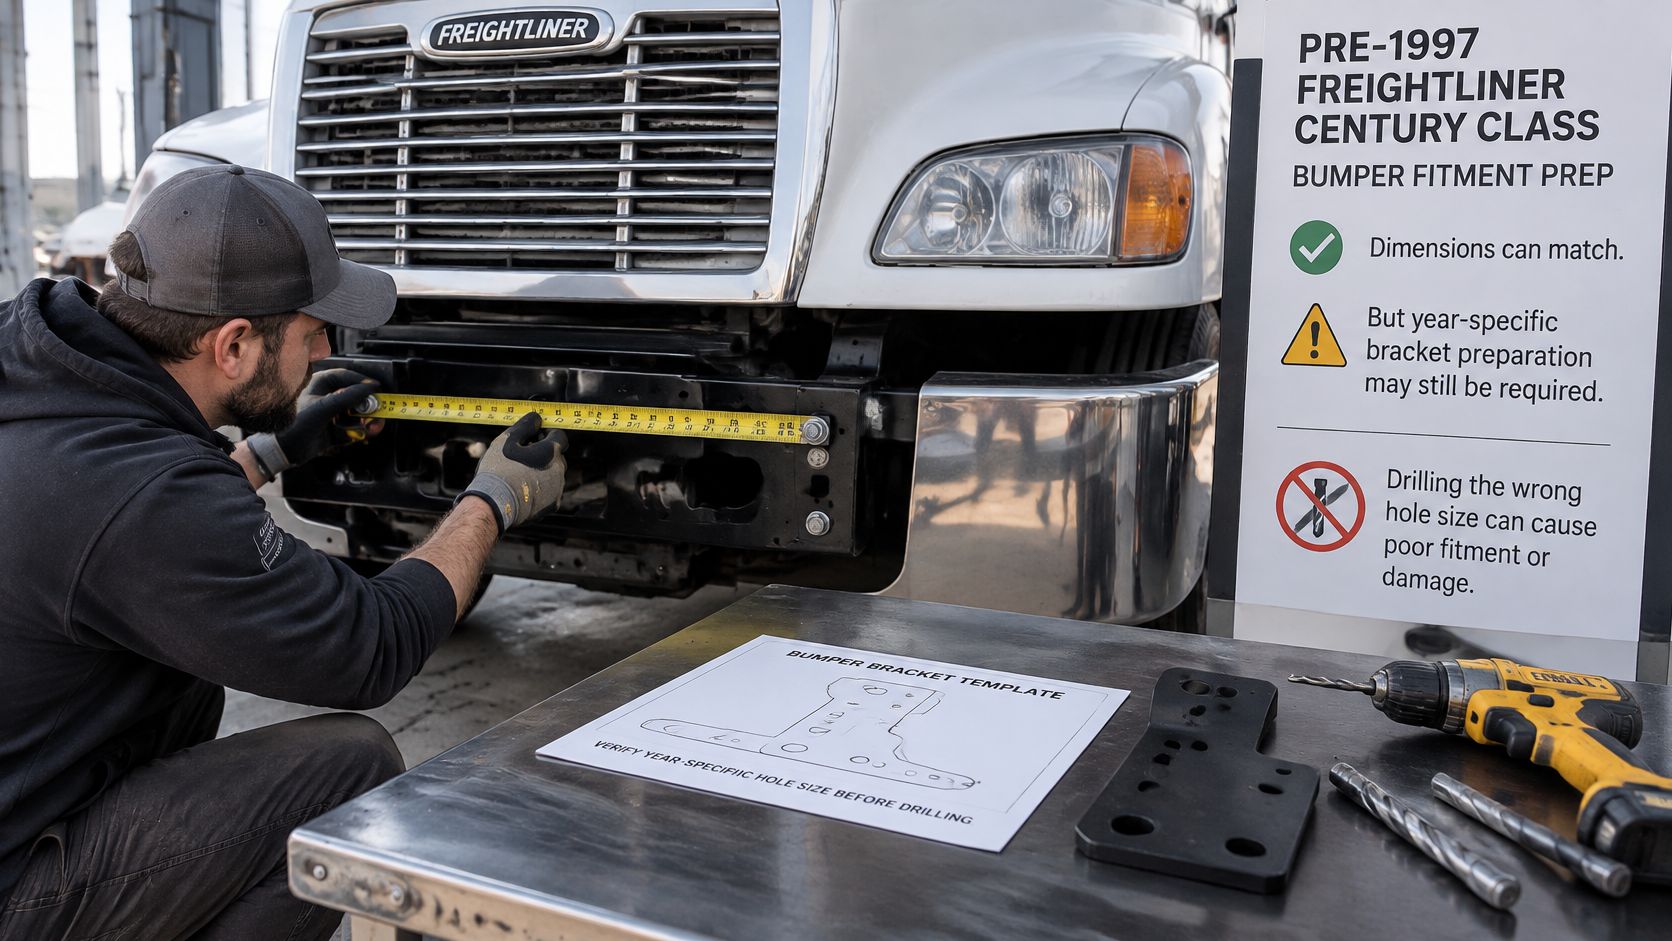
Decide on fabrication before final installation
Match the catalog assembly to the proposed bumper first. Then inspect the existing bracket geometry and compare the hole locations against the chassis. A previous owner may have already changed the mounting arrangement.
Use this sequence:
- Confirm the assembly: Check material, style, mounting drawing, and production-year notes.
- Inventory the hardware: Order required brackets and spacers with the bumper instead of assuming they'll be included.
- Mock-fit the parts: Support the bumper on a suitable stand and position it without forcing bolts through.
- Mark only after alignment: Confirm hood clearance, bumper position, and bracket seating before marking any permitted hole.
- Finish the work properly: Deburr drilled edges, protect exposed metal, and tighten hardware to the applicable installation specification.
A guide to bumper mounting brackets can help identify bracket functions, but the assembly instructions must control the actual fabrication.
Don't use the bolts to pull a misaligned bracket into place. Find out why it doesn't seat.
Drilling changes a mounting part. If the specified hole would land near a damaged edge, an existing elongated hole, or a cracked area, stop and have the mounting arrangement evaluated. Don't slot holes as a shortcut.
The final decision belongs before bolt-up: either the truck matches the documented preparation, or the shop needs a different bracket or bumper configuration.
Crate Size, Weight and Freight Handling
A Century-compatible listing does not guarantee that the crate will suit your receiving setup. Check the packed dimensions and weight tied to the specific listing, then confirm the carrier service and unloading arrangements before ordering.
Century bumper shipping figures
| Shipping figure | Reported value | What it affects |
|---|---|---|
| Crate length | About 98 inches | Dock access and freight handling |
| Fully crated size | 98 by 24 by 34 inches | Storage space and lift-gate needs |
| Shipping weight, steel chrome bumper | 150 pounds | LTL handling and lift-gate use |
| Alternate Century listing | 112 pounds; 98-inch length, 27-inch width, 33-inch height | Freight class and yard storage |
Source: Big Truck Hoods Century and Columbia listing. The alternate figures are reported for another Century application.
The Big Truck Hoods Century and Columbia listing reports a 98-by-24-by-34-inch crate weighing 150 pounds. Another Century application reports 112 pounds and dimensions of 98 by 27 by 33 inches. Treat these as listing-specific planning figures, not guaranteed dimensions for every replacement bumper.
Confirm the packed dimensions on your quote. Shipping weight includes the crate, so allow space for the full package rather than the bumper alone. Ask whether the freight quote includes an appointment, lift-gate service, or delivery to a commercial dock. The guide to LTL freight shipping explains these delivery arrangements.
Inspect before accepting delivery
- Walk around the crate. Check for crushed corners, punctures, shifted blocking, or exposed metal.
- Document visible damage. Photograph the packaging and any accessible damage to the bumper or brackets before signing.
- Notify the driver and seller. Describe specific damage on the delivery receipt and follow the carrier's claim procedure.
Record visible damage before the delivery is accepted. Keep the truck's repair schedule flexible until the bumper arrives and has been inspected. A crate that cannot be unloaded or a part that does not fit can add handling and return-freight costs, so confirm the end shape and openings against the truck before ordering.
Repair the End Cap or Replace the Whole Bumper
The Freightliner Century Class S/T driver information describes a three-piece aerodynamic bumper with a steel center section and damage-tolerant plastic end caps. That layout can keep a corner hit from turning into a full-assembly purchase.
Start behind the visible damage. A cracked cap may hide a bent support, while a scuffed cap may still have sound mounting points. Clean the area and inspect it before deciding what to order.
Repair decision by damage location
| Damage location | Repair action | Check before reuse |
|---|---|---|
| End cap | Order the end cap only when damage is isolated | Confirm the mounts behind it are straight |
| Mounting structure | Check brackets and holes before reusing anything | Replace any bent bracket |
| Steel center section | Order a complete assembly when center damage warrants it | Match finish and adjacent front-end trim |
A yard scrape that cracks a corner cap calls for a different repair than a highway collision that bends the center. In the yard-scrape case, the shop should check cap tabs, fasteners, and the support behind the corner. If those parts are sound, replacing the cap can avoid unnecessary removal work.
A displaced center section needs a broader inspection. Check frame ends, tow access, mounting faces, and nearby front-end parts before assuming a new bumper will solve the alignment problem.
Match the finish without hiding damage
The Century was offered with painted or chrome grille treatments, so choose a bumper finish that suits the surrounding trim. Inspect adjacent metal for corrosion rather than covering it with fresh cosmetic parts.
Use the bumper repair versus replacement guide to weigh repair scope, but don't let appearance decide whether a damaged mount is acceptable.
Repair priority: Choose the smallest repair that restores sound mounting and the correct bumper position.
A complete assembly isn't automatically necessary because the center has a scratch. It becomes the sensible choice when deformation, attachment damage, or unavailable service parts make a smaller repair unsuitable. Never reuse a bent bracket just to release the truck sooner.
What a Century Bumper Costs Over Its Life
A Century bumper's listed price is only one part of its cost. Fleet Truck Parts lists a 1996–2004 chrome-steel bumper at $1,272.69 in its 2026 listing, while Lynn Truck Parts lists a 1996–2003, 16-inch chrome-steel bumper with tow-pin and step holes at $1,400.00 in 2026. Those listings differ in year range and configuration, so compare the specified bumper features before treating the prices as like-for-like.
Listed Century bumper prices
| Seller | Model years | Bumper | Listed price |
|---|---|---|---|
| Fleet Truck Parts | 1996–2004 | Chrome-steel | $1,272.69 |
| Lynn Truck Parts | 1996–2003 | 16-inch chrome-steel, tow-pin and step holes | $1,400.00 |
Depth affects both the purchase decision and clearance. 4 State Trucks' Freightliner bumper guidance identifies common OEM-style depths of 16 or 20 inches, with custom bumpers extending 2–6 inches farther. Confirm the truck's clearance before choosing a deeper bumper.
Budget for the route
For downtime, add the lost contribution margin, substitute-truck expense, and rescheduling costs for the time the truck is out of service. A hypothetical week off the road can outweigh the $127.31 difference between the two listed prices. Use your actual daily figures and expected repair or installation time to calculate the break-even point.
Repair scope matters too. If a damaged component can be serviced while sound adjacent parts stay in place, compare that repair cost with the price and installation cost of a complete bumper. If mounting points have cracks, severe section loss, or elongated holes, get a qualified repair assessment before putting the truck back in service.
Autobody News' coverage of the CCC Crash Course report on collision repair discusses parts use in collision repairs. For fleet budgeting, the practical question is whether the chosen bumper configuration allows damaged components to be serviced without replacing sound adjacent parts.
Order Your Century Bumper With Confirmed Fitment
A “Century-compatible” listing is a starting point, not proof of fit. Give the parts counter the truck's year, axle setup, measurements, opening locations, and bracket photos. Specify the material and receiving-site details, then request written confirmation of the exact application before paying.
The chrome bumper for Freightliner Classic is listed for the Classic. Its fitment does not confirm compatibility with a Century, and its material or mounting choices should not be assumed to transfer.
Put the order details in writing
Before authorizing the purchase, request:
- Fit confirmation: Exact truck application, mounting arrangement, and required preparation.
- Material specification: Steel grade, gauge or thickness, and finish.
- Included parts: Brackets, spacers, hardware, and configured cutouts.
- Warranty terms: Coverage for manufacturing defects and how to report a problem.
- Shipping details: Whether the bumper is in stock or made to order, expected shipping lead time, and any receiving requirements for LTL freight.
Galhor's in-stock stainless steel 430 and 304 flat bumpers can ship within 48 hours. Made-to-order carbon steel units typically ship in 4–6 weeks. Confirm which lead time applies to the selected bumper before placing the order.
Settle the fit and delivery details first. The shop then has a defined installation plan and knows what to expect when the freight arrives.
Galhor Inc. offers chrome bumpers for Freightliner, Peterbilt, Kenworth, and Volvo trucks. Visit Galhor Inc. with your Century's year, axle setup, measurements, and bracket photos to request written fitment confirmation and shipping details. Once the application is confirmed, order the bumper specified for your truck.