
How to Remove Oxidation from Stainless Steel Safely
November 13, 2026 · Francisco Hornelas

You pull in after a long winter run and the stainless bumper on your truck has gone orange along the bottom edge. Not a faint haze either. A tea-colored stain that creeps up around the bracket bolts and the tow hook cutouts, right where the salt spray lands hardest.
Most drivers grab steel wool, a scuff pad, or whatever wheel cleaner is already on the shelf. That's the moment a cosmetic problem turns into pitted metal. Learning how to remove oxidation from stainless steel starts with one skill that has nothing to do with cleaners: telling a stain that sits on the surface apart from damage that has already eaten into it.
Get that call right and the rest is a short routine. Get it wrong and you'll polish the same bumper every spring until you replace it.
Table of Contents
- Tell Surface Stains from Pitting Damage
- Remove Light Oxidation in Five Steps
- Match the Cleaner and Avoid Damage
- Stop Oxidation from Coming Back
- Decide Between Polishing and Replacing Your Bumper
Tell Surface Stains from Pitting Damage
Run a fingernail across the spot before anything comes out of the cabinet. If the metal feels smooth and the brown lifts under your nail, the stain is sitting on top of the surface. If the nail catches in a small crater, or the color sits down inside a cavity, the metal is already gone. No cleaner brings that back.
Stainless doesn't resist rust by being rust-proof. The Ryerson stainless steel guide explains that the metal resists corrosion because chromium forms a thin protective oxide film on the surface. Stainless steel has to contain at least 10.5 percent chromium, and common 304 runs about 18 percent chromium and 8 percent nickel. That means a light orange bloom on a 304 bumper is usually contamination on the passive film, not proof that the whole bumper has failed.
The ASTM A380 stainless steel cleaning standard draws the same line. Oxidation is either removable surface contamination or damage to the alloy's protective passive film, and the two get completely different answers. Brown discoloration can be iron you can wash away. Pits, etching, or a roughened surface are corrosion damage, and scrubbing only wastes an afternoon.
Read the Symptom, Not the Color
| Symptom | Likely Cause | Next Step |
|---|---|---|
| Light orange or brown haze that wipes off | Surface film or road grime | Degrease, clean with a citric or phosphoric cleaner, rinse and dry |
| Tea-colored stain that stays after cleaning | Embedded free iron | Acid treatment, recheck after rinsing, then a professional if it persists |
| Pits, etched spots or rough patches | Chloride corrosion damage | Refinish or replace; cleaning cannot reverse it |
| Scratches in the mirror polish | Abrasive contact | Mechanical polish or replacement |
| Peeled or darkened chrome | Plating loss | Replacement; cleaning will not restore the plating |
Quick check: if the stain lifts under a fingernail but comes back a week later, the problem is on the surface. If it never moves at all, the problem is in the metal.
Picture a Kenworth working the Gulf coast, where salt air and brackish spray hit the front end every day. The bumper shows dull orange blotches plus dark pits clustered around the frame bracket. That's two problems in one part. The blotches will clean. The pits need refinishing or a new bumper, and no acid on the shelf changes the metal that's already missing.
If you're weighing materials, this breakdown of stainless 304 steel covers what the grade delivers on a Class 8 bumper before you spend a dollar on product.
Remove Light Oxidation in Five Steps
A winter of salted roads leaves an orange haze along the bottom of a stainless bumper and around the tow hook cutouts. It wipes off, then comes back. That's the light-to-moderate case, and it's the one you can handle in the yard with a hose, a pad, and the right bottle.
Here's the whole sequence in one view.
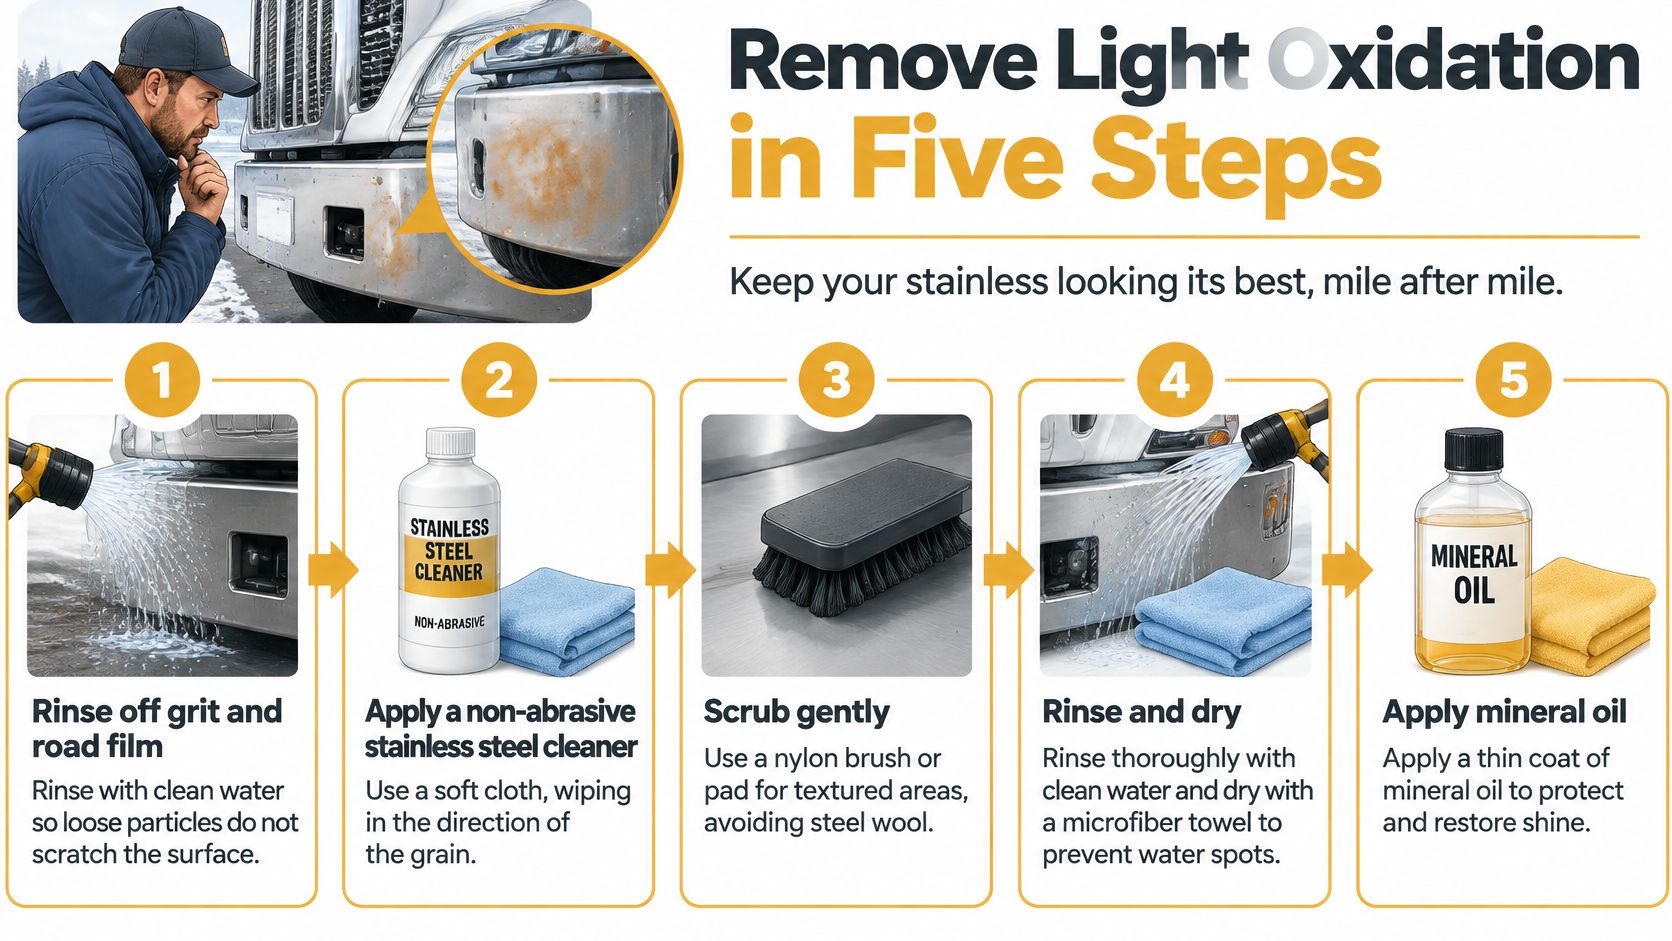
A Five-Step Routine for How to Remove Oxidation From Stainless Steel
- Rinse the grit off first. Loose sand and dried road salt turn into sandpaper the second you start scrubbing, so flush the panel with clean water before you touch it.
- Degrease with a neutral detergent and warm water. Diesel film, polish residue, and road grime all block the acid from reaching the stain. Rinse the detergent off before the next step.
- Apply a stainless-safe citric or phosphoric acid cleaner with a soft nylon pad. Work along the polish lines, not across them. Keep the pressure light and let the chemistry do the cutting.
- Rinse immediately with clean water. Leftover acid keeps working after you walk away, and residue trapped under the film undermines the passive layer you're trying to rebuild.
- Dry it completely with a clean microfiber cloth. Bolt holes, seams, and bracket edges hold water longest, and that's exactly where the next round of staining starts.
Dwell time comes off the product label, never off a guess, and the surface should be cool to the touch. Test an inconspicuous spot first, and keep cleaner off painted, aluminum, rubber, and chrome-plated parts. The World Stainless cleaning guide rates phosphoric-acid cleaners as suitable for moderate rust staining when you give them enough contact time, and it warns that abrasive cleaning pastes scratch the passive surface you're trying to protect.
Dwell time comes off the label. A cleaner left on too long etches the surface as surely as an acid that's too strong.
The Water-Break Check
After the final rinse, watch how the water leaves the panel. A clean surface sheets off in one continuous film. If the water beads up into droplets, oils or residue are still on the metal, so run another degrease pass and rinse again.
If staining survives all five steps, stop treating it as dirt. Treat it as embedded free iron and move to the professional end of the process.
Watching someone work the pad along the grain is faster than reading about it. This runs through the same motions on a bumper.
Match the Cleaner and Avoid Damage
Every product below has a job. Trouble starts when a stronger product gets aimed at a stain a mild one would have lifted in ten minutes.
| Cleaner | Best For | Use On | Avoid |
|---|---|---|---|
| Neutral detergent and warm water | Road film, grime, light haze | Any polished or brushed stainless | Nothing beyond normal wash-off |
| Citric-acid stainless cleaner (4 to 10 percent) | Light oxidation and light iron staining | Mirror and brushed finishes, after degreasing | Dwell time longer than the label allows |
| Phosphoric-acid cleaner | Moderate rust staining | Stainless only, used with a soft nylon pad | Painted, aluminum, rubber and chrome-plated parts |
| Professional nitric-acid cleaning | Embedded free iron that stays after acid cleaning | Qualified shop with ventilation and trained staff | Roadside or driveway use |
| Bleach, hydrochloric or muriatic acid, chloride cleaners | No safe use on stainless bumpers | Never | All stainless parts, because they cause pitting |
Where Each One Stops Working
Citric-acid products sit in the 4 to 10 percent concentration range that the ASTM A967 passivation standard covers for both citric and nitric processes. That standard pairs concentration with tight time and temperature windows: 4 minutes at 60 to 71°C, 10 minutes at 49 to 60°C, or 20 minutes at 21 to 49°C. Concentration alone never sets the result, and going stronger than the label is not an upgrade.
Neutral detergent handles the first pass on any finish: road film, fingerprints, and the film that builds up behind the front wheels. It won't touch iron staining, and it isn't supposed to.
Phosphoric acid earns its place on moderate rust staining, but it's a stainless-only product. Mask or rinse the surrounding painted, aluminum, and chrome-plated parts before you open the bottle, because those surfaces lose their finish fast.
Nitric-acid cleaning is the answer for embedded free iron that survives everything above, and it belongs in a qualified shop with engineered ventilation and trained staff. Skip anything that pairs nitric with hydrofluoric acid. HF causes severe systemic injury, needs compatible tanks, emergency controls, and regulated waste handling, and it has no place in a truck bay or a driveway.
Chloride products are the one category with no correct use. The British Stainless Steel Association care guide warns specifically against hypochlorite bleach and hydrochloric-acid cleaners, because they cause staining and pitting instead of removing oxidation, and chloride damage turns into localized pitting that goes deeper than any surface haze.
Tools That Make It Worse
- Carbon-steel wire brushes: they shed iron into the surface, and that iron rusts back through within weeks.
- Steel wool: same transfer problem, plus fine scratches that trap road salt.
- Abrasive polishing pastes: they cut the passive layer and leave the grain uneven.
- A grinding wheel on a stain: it removes the polished finish and opens fresh metal to contamination.
Rule of thumb: start with the mildest product that could work, and step up one level only after the stain survives a full rinse and dry.
Two habits keep you out of trouble. If a label mentions chloride or hydrochloric acid, it doesn't go near a bumper. If a brush or pad has touched carbon steel, it stays out of the stainless work area for good.
A tea-colored streak running up from a bumper bracket after a salted highway run is the textbook citric-acid case. Degrease, work the citric cleaner in with a nylon pad, rinse, dry, and check it. Steel wool on that same streak just drives iron deeper and guarantees you'll see it again.
Stop Oxidation from Coming Back
Getting the stain off is the easy half. Keeping it off comes down to what's still sitting in the seams and what lands on the panel next week.
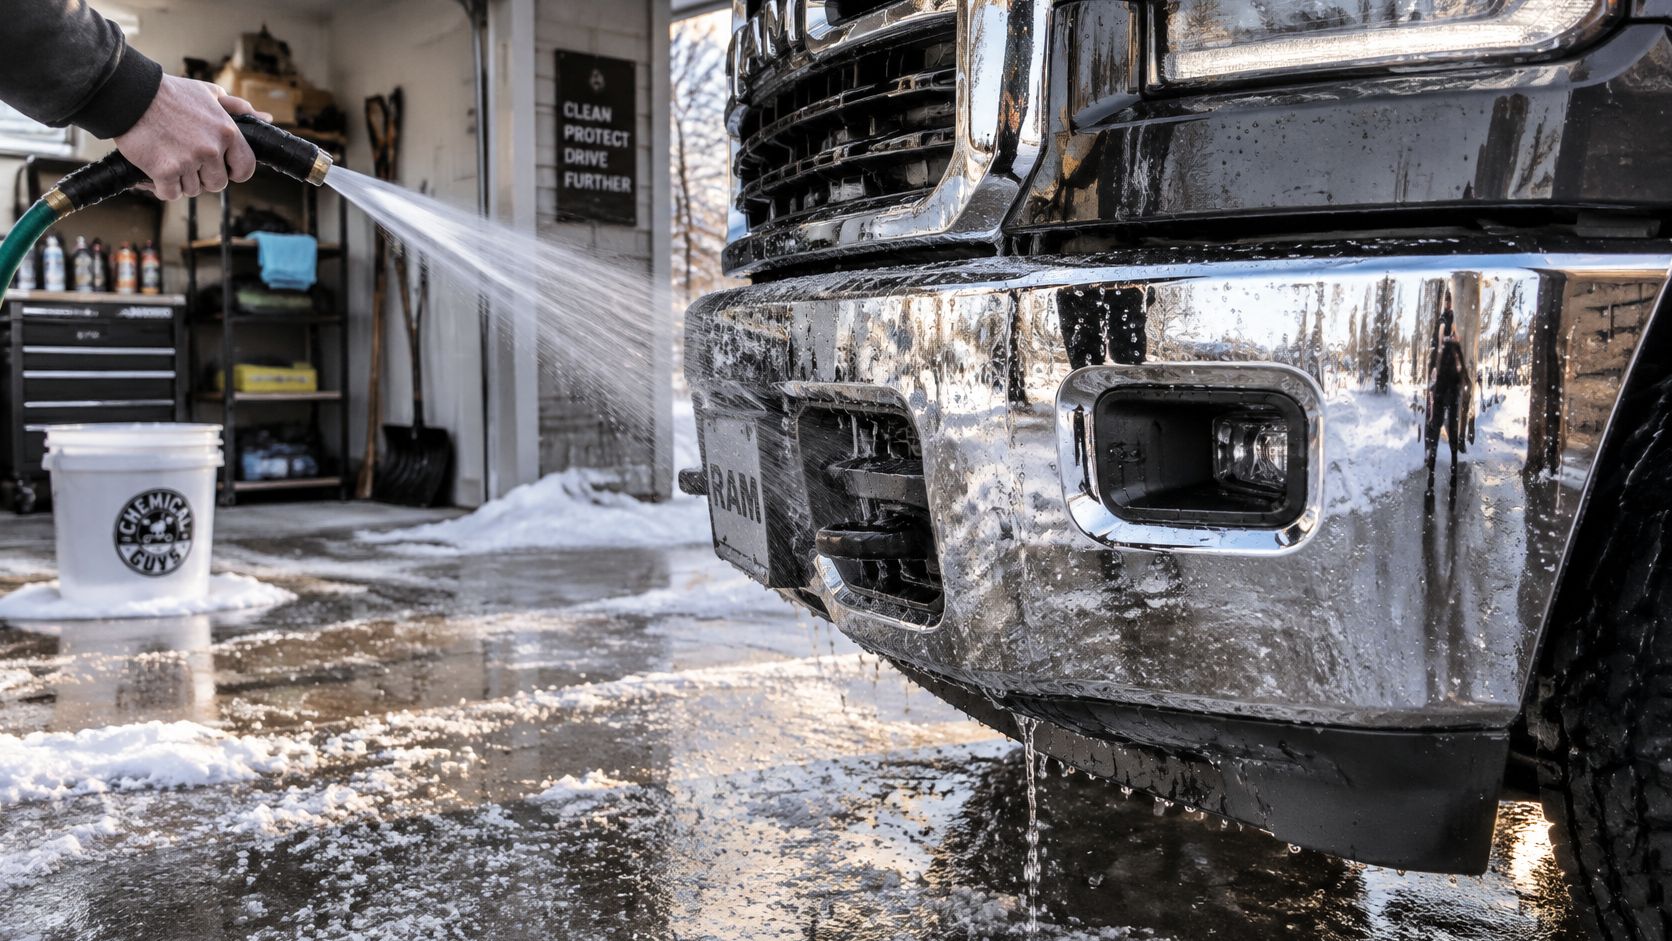
Rinsing is the cheapest tool in the whole routine.
The Habits That Hold
- Fresh-water rinse after every salted run. Chloride deposits sit in seams and bracket joints, and they keep working long after the road dries.
- A monthly wash in coastal or de-icing country. Salt air and brine spray build up faster than most drivers expect.
- Separate tool bins. Pads and brushes that touch stainless never touch carbon steel, and the reverse.
- Grinding stays away from the bumper. Grinding dust carries free iron and settles on everything nearby.
- Spot-check the joints. Bolt holes, seams, and bracket edges hold residue longer than any flat panel.
The ASTM A380 cleaning standard lists free iron, oxide scale, metal chips, soil, and other deposits as contaminants that impair stainless steel's corrosion resistance. The BSSA goes a step further and says acid treatment beats a single abrasive pass for contamination staining, because wire brushing and abrasive pads can spread iron rather than remove it.
That's the part most cleaning advice skips. You scrub the mark away, leave iron behind, and the rust returns on schedule.
Say a maintenance crew cleans a batch of bumpers in the same bay where they've been grinding steel all week. Every bumper looks right on Friday. Three weeks later the rust is back along the top edge. It stops when the grinder moves to the other side of the shop and a final fresh-water rinse goes into the routine.
Log the condition of each bumper at every service. A photo and a one-line note show you when a spot stops responding to cleaning, which is your signal to move from maintenance to replacement. This guide to truck rust prevention covers the seasonal side of that schedule.
Decide Between Polishing and Replacing Your Bumper
Set your stop rules before you buy another bottle of cleaner.
- Stains return within days of treatment. That's iron still in the surface or a contaminated work area, not weak product.
- Pits or plating loss are visible. Missing metal and lifted chrome don't come back with acid.
- A professional acid treatment fails to clear the iron. If a qualified shop can't passivate it, the part is done.
Pick the Grade by Route
For winter salt routes and coastal work, 304 is the right call. The higher nickel content builds a stronger passive film against chlorides, and it costs more for a reason.
For mild-climate units that rarely see brine, 430 is a solid mid-tier choice: no nickel, less corrosion resistance, and more upkeep if the truck does see salted roads. Carbon steel sits at the bottom on corrosion resistance and needs the most attention of the three.
In our own lineup, the 304 tier is the chrome-plated top of the line with a 5-year warranty, and it carries the higher nickel content, heavier gauge steel, and deeper chrome saturation that coastal rigs and salted routes need.
A better grade doesn't remove the need to rinse road salt off. It just gives the metal more margin between washes.
Grade buys margin. Rinsing buys time. You need both, and neither one replaces the other.
Three next steps, in order. Run the fingernail test on the bumper today. Clean it with the mildest product from the table that matches the stain. If the metal is pitted or the plating is lifting, work through bumper repair vs replacement and compare grade and fitment for your exact truck model before you order anything.
Galhor Inc. builds chrome bumpers for Class 8 trucks out of Magnolia, Texas, with 304 and 430 stainless options that hold up to salt, brine, and long hauls. If your current bumper is past cleaning, you can spec brand, model, year, style, cutouts, and finish in the online configurator, and in-stock stainless 430 and 304 flat bumpers ship within 48 hours. Visit Galhor Inc. to match the right grade and fitment to your truck and get back on the road.