
Peterbilt 389 Front Bumper Guide: Fit, Materials and Price
October 25, 2026 · Francisco Hornelas

Your bumper is bent, the chrome is peeling, or the replacement you're considering looks right but leaves you unsure about the mounts. Before ordering a Peterbilt 389 front bumper, check more than the face and price. The wrong brackets, missing tow-hook openings, or poor lamp placement can turn a quick replacement into another shop visit.
Choose for fit, road conditions, and total installed cost first. Then choose the finish. A bumper should give your truck a professional front end without creating clearance problems, extra maintenance, or avoidable downtime.
Table of Contents
- Peterbilt 389 Front Bumper Fit Check Before You Buy
- Peterbilt 389 Bumper Styles, Mounts and Cutouts
- Stainless 304, Stainless 430 or Chrome Steel Compared
- How to Install a Direct Bolt-On Peterbilt 389 Bumper
- Lighting, Frame and Federal Compliance Limits
- Lowest Price Versus Lowest Long-Term Cost
- Order Your Peterbilt 389 Bumper and Confirm Fit
- Peterbilt 389 Front Bumper FAQs
Peterbilt 389 Front Bumper Fit Check Before You Buy
A Peterbilt 389 front bumper is a model-specific part. A bumper that looks right can still sit wrong.
Start with the truck's identity. Peterbilt introduced the 389 in 2006 as the successor to the 379 and ended production at the close of 2023. The company reported more than 100,000 trucks built, with the milestone truck completed in Denton, Texas, on September 7, 2023. Its replacement, the 589, entered production in January 2024, according to Peterbilt's Model 389 production history.
That history matters when a seller groups several models together. Match the listing to the truck, not just the familiar long-hood shape.
Measure From Fixed Chassis Points
Use the frame as your reference, not a bent bumper edge. Record the axle-to-frame and bumper-to-frame relationship before removing anything.
The following chassis dimensions come from Peterbilt's engineering reference material. The axle-rating row uses Peterbilt's published 389X specifications, while the production row follows the model history cited above.
Peterbilt 389 fit-check reference values
| Measurement | Peterbilt 389 (389-131) | Peterbilt 386 |
|---|---|---|
| Front axle to front of frame | 19.6 in | 35.6 in |
| Front of bumper to front of frame | 11.4 in | Unconfirmed, check Peterbilt's manual |
| Reference bumper thickness | 0.25 in | Not established |
| Front axle rating range | 12,000–22,800 lb, published for 389X | Not established |
| Production years | 2006–2023 | Not established |
These are reference values, not a promise that every truck has untouched factory geometry. Prior repairs, different brackets, and custom equipment still need inspection.
The chassis comparison also shows why another Peterbilt bumper isn't automatically interchangeable. Similar styling can hide differences of several inches in the frame relationship.
Check the Actual Equipment
A higher-rated front axle may come with different springs, brackets, or equipment. Don't assume that the bumper mount and steering clearance match another truck carrying the same hood badge.
Some market listings cover both the 388 and 389. Treat that as a starting point, not final fit approval. Send the seller photos and measurements if the truck has collision repairs or custom front-end work.
Before buying, answer these questions from the registration, build sheet, and truck:
- Model year: Does the listed application match your truck?
- Front axle rating: Does the supplier accept that axle and chassis configuration?
- Factory bumper package: Do the mounts, lamps, and tow-hook provisions match?
Peterbilt 389 Bumper Styles, Mounts and Cutouts
A bumper with the wrong cutouts is like a boot in the wrong size. It looks close and causes trouble every day.
Choose the mounting arrangement, lamp openings, tow-hook access, and finish as separate decisions. Don't let a clean product photo make those choices for you.
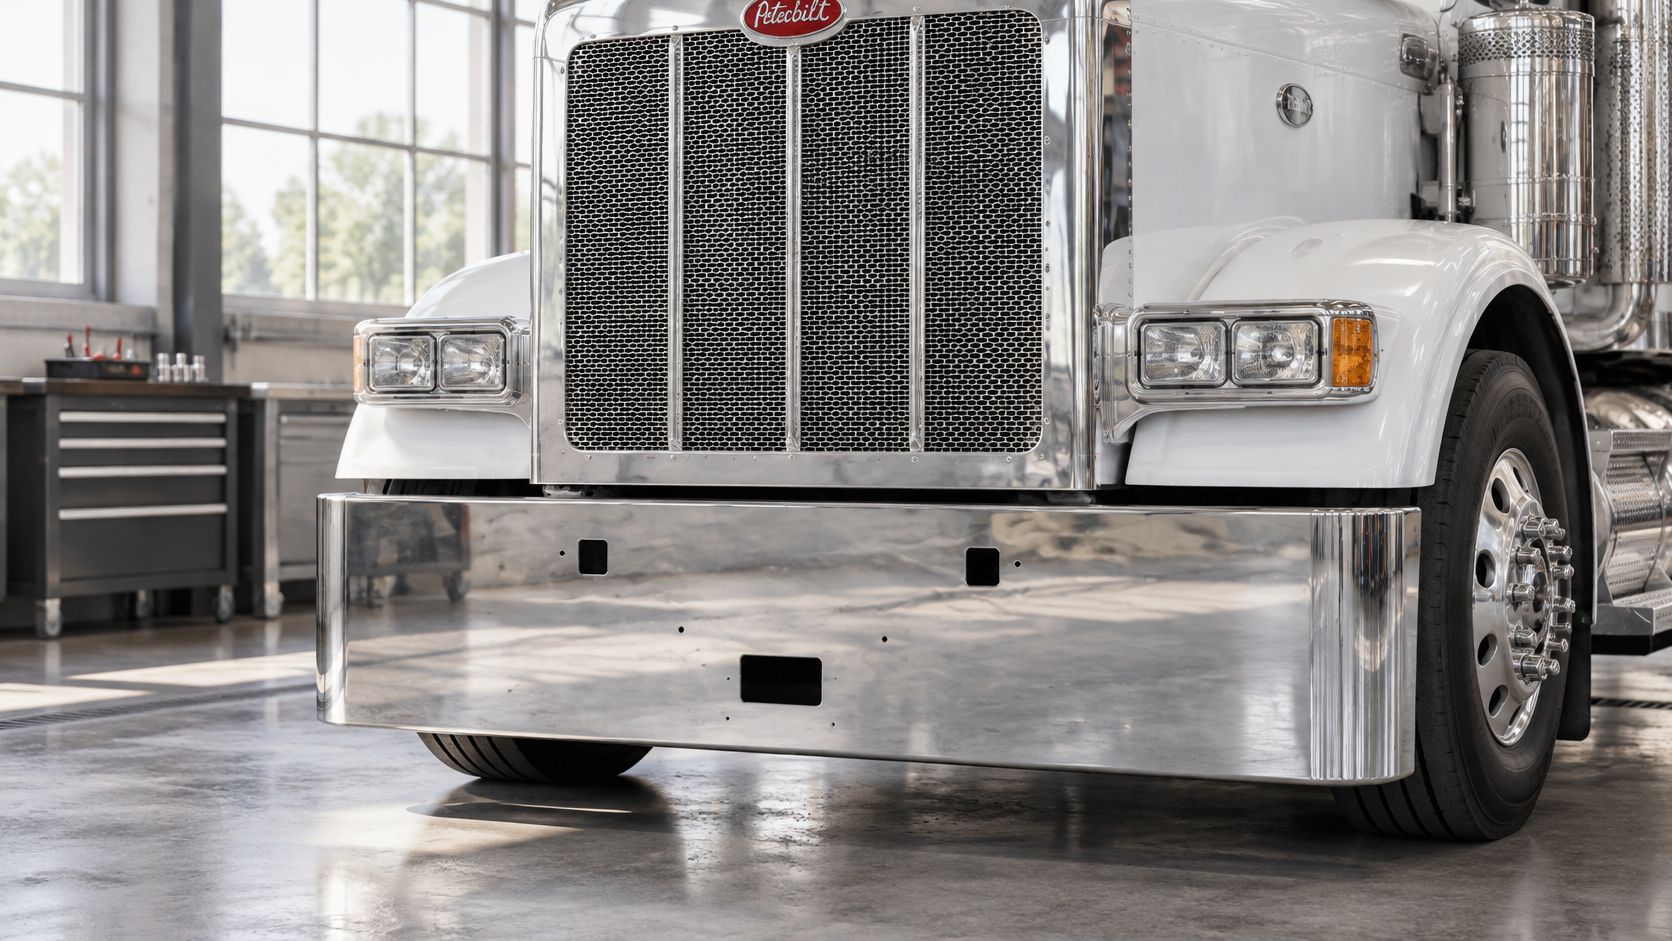
This close-up shows the broad chrome face that makes layout and alignment so visible.
Bumper options and the trucks they suit
| Option | What It Changes | Choose It When |
|---|---|---|
| Standard mount | Bolts to the specified factory mounting points with visible hardware | You want a traditional look and simple fastener access |
| Blind mount | Hides fasteners behind the bumper face | You want a cleaner front end |
| Light cutouts | Provides openings for lamps and marker lights | Your truck runs fog lamps or auxiliary lights |
| Tow-hook cutouts | Provides single or dual openings, depending on configuration | You need front recovery access |
For a regional fleet truck, retaining the existing lamp layout can keep the job simple. For an owner-operator adding fog lamps, the order needs to account for the lamp body and mounting space, not just the visible lens. A vocational truck needs usable recovery access, not openings that merely line up in a photograph.
Pick Access Before Appearance
Standard mounts make the hardware visible and accessible. Blind mounts hide it, so check how you'll reach the fasteners during installation and later inspections. The bumper mounting bracket guide is useful when comparing those arrangements.
The Chrome bumper for Peterbilt 388 / 389 / 589 is listed with standard and blind mounts as direct bolt-on options, with no drilling or cutting required for the specified application. That shared listing doesn't remove the need to verify your truck.
Ordering rule: Write down the light and tow-hook layout first. Pick the bumper style afterward.
For a drop bumper, also check the route and operating environment. A low front end that suits a show truck may not suit uneven yards or steep entrances.
Stainless 304, Stainless 430 or Chrome Steel Compared
The base metal matters as much as the shine. Chrome describes the surface treatment, not the material underneath it.
Use the material comparison as a starting point, then ask for the exact build specification on the bumper you're ordering.
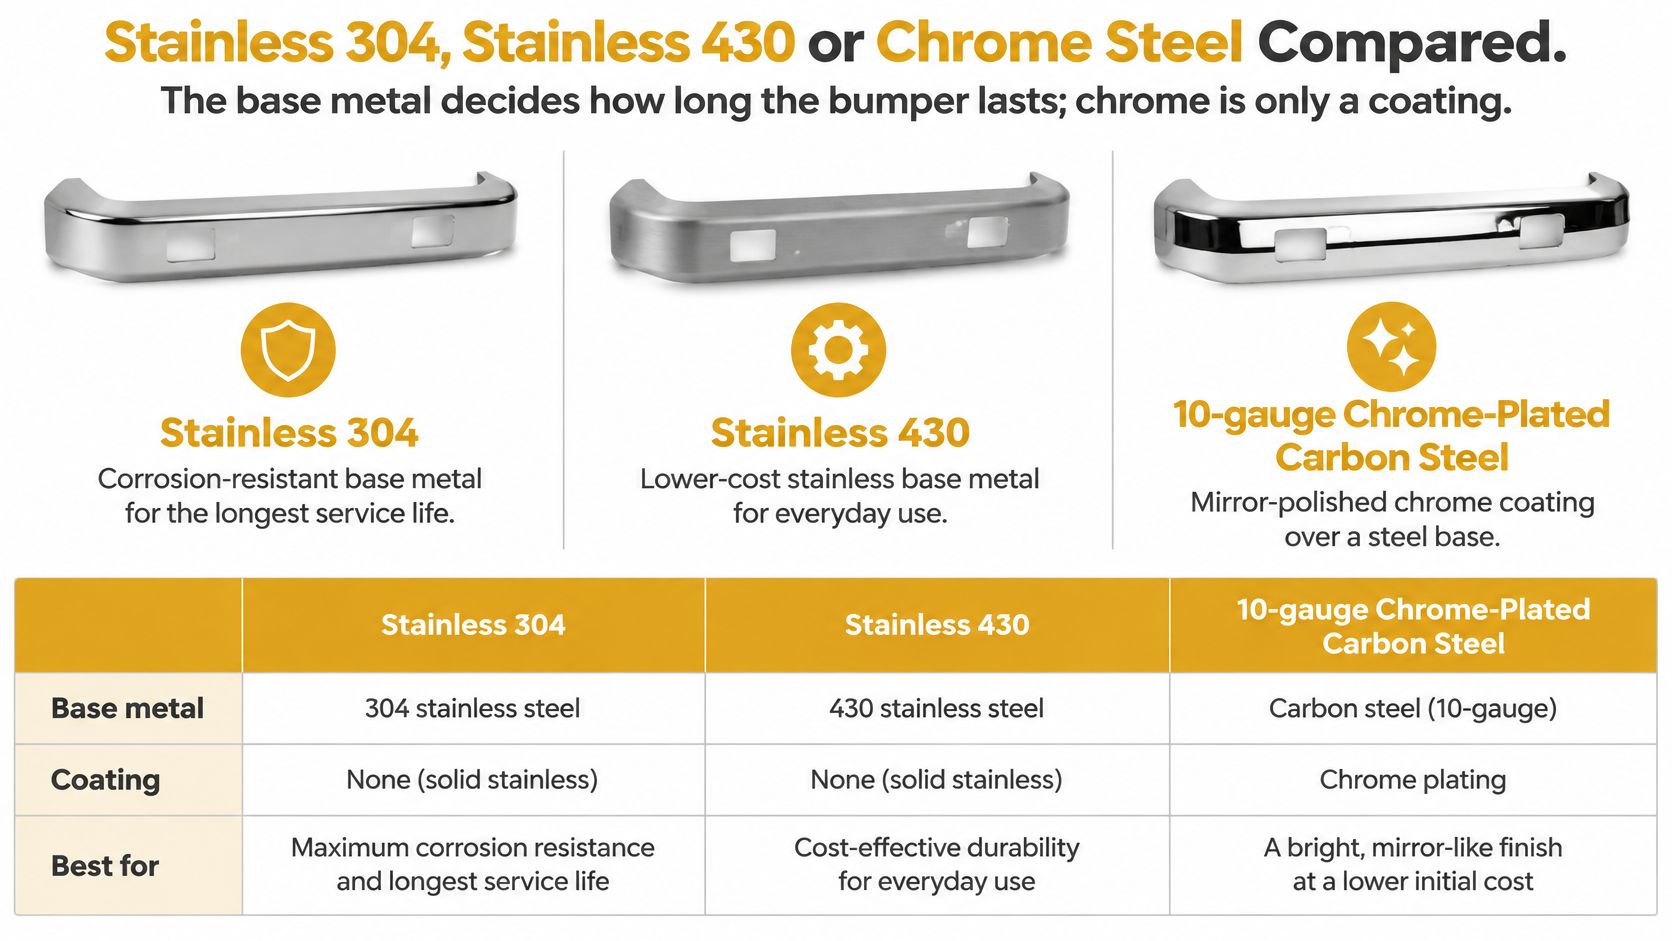
Match the Metal to the Route
For salt-belt work, give corrosion resistance more weight in the decision. For dry routes, compare the stainless upgrade against your actual cleaning and replacement costs. The 430 versus 304 stainless steel comparison provides background for that choice.
Carbon steel relies on the condition of its protective finish. Stainless offers a different base material, but it isn't permission to ignore damaged edges, trapped road grime, or poorly fitted brackets. Neither material can correct a distorted mounting surface.
The catalog item linked above specifies the following material thicknesses and finish. Shipping windows below reflect the publisher's stated order policy, not guaranteed arrival dates.
Material, build and ship time compared
| Material | Build | Finish | Ship Time |
|---|---|---|---|
| Chrome-plated carbon steel | 10-gauge steel | Triple-layer chrome, 35 microns of nickel, mirror polish | Typically 4–6 weeks, made to order |
| Chrome-plated stainless 430 | 3 mm stainless | Triple-layer chrome, 35 microns of nickel, mirror polish | In-stock flat bumpers can ship within 48 hours |
| Chrome-plated stainless 304 | 3 mm stainless | Triple-layer chrome, 35 microns of nickel, mirror polish | In-stock flat bumpers can ship within 48 hours |
The catalog identifies the coating as a hexavalent triple-layer chrome process. Confirm that the selected build carries the stated finish before approving a custom order.
A bumper is only as tough as the metal under its chrome.
Weight belongs in this comparison too. 4 State Trucks' bumper weight guidance lists typical stock units at 80–100 pounds and aftermarket chrome-steel units at 120–180 pounds. Ask for the selected bumper's actual weight rather than treating those ranges as a product specification.
Inspect the Delivered Finish
Inspect the part before scheduling the truck into the bay:
- Reflection: Look for an even finish without dull patches.
- Surface: Check for pitting, bubbling, and visible damage.
- Welds: Inspect seams for rough finishing or obvious defects.
- Edges and holes: Check for burrs, damaged coating, and distorted openings.
Don't accept a finish defect just because the bumper will fit. Photograph concerns while the part is still off the truck.
For a closer view of the bumper presentation, watch the video below.
How to Install a Direct Bolt-On Peterbilt 389 Bumper
Direct bolt-on describes the intended attachment, not permission to skip inspection. Stop if the holes won't align without forcing the bumper or altering the frame.
Keep the fit sheet beside the truck throughout the job.
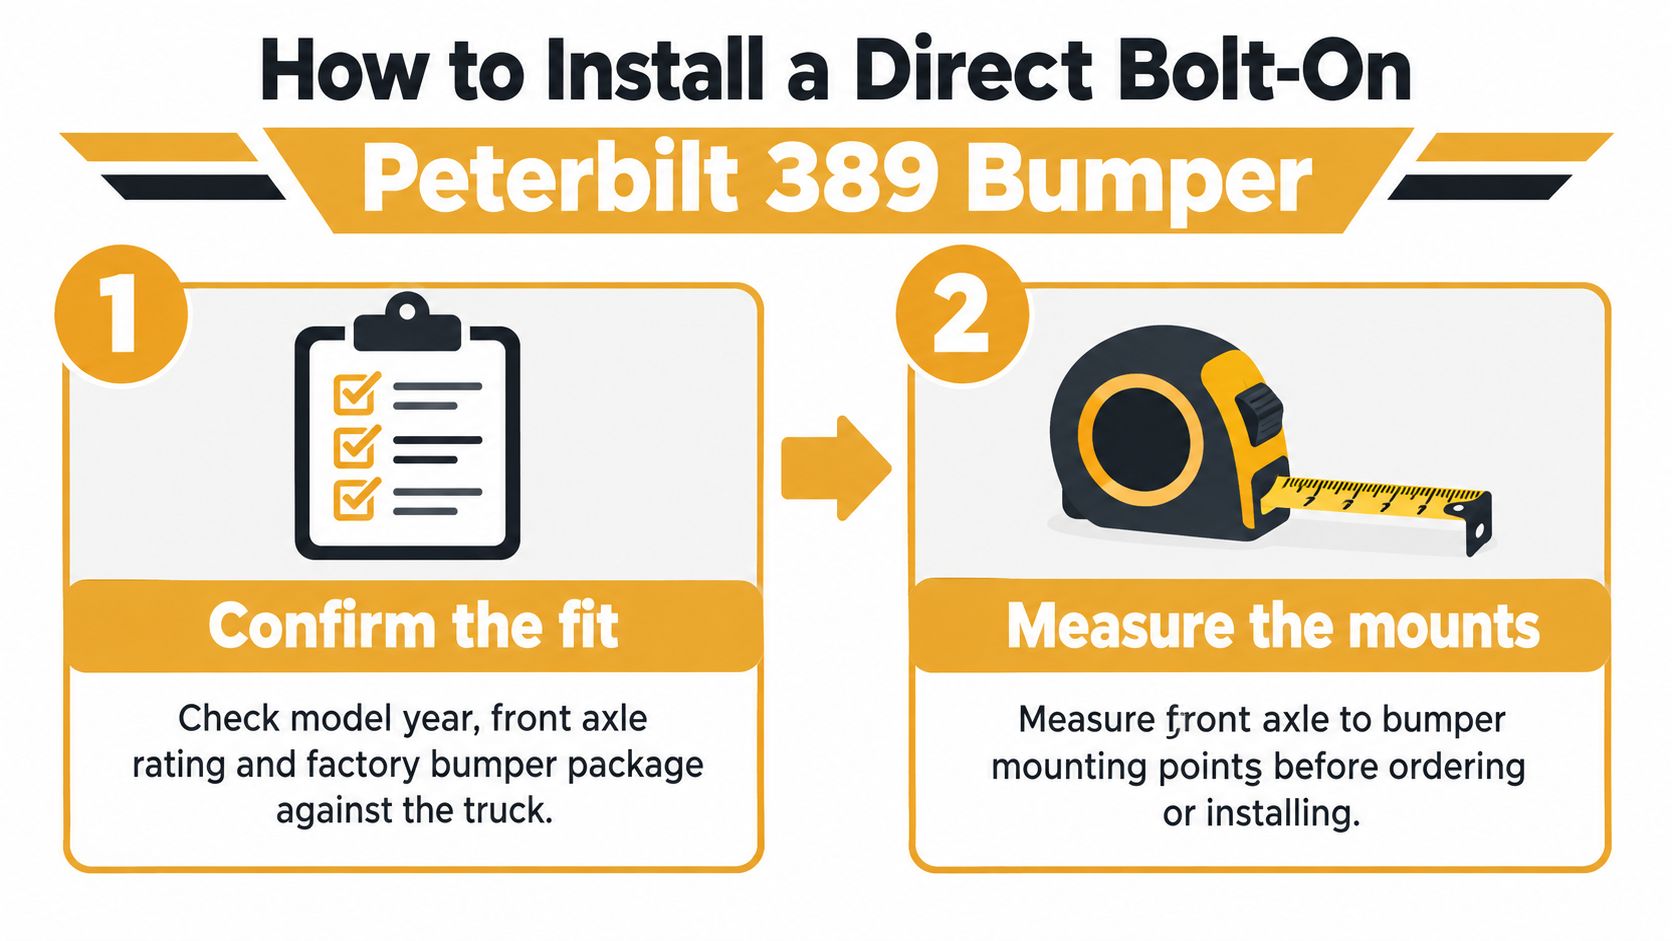
Follow the Truck and Bumper Instructions
- Confirm the application. Match the model year, front axle rating, and factory bumper package to the order. Resolve any mismatch before removing the existing bumper.
- Measure the reference geometry. Compare your measurements with the fit-check table and the supplier's drawing. Peterbilt's Heavy Duty Body Builder Manual treats its bumper dimensions as reference values, so the truck's actual configuration still controls.
- Support and remove the old bumper. Park on a firm, level surface, secure the truck, and disconnect bumper wiring before removal. Use suitable lifting equipment and retain the old brackets for comparison, not automatic reuse.
- Inspect the exposed mounts. Check for cracks, bends, corrosion, and evidence of earlier impact repairs. If the mounting surfaces aren't sound and straight, have the damage assessed before hanging the new part.
- Trial-fit the replacement. Support its weight while aligning the brackets and checking the grille, hood, and recovery openings. Have a qualified technician verify tire, steering, and suspension clearance through the required operating range.
- Install the specified hardware. Follow the truck and bumper manufacturers' fastener, torque, and assembly instructions. Don't use an impact wrench setting as proof that final torque is correct.
- Reconnect and test the lamps. Check every lamp and marker, then inspect wiring clearance and protection. A working lamp isn't enough if its housing or harness rubs against the bumper.
- Schedule the follow-up inspection. Use the manufacturer's stated recheck interval for fasteners and alignment. Record the inspection rather than relying on the driver to notice a rattle.
Stop When Fit Requires Force
A direct replacement should not need improvised holes, bent brackets, or a stack of washers to make the face look level. Those workarounds can hide the actual problem.
Check clearance with the hood moving, not just latched. Incorrect setback or standoff can leave a bumper looking straight while allowing contact during normal truck movement.
Shop check: Keep the old mounting parts until the replacement passes its fit inspection.
Photograph the completed installation and retain the part identification, hardware details, and torque instructions with the work order.
Lighting, Frame and Federal Compliance Limits
A heavier, shinier bumper is not automatically safer. Incorrect standoff, altered frame attachments, and blocked lamps can create risk even when the front end looks factory-correct.
NHTSA identifies FMVSS No. 108, codified at 49 CFR 571.108, as the governing federal lighting standard. Its interpretation on heavy-truck lighting and added equipment explains that added equipment must not impair required lighting, including applicable markers and reflectors.
Extra Lights Still Have Limits
Fog lamps, illuminated trim, and auxiliary light bars need more than a convenient opening. Check their placement against required lamps and reflectors, and inspect for glare at night.
NHTSA's interpretation on supplemental lighting explains that additional lighting may be allowed when it doesn't impair required equipment. Owner-installed lighting remains subject to state laws where the truck is registered or operated, while dealers and repair businesses may not render original lamps or reflectors wholly or partly inoperative.
Don't assume that a supplied light opening proves the finished installation is compliant. Lamp selection, position, wiring, and nearby trim all need review.
Protect the Frame and Keep Evidence
Peterbilt's body-builder guidance on frame modifications and safety standards warns against drilling upper or lower frame-rail flanges because damage can cause premature rail failure and an accident. Its guidance also requires modifications to preserve applicable federal safety standards.
A replacement on existing approved mounts differs from a job involving fabrication or changed equipment. When the work goes beyond direct replacement, have the responsible shop determine which certification and inspection obligations apply. The bumper safety standards guide offers additional background.
Before returning the truck to service, document:
- Night visibility: Required lamps remain visible and added lights don't create unacceptable glare.
- Wiring: Harnesses are secured and protected from road damage.
- Reflectors: Required reflective devices remain exposed.
- Clearance: No unintended contact exists with the frame or moving components.
- Records: Keep dated photos, part details, and the installation work order.
This is a compliance overview, not legal advice. Use the applicable vehicle instructions and operating-state requirements for the actual truck.
Lowest Price Versus Lowest Long-Term Cost
The lowest sticker price isn't always the lowest installed cost. Compare the complete configuration and the expense of keeping it on the road.
The following are published 2026 listings, not price guarantees. Southwest Truck Parts' bumper listing identifies its construction and tow-hook layout; JW Auto Service's Peterbilt listing identifies its compatible models and regular price.
Published 2026 listings for Peterbilt 388/389 bumpers
| Source | Product | Listed Price | Delivery Terms |
|---|---|---|---|
| Southwest Truck Parts | 20-inch chrome front bumper, 7-gauge steel, dual tow-hook cutouts | $1,004.61 | Confirm with seller |
| JW Auto Service | Chrome front bumper for Peterbilt 388/389 | $455 regular price | Confirm with seller |
| Galhor | Configurable chrome bumper, carbon steel or stainless | Set in configurator | LTL freight delivery, confirm order terms |
These aren't automatically like-for-like parts. A listing price alone doesn't establish matching dimensions, bracket inclusion, finish, freight, or lamp provisions.
Build a Cost Sheet From Your Own Records
For each option, add up the costs your shop will really pay:
- Delivered cost: Bumper, freight, and any required accessories.
- Installation: Labor, hardware, wiring work, and mount repairs.
- Out-of-service time: The expense of holding the truck while waiting for parts or correcting fit.
- Upkeep: Cleaning, polishing, finish repair, and inspections.
- Replacement: Removal, disposal, another bumper, and another installation.
Use invoices and maintenance records rather than guessed savings. Add your yearly polishing, replacement, and bumper-related downtime costs, then compare that total with the price gap between materials.
Separate Finish Trouble From Structural Damage
Cosmetic staining or surface deterioration calls for a finish assessment. Deep corrosion, cracked areas, distorted brackets, or changed alignment calls for a structural inspection. Polishing won't straighten a mount.
After a minor front impact, look behind the face. Check bracket shape, fasteners, and areas around tow-hook openings before deciding the bumper only needs cosmetic work. Repeat the clearance check after relevant axle or suspension repairs.
The practical lifecycle question raised by 4 State Trucks' Peterbilt 389 bumper selection is whether the selected material and configuration suit the truck's real work. Premium stainless may reduce corrosion-related upkeep, but it can't compensate for damaged mounts or poor alignment.
Buy the part you can keep in service, not the part with the lowest checkout total.
Order Your Peterbilt 389 Bumper and Confirm Fit
Order from a completed fit sheet, not memory. A clear purchase record helps the supplier build the right configuration and gives the installer something concrete to check.
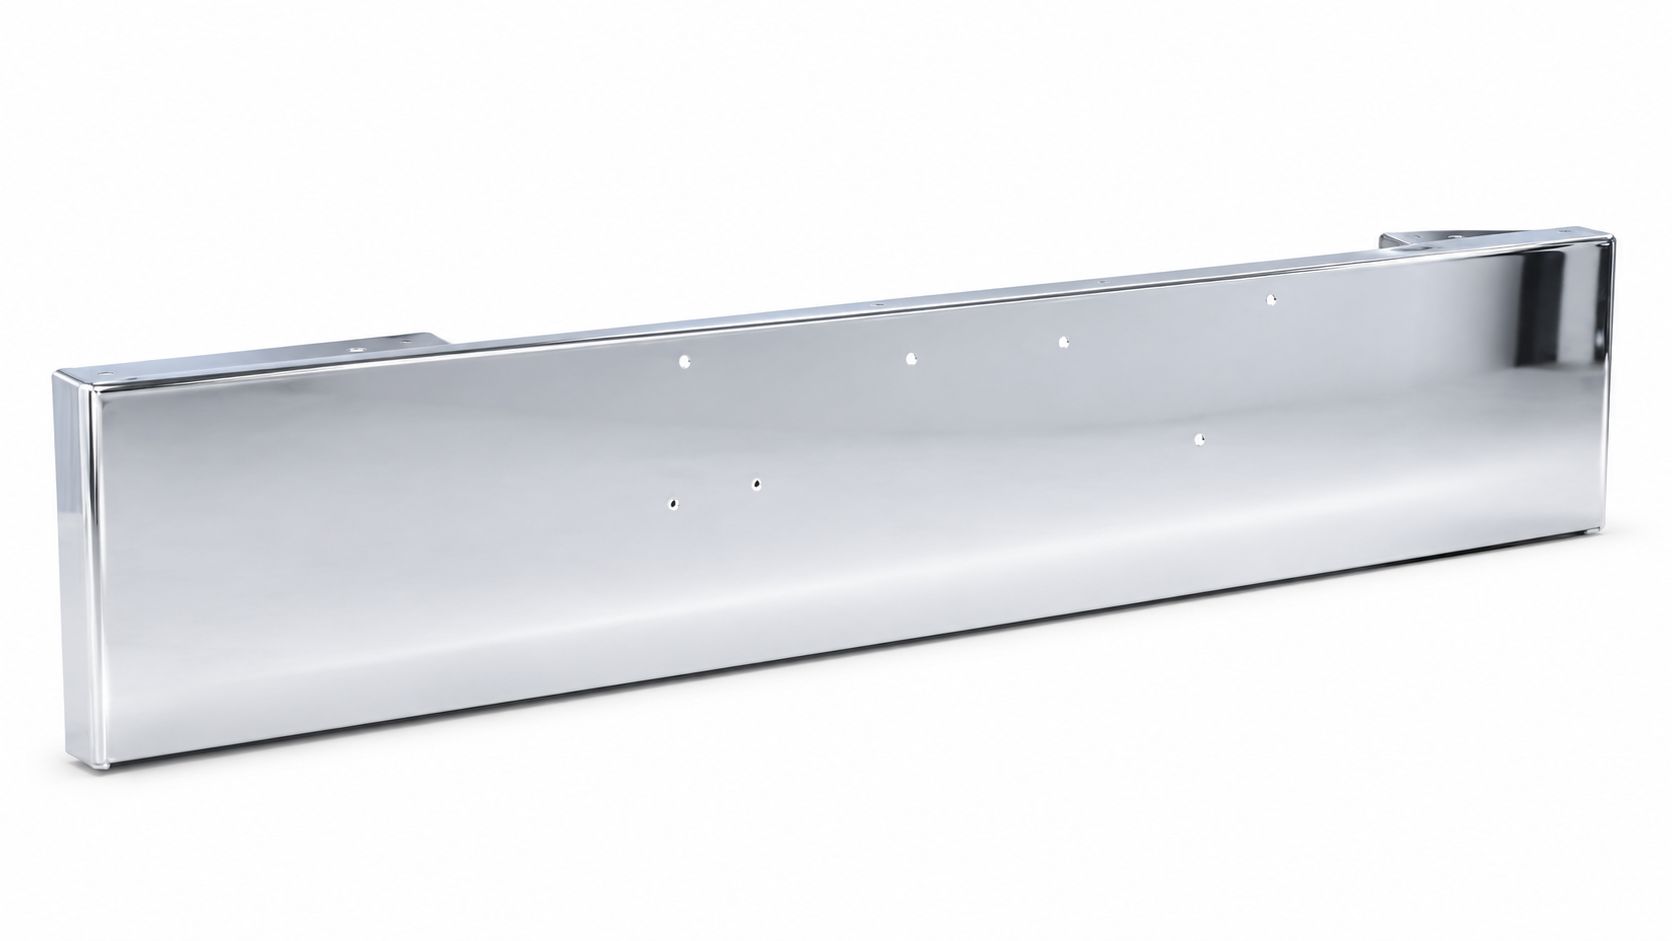
The catalog image below is for a different Peterbilt application. Don't use it as proof of 389 fitment.
Complete the Purchase Checklist
- Configure the truck: Select brand, model, year, style, cutouts, and finish in the configurator.
- Match the measurements: Compare the selection with your chassis measurements, bracket photos, lamp list, and tow-hook locations.
- Choose the material: Use the material table to match the build to your routes and maintenance budget.
- Confirm dispatch: Ask whether your exact configuration qualifies for the stated in-stock shipping window or requires production.
- Approve freight: Confirm LTL charges, receiving arrangements, and expected transit across the United States.
- Book the bay: Schedule installation after the delivered part passes inspection. Keep the compliance checklist with the work order.
According to the publisher's stated policy, products are engineered in-house, use U.S.-sourced steel, and are manufactured in Mexico under quality control. Orders are processed and supported in Magnolia, Texas, with warranty coverage for manufacturing defects. Confirm the written coverage, shipping, and return terms before payment.
For buyers handling another truck in the shop, the Chrome bumper for Peterbilt 378 / 379 is a separate catalog application. Its listing isn't a substitute for selecting the correct 389 part.
Official distributors and chrome shops also carry the brand's products if you prefer local handling. Ask who will verify fit, receive the freight, and handle any claim.
Order your Peterbilt 389 front bumper once the fit and freight details are confirmed. Fast dispatch helps, but the right part arriving ready for installation does more for uptime.
Peterbilt 389 Front Bumper FAQs
Will a Peterbilt 389 Bumper Fit a 388?
Some listings cover both models. Match the year, axle configuration, mounts, and factory bumper package before buying. A shared listing isn't enough by itself.
What's the Difference Between 304 and 430 Stainless?
They're different stainless grades, not finish names. Use the material comparison above to discuss route exposure, corrosion resistance, and cost with the supplier.
How Much Does a Peterbilt 389 Front Bumper Weigh?
Weight varies by construction and configuration. The stock and aftermarket ranges in the material section are buying references, not a substitute for the selected part's actual weight.
How Long Does Shipping Take?
Dispatch depends on stock and whether the bumper requires production. Use the stated material-table windows for planning, then confirm availability and freight transit before booking installation.
Can I Add Lights to the Bumper?
Yes, provided the installation doesn't impair required lamps or reflectors. Glare and applicable state rules still need checking.
Do I Need to Drill the Frame?
Not for a correctly matched direct bolt-on application. If installation appears to require new frame holes, stop and resolve the mismatch. Never drill the frame-rail flanges to force a fit.
Galhor Inc. offers configurable chrome-plated carbon-steel and stainless bumpers for truck-specific applications. Visit Galhor Inc. with your model details, mount measurements, and cutout list to confirm your Peterbilt 389 front bumper configuration and delivery terms before ordering.