
Custom Semi Trucks Mods, Rules and Bumpers
November 11, 2026 · Francisco Hornelas

You're at a fuel stop at 2 a.m., wiping road film off a bent front bumper and wondering if it'll pass a close look at the next scale. Custom semi trucks earn their keep on real lanes, not show lots. A sharp front end has to bolt up clean, clear steep docks, and shrug off salt. That's the standard for every mod below.
Table of Contents
- Why Custom Semi Trucks Pay Off on the Road
- Class 8 Mods Compared by Job
- Steel Gauge and Chrome That Last
- Drop Bumpers and Aero on Real Routes
- Rules to Check Before You Bolt On
- How to Spec a Direct Bolt-On Bumper
- Order the Bumper and Get Back to Work
Why Custom Semi Trucks Pay Off on the Road
Say a Peterbilt 389 pulls in after 500 miles of rain and construction. The chrome still shines under the pumps. The driver still has to back to a tight dock, cross a rough lot, and roll again before daylight. Looks matter when a customer sees the truck, but fit decides whether it leaves on time.
Custom semi trucks in U.S. freight are Class 8 work trucks, not weekend toys. Trucks moved roughly 72.7% of the nation's freight by weight in 2024, according to American Trucking Associations economics and industry data. That work puts bumpers, lights, and brackets in daily contact with docks, curbs, stone chips, and winter brine.
Where the money goes first
Most owners start with the parts they can see and replace fast. Bumpers lead the list, then lighting, aero pieces, paint and polish, and cab interiors. That order makes sense if the nose is bent or rusting. It doesn't make sense to polish tanks while a cracked bracket lets the bumper shake.
Peterbilt, Kenworth, Freightliner, International, and Volvo tractors don't share one front end. A Kenworth W900 chrome bumper won't solve a Freightliner Cascadia fit problem, and a Peterbilt 389 bumper won't bolt to every Peterbilt. Model, year, frame, and front options set the hole pattern before finish enters the talk.
A good-looking bumper that misses the frame, blocks a sensor, or scrapes a ramp costs more in downtime than it saved at purchase.
Used right, custom work pays off in plain ways. You replace parts less often, keep lights and tow points usable, and present a clean truck at the gate. For a wider view of parts that fit this class, see the guide to Class 8 truck accessories. Start with uptime, then style.
Class 8 Mods Compared by Job
Match the mod to the job before you spend. Six upgrades cover most of the custom work on a Class 8 tractor, and each one carries its own fitment or clearance catch.
| Mod | Main job | Verify first |
|---|---|---|
| Chrome or stainless bumper | Front protection and look | Model, year, tow hooks, lights, sensors |
| 18 inch drop bumper | Lower face and style | Approach angle, ramps, rough yards |
| Aero kit or smooth front | Less wind on highway miles | Cooling air, radar, flow at the wheels |
| LED and marker lights | See and be seen | Color, height, state rules |
| Paint or polish | Rust look and company brand | Prep quality and winter salt |
| Cab interior | Driver comfort on long hauls | Added weight; does not fix the front |
Pick the job before you pick the shine. A bumper protects the hood, grille, and lights when a yard move goes wrong. Lights help other drivers read your size at night. An interior helps a driver rest. It won't straighten a bent nose.
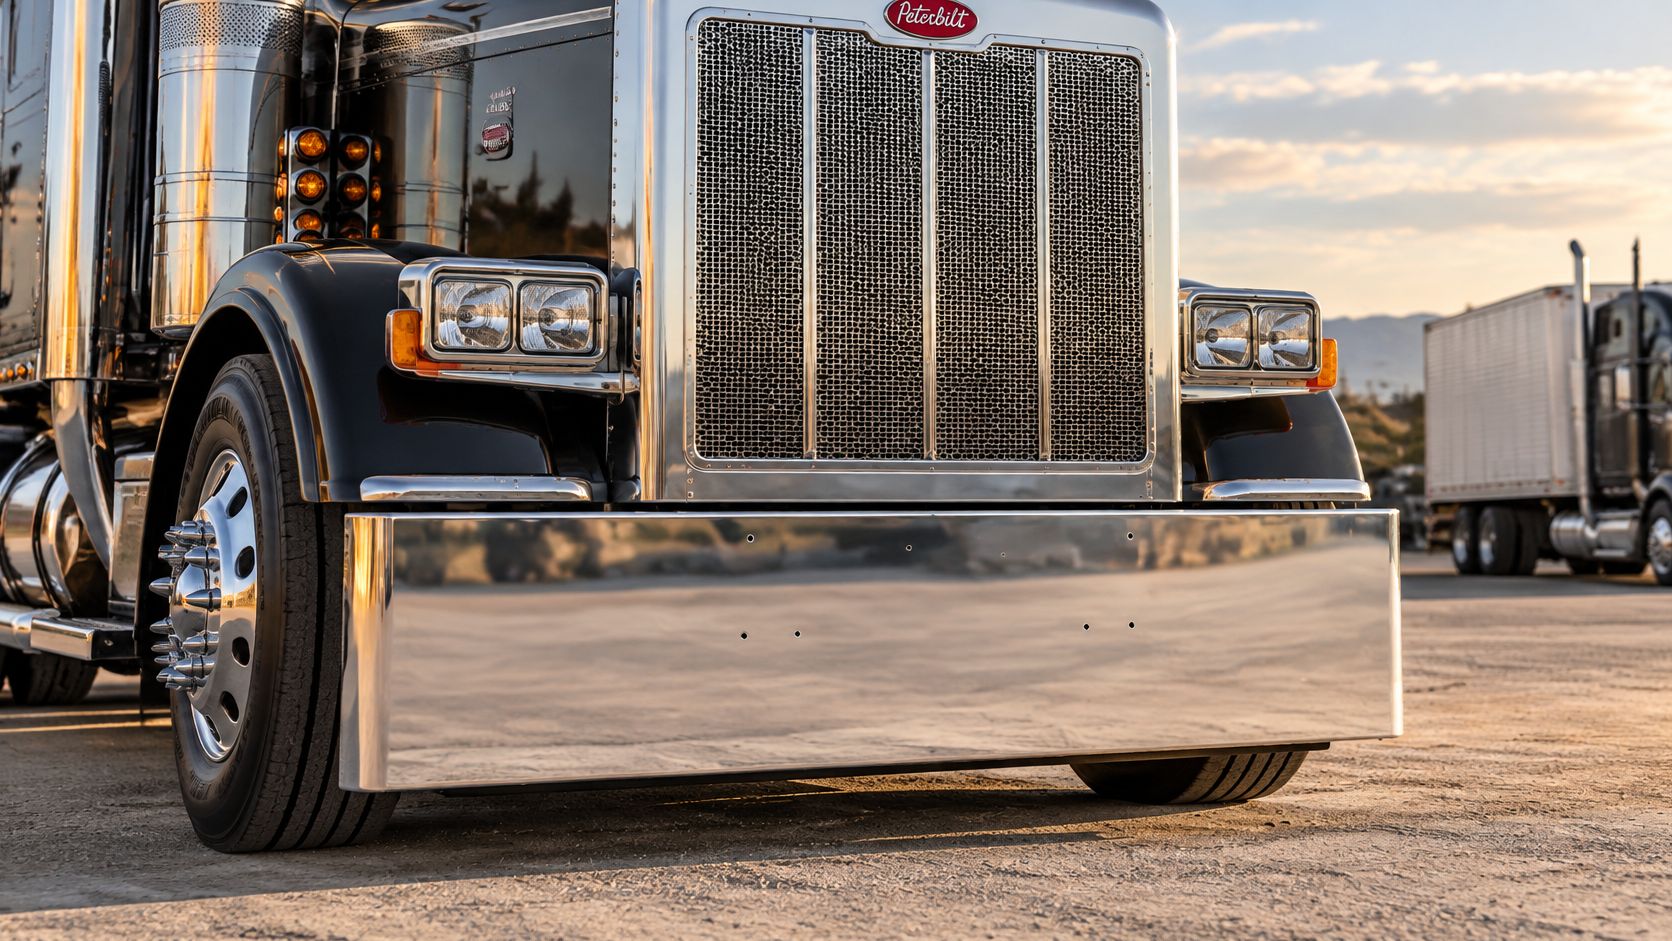
Bumpers and drop bumpers
A chrome or stainless bumper is the core mod because it's structure, finish, and first contact in one part. Verify make, model, year, tow hooks, fog lights, and radar or camera openings before you order. Cost usually sits in the mid band compared with a one-off fabrication, because a direct bolt-on pattern avoids shop time cutting and drilling.
The Chrome bumper for Peterbilt 378 / 379 starts at $874.99 and carries a triple-layer chrome finish with 35µm nickel. It's a direct bolt-on fit, sold individually, with cutouts depending on configuration.
An 18 inch drop bumper drops the face for a low, full look. It wins on smooth highway trucks and show-ready owner-operator rigs. It loses when your lanes include steep driveways, rail crossings, ferry ramps, or broken concrete at a plant. Measure the lowest edge against tire size and suspension height, then look behind it. A dropped face can hide cracked brackets and bent frame ends, so inspect what's underneath before the new part goes on.
Aero, lights, paint, and cab work
An aero kit or smoother front can help on steady highway miles, but a bumper never works alone. Grille openings feed the radiator, and lamp pockets and edges shape air around the front wheels. A smooth face that blocks cooling air or covers radar trades a small gain for heat or fault codes. Treat bumper, grille, and hood as one shape.
LED and marker lights are often the lower spend and the fastest safety win. Drivers see you sooner, and you spot a dark dock edge sooner. Lamp color, height, spacing, and state rules still apply, so don't add bright colors forward that belong at the rear. Keep wiring sealed where spray hits it.
Paint or polish shows your name and keeps dull metal from making a solid truck look tired. Prep decides the result. Polish over pitted chrome won't last, and fresh paint over rust will lift. Winter salt finds every missed edge.
A cab interior upgrade helps sleep, storage, and driver retention on long hauls. Spec it after the truck is safe and legal outside. I'd start with the bumper if the truck hits docks or needs collision work, then stack lights and aero only after the front bolts up clean.
Every row on that table is a fitment decision before it's a style decision. Passenger-car bumper rules stop well short of a Class 8 tractor, so each part passes or fails on hole pattern, clearance at full turn, and what it covers up.
Steel Gauge and Chrome That Last
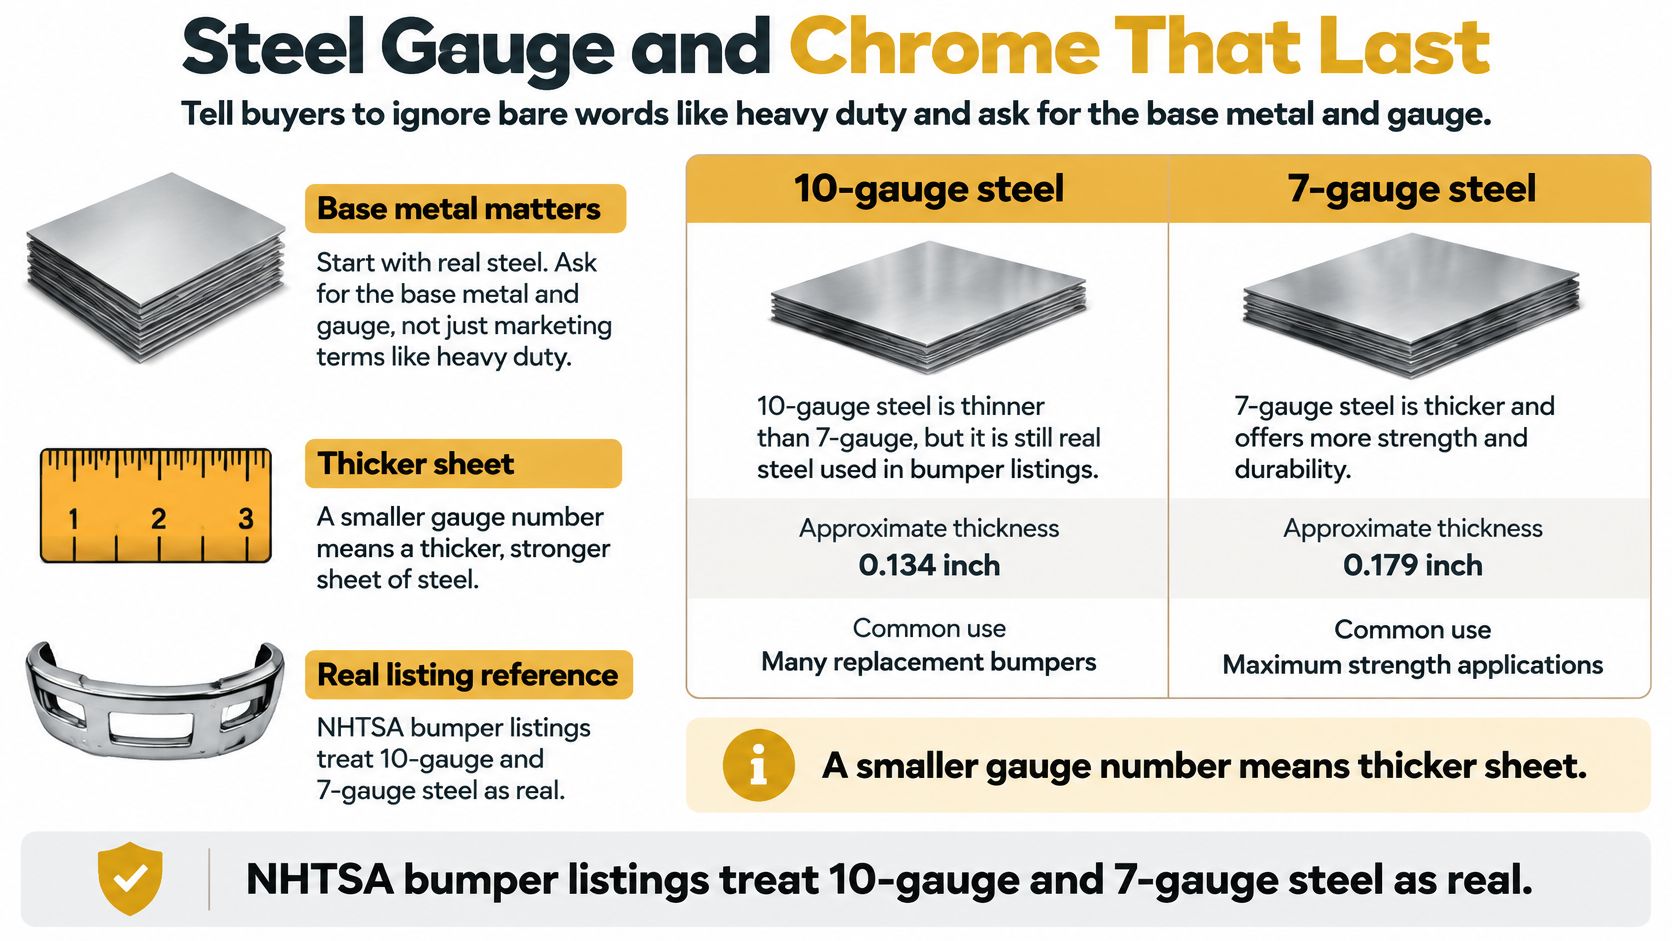
Ignore bare words like heavy duty and premium until a seller puts base metal and gauge in writing. Gauge reads simple once you flip the number in your head. A smaller number means thicker sheet. Thicker sheet usually resists bending better, and it also adds weight at the nose.
Passenger-car bumper rules were written for cars, and they do not carry over to a Class 8 tractor, so the spec sheet is your evidence. NHTSA's bumper catalog identifies 10-gauge steel and 7-gauge steel as measurable bumper specifications, and that same catalog lists separate dimensional values for Kenworth and Peterbilt applications. Width, height, cutouts, and mounting geometry differ between brands even when two bumpers look alike in photos.
| Metal | Gauge | Best route | Finish | Trade-off |
|---|---|---|---|---|
| 10-gauge chrome-plated steel | 10 ga | Dry highway | Chrome plate | Lighter; dents sooner if structure is thin |
| 7-gauge steel | 7 ga | Rough yards and heavy impact | Confirm finish in writing | Heavier; resists bending better |
| Chrome-plated carbon steel | Confirm gauge in writing | Dry highway, budget build | Mirror polish | Rusts once stone chips break the plate |
| 430 stainless | 11 ga (confirm in writing) | Salt belt and yard work | Mirror polish | Thinner sheet; strong corrosion resistance |
What gauge does and doesn't prove
7-gauge steel is thicker than 10-gauge and generally fights bending better. Gauge alone does not decide whether a hit stays cosmetic or twists the mount. Reinforcement behind the face, bracket thickness, weld quality, and how loads spread into the frame decide that. A thick face on weak brackets still moves.
10-gauge chrome-plated steel is the common bright-face spec on fronts like the Freightliner FLD 120 and the Kenworth T600. It keeps weight down and looks right. It gives you less margin if the structure behind it is thin and the truck works around loaders, dock plates, or tight yards every day.
Match alloy to the road
Chrome-plated carbon steel gives you the mirror look at a lower metal cost. Once stones break the plate and salt reaches bare steel, rust creeps under the shine and lifts it from the edges. Check the bracket pockets and lower edge at every wash, because a bumper can photograph clean up front while it rots where the mount traps spray.
430 stainless trades some sheet thickness for corrosion resistance. An 11-gauge 430 sheet holds up where plated steel fails, but confirm the grade and gauge on the order because stainless grades don't age the same. The detailed comparison of stainless 430 vs 304 is worth reading before you pay for an upgrade you may not need.
Chrome-plated 304 stainless costs the most and earns it where brine and coastal air kill bumpers before impact does. It still fails as a purchase if the holes, wrap, or cutouts are wrong for the truck.
Ask what sits under the shine. A triple-layer chrome stack puts a corrosion barrier under the final bright layer, and it is a spec you can compare across sellers. Galhor builds the Freightliner Columbia (2008+) and Peterbilt premium chrome bumpers with 35 microns of nickel in that stack. Thick chrome can also dress over a bent face or pitted steel, so check the mirror for ripples and look at the backside before you call a used bumper good. Order by base metal, gauge, and mirror polish rather than the word chrome alone.
Drop Bumpers and Aero on Real Routes
A bumper can look perfect on flat show pavement and still kiss concrete on a steep dock approach. That first scrape scars chrome at best. At worst it bends a bracket, shifts the face, and leaves the bumper hanging close to a steer tire. The worst ramp on your route sets how low you can go.
NHTSA's response on truck conspicuity and underride protection reports that front bumpers on more recent truck tractors average about 14 inches of ground clearance. An 18 inch drop style hangs the visible face lower than a standard front, so approach angle, curb clearance, and ramp clearance all shrink.
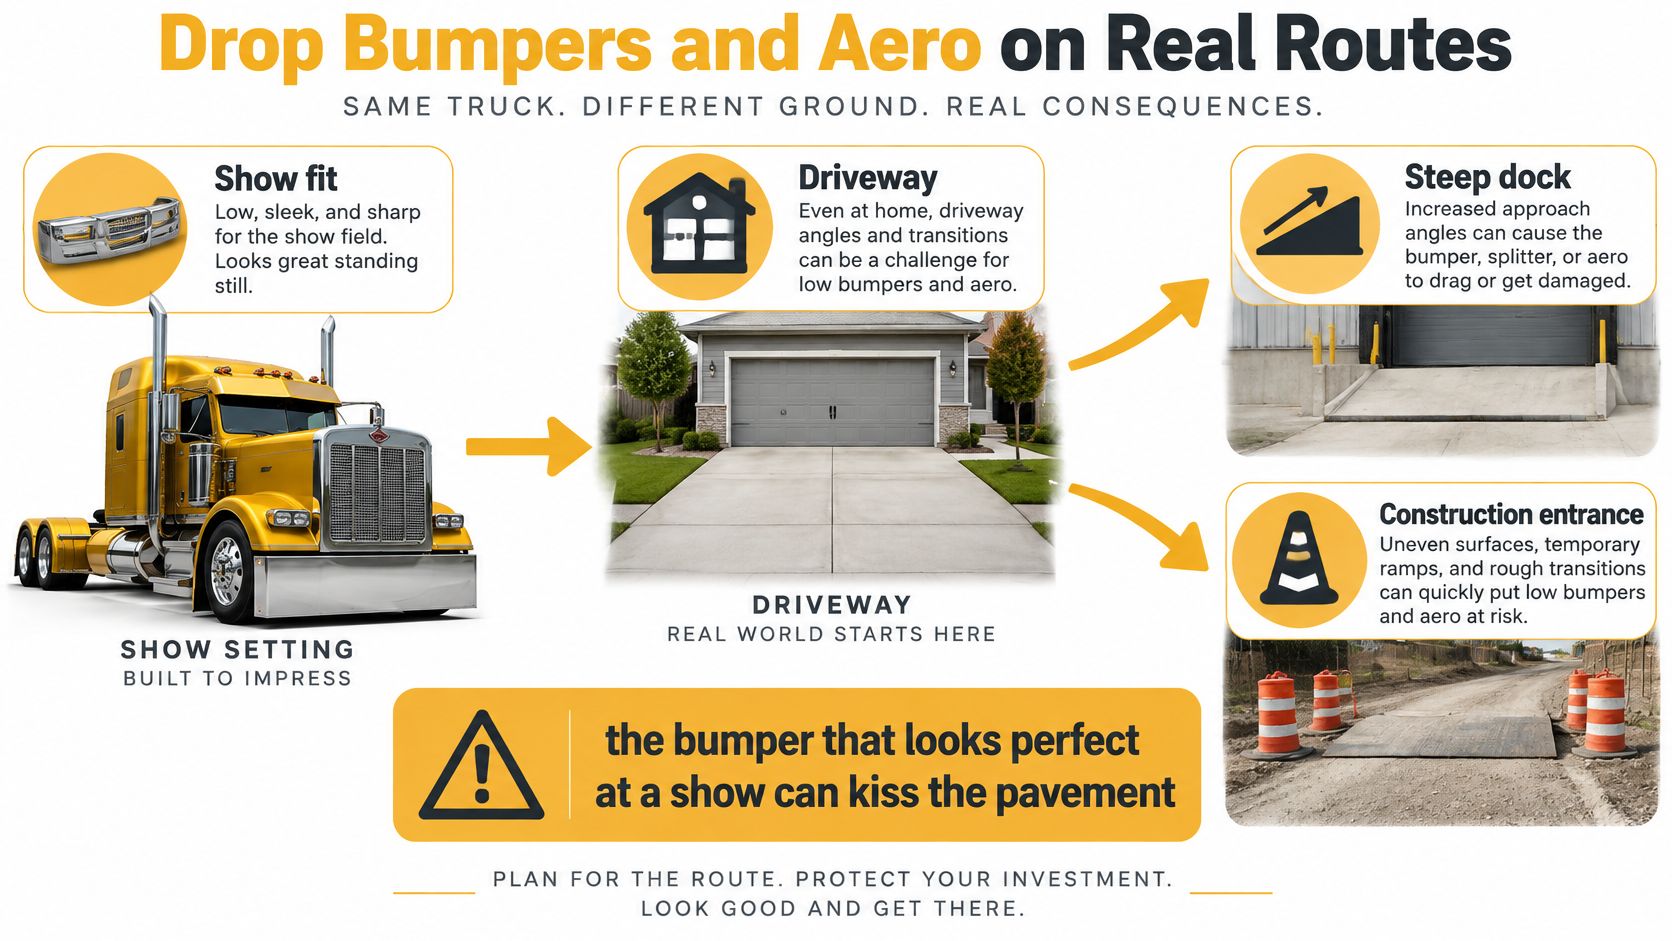
Measure the worst driveway on your route
Start with the finished truck at normal ride height and normal steer tires. Measure from pavement to the bumper's lowest point, including any lower lip or light box. Then walk the worst entrance on your regular lane with a loaded trailer pushing the nose through a dip.
- Steep docks: Check breakover at the top and bottom of the ramp, where the nose transitions, because mid-slope height alone won't catch the scrape.
- Construction entrances: Look for plates, ruts, and gravel ridges that lift one steer tire.
- Fuel stops and motels: Watch short, sharp driveway aprons that long wheelbases cross at an angle.
- Tow access: Confirm hooks and frame points stay reachable after the lower face goes on.
A deeper drop holds up when the lane stays shallow: interstate miles, flat distribution-center aprons, gentle fuel-island ramps. Serve farms, plants, quarries, or older downtown docks with steep approach angles, and I'd trade some low look for clearance.
A straight bumper that never drags beats a deep one you straighten twice a year.
Weigh aero claims against your lane
At highway speed, wind drag takes a large share of the energy a truck burns. The bumper can't be judged apart from the grille, hood, mirrors, wheel openings, tractor to trailer gap, and underbody, because they all feed the same airflow. A face that looks smooth can still add drag if air breaks away at the corners or piles up ahead of the front wheels.
Don't shrink the grille to chase a clean look. The radiator still needs air under load on a grade, and fan demand costs fuel. Lamp recesses, tow cutouts, and the step from bumper to fender matter too, since sharp pockets trip airflow. Small changes stack up over long highway days, for better or worse.
Weight and shape don't matter equally on every route. In stop-and-go work and hills, added mass and axle loading show up sooner. At steady highway speed, shape carries more of the fuel bill. Judge any aero claim against your own speed, payload, trailer, and lane.
Write four specs down before you buy: drop depth, bottom-edge height, tow-point clearance, and whether cooling openings stay open. If a seller can't answer those points for your exact model, you're buying a look and hoping the route agrees.
Rules to Check Before You Bolt On
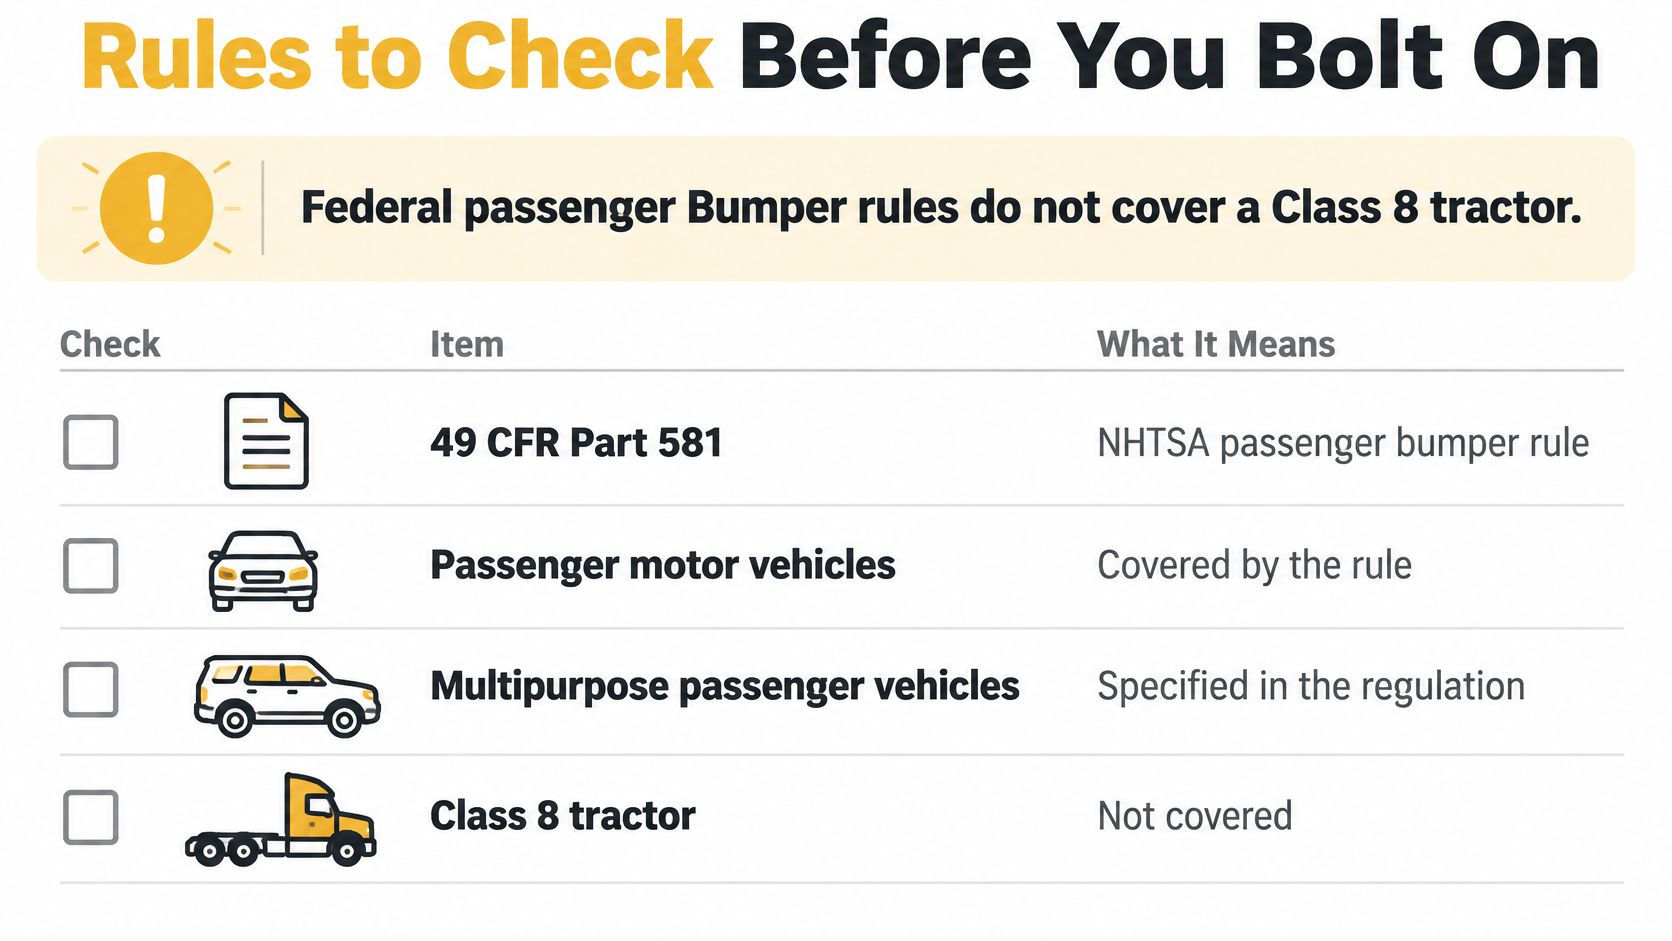
Federal passenger-car bumper rules don't cover your Class 8 tractor. That's the myth to kill first. NHTSA's interpretation of the bumper standard states that 49 CFR Part 581 applies only to passenger motor vehicles other than multipurpose passenger vehicles, so there's no federal bumper standard specifically applicable to trucks.
That doesn't mean anything goes on a Peterbilt 389, Kenworth W900, Freightliner, or Volvo. You still have to clear state equipment rules, lighting rules, carrier policy, and the truck's real mounting pattern. A part can be legal to sell and still be wrong for your fleet, your state, or your sensor package.
Separate the three layers
Keep the rule layers apart so nobody in the shop talks past each other.
- Federal vehicle and lighting rules: These cover required lamps, visibility, and safety systems that must keep working after a mod.
- State add-ons: States can set equipment details that affect lighting color, height, and road use.
- Carrier and shop policy: A fleet can ban a style that hides damage, complicates a tow, or slows inspections.
Before you order, confirm GVWR, axle and frame layout, model year, and every front device the bumper must clear. That list includes tow hooks, fog lamps, radar, cameras, license mounting, and factory brackets. For a focused breakdown, review the key regulations for semi truck bumpers before the part ships.
Run a yard check after install
A driver or tech can catch most problems in ten minutes with a wrench check and a walk-around. Confirm the bumper sits tight on the frame and brackets show no cracks or fresh bending. Check that lamps are visible and aimed, sensors aren't blocked, and wiring isn't pinched behind a cutout.
Then check working clearance. Turn the steers lock to lock, look for tire contact, and confirm tow points accept a hook without forcing it. Look at cut edges and bolt holes for bare metal that'll rust first. Take the truck over the yard entrance it uses every day before you send it loaded.
Bolt-on does not mean compliance-neutral.
Fleets should care about one more risk. A deep, polished face can hide small cracks and bracket damage during a fast pre-trip, especially under road grime. If a covered lamp or shifted sensor puts a truck out of service, the premium look created the loss. Write model, year, style, and cutouts on the work order so the next shop isn't guessing.
How to Spec a Direct Bolt-On Bumper
Spec the bumper from the truck outward. Don't start with a photo of another rig and hope your frame agrees. These steps work on a phone in the cab, and each one prevents a return, a drill bit, or a truck sitting with the nose off.
Build the spec in order
- Write down make, model, and year. Read them from the door label or build sheet, not memory. A Peterbilt 379 isn't a 389, and a Kenworth T680 isn't a W900. Year breaks matter because lights, brackets, and sensor packages change mid-run.
- List the front equipment already on the truck. Note tow hooks, fog lights, blocker or beam parts, radar, cameras, and whether the current bumper wraps the corners. Take straight-on and corner photos in daylight. A missing cutout discovered after delivery can turn a bolt-on job into cutting you never wanted.
- Choose flat or drop style after clearance. A flat or standard face is the safer work spec for rough yards. Choose an 18 inch drop bumper only after you've checked bottom-edge height against your worst ramps and driveways. Style picked first often forces route changes later.
- Match cutouts to hardware. Tow hooks need room to swing and accept a pin or hook under load. Fog lamps need the right opening and aim, not just a hole that looks close. A solid face that covers a required lamp or sensor is the wrong part, even if every bolt lines up.
- Pick metal and finish for the route. Use chrome-plated carbon steel for a bright face on drier lanes, 430 stainless where salt is normal, and 304 stainless where corrosion is the main enemy. Ask for gauge, nickel-backed chrome details, and mirror polish in writing.
- Confirm direct bolt-on means your frame pattern. Ask whether the bumper uses standard mount or blind mount, and whether wrap styles include the brackets they need. Wraparound bumpers such as Freightliner Cascadia and Kenworth T680 include the required mounting brackets in our range. Oversized applications such as Kenworth T680 NEXTGEN and T680 ship by freight (LTL).
- Check ship time before you promise the truck back. An in-stock part can keep a collision repair moving, while a made-to-order unit needs planning around shop time. Oversized bumpers move by freight, so confirm delivery access for a pallet and inspect the carton before signing.
- Save the exact configuration. Keep brand, model, year, style, cutouts, metal, and finish with the work order. If the truck gets hit again, the next order starts from facts instead of a driver trying to remember which lamp option he picked.
Use model names with care
Faces for Peterbilt 389 and 379, Kenworth W900 and T680, and Freightliner Classic, Columbia, and Cascadia are model-specific for a reason. Hood width, fender shape, grille surround, and frame horns differ. Search terms help you find the family, such as Peterbilt 389 bumper or Kenworth W900 chrome bumper, but the build sheet settles the order.
On install day, hang the bumper on the existing pattern and snug all mounts before final torque. Center the face to the grille and fenders, then torque evenly so one corner doesn't pull tight while the other floats. Recheck lights, sensor view, tire clearance, and tow access before the first load.
Fit check: If you have to force the third bolt, stop and find out why instead of pulling the bracket to the hole.
I'd use a 3D builder that starts with brand, model, and year when it's available. Seeing cutouts and end style on your truck shape catches mistakes a flat catalog photo hides. The goal is boring in the best way. The part arrives, bolts up, clears everything, and the truck goes back to work.
Order the Bumper and Get Back to Work
A bumper order is a downtime decision as much as a parts decision. Spec it by brand, model, year, style, cutouts, and finish, and you buy one install. Spec it off a flat catalog photo, and you risk a second shipment while the truck sits against the fence.
Galhor, based in Magnolia, Texas, builds chrome bumpers for Freightliner, Kenworth, Peterbilt, and Volvo Class 8 trucks. Steel is U.S.-sourced, parts are manufactured in Mexico under a controlled quality system, and every order is processed and supported in Texas. Warranty coverage applies to manufacturing defects.
Price and timing you can plan around
The Peterbilt 378 / 379 chrome bumper starts at $689.99, a direct bolt-on fit sold as a single piece with triple-layer chrome. Other anchors on the same shelf: the Kenworth T600 chrome bumper starts at $1,599.99, the Kenworth T680 NEXTGEN runs from $1,679.99, and the Freightliner Columbia (2008+) runs $1,669.99 to $1,909.99 depending on size, material, and end style. Use those numbers to budget the repair, then lock metal and options before checkout.
In-stock stainless 430 and 304 flat bumpers can ship within 48 hours. Made-to-order carbon steel units typically ship in 4 to 6 weeks by LTL freight. Match that split to the truck's calendar. If the nose has to be back this week, start with in-stock stainless. If the truck is already booked for planned shop time, made-to-order fits the schedule.
Wraparound bumpers for the Freightliner Cascadia and Kenworth T680 arrive with the required mounting brackets, so the job starts with hardware on hand instead of a second order. On the Kenworth T600, ordering without the 3D builder carries the same price and the same warranty, with shipping included.
The return on the right spec is simple. One purchase, one install, no cutting to save a wrong cutout, and a face that clears your regular dock approaches instead of dragging on them. Match the listing to the model on the door plate, pick the material that fits the weeks the truck can sit, and place the order so the bumper is waiting when the shop slot opens.
Galhor Inc. builds direct bolt-on chrome bumpers for Peterbilt, Kenworth, Freightliner, and Volvo Class 8 trucks, with carbon steel, 430 stainless, and 304 stainless options you can spec by model, year, style, and cutouts. Build the front end your route can live with, then visit Galhor Inc. to open the 3D configurator and order yours today.