

Aftermarket Bumpers for Trucks: Buyer's Guide 2026
The truck is sitting in the yard with a bent front bumper, a cracked lamp opening, and a load scheduled for tomorrow. The chrome may be the first thing you notice, but the bigger problem is fitment. A replacement that sits too high, blocks a light, misses the tow-point opening, or needs improvised drilling can create more trouble than the original damage.
Aftermarket bumpers for trucks should be selected as working equipment, not just exterior trim. Whether you're comparing a Peterbilt 389 bumper, a Kenworth W900 chrome bumper, a Freightliner replacement, or an 18 inch drop bumper, the decision affects uptime, corrosion control, lighting visibility, clearance, and the truck's professional appearance.
Table of Contents
- Why Aftermarket Bumpers for Trucks Matter for Uptime
- Material Choices - Carbon Steel vs Stainless Grades
- Using the Configurator for Perfect Fitment
- Safety, Compliance, and Federal Standards
- Finish Durability and Corrosion Protection
- Installation, Maintenance, and Warranty
Why Aftermarket Bumpers for Trucks Matter for Uptime
The truck is loaded, the driver is ready, and the front bumper is the part that stops the day. I have seen trucks sidelined by damage that looked minor at first glance, then turned into a fitment problem. Once the bumper shifts, it can crowd a lamp opening, block a tow point, rub a grille surround, or sit at the wrong height for the truck's normal route. On newer setups, bad front-end geometry can also interfere with the space other components need to sit where they belong.
That is why aftermarket bumpers for trucks matter to uptime. A front bumper is not just a chrome panel you bolt on to clean up the nose. It is part of the truck's working front end, and the wrong replacement can create a second repair, extra labor, or a return visit after the truck should already be back on the road.
The repair volume behind collision work is substantial. The Federal Motor Carrier Safety Administration reported approximately 503,000 police-reported crashes involving large trucks in the United States in 2022, including 5,279 fatal crashes, about 114,000 injury crashes, and 117,641 large trucks involved in towaway crashes. These totals cover all crash types, not bumper damage specifically. They still show the scale of collision-related parts demand.
Practical rule: Treat a front bumper replacement as a return-to-service decision. Appearance matters, but clearance, mounting, lighting, tow access, and legal front-end fit matter first.
What a damaged bumper can affect
A front bumper sits beside several items that need inspection after any hit, even a low-speed one:
- Lighting openings: A cutout that is off by a small amount can leave a lamp unsupported, partly blocked, or aimed poorly because the surrounding panel no longer sits right.
- Tow points: If access is covered or shifted, the next roadside recovery gets slower and more expensive.
- Frame mounting: Bent brackets, poor weld alignment, or wrong hole spacing can preload the bumper and transfer stress where it should not be.
- Approach angle: A deeper drop may look right in the yard and still scrape on ramps, dock entrances, uneven fuel islands, or rough jobsites.
- Grille and front-end clearance: The bumper has to leave adjacent panels in their intended position, without forcing field modifications.
A direct-fit aftermarket part can cut fabrication time and help get a truck back in service faster. But direct fit only counts when the exact truck, model year, frame setup, mount style, and cutouts all match. If any of that is off, downtime comes back quickly.
National crash totals also show how often heavy equipment is involved. NHTSA reported approximately 528,177 large trucks involved in police-reported crashes in 2023, with 5,472 people killed and an estimated 153,452 people injured in traffic crashes involving large trucks. The same NHTSA summary states that heavy trucks above 26,000 pounds GVWR accounted for 71% of large trucks involved in fatal crashes, which keeps the issue tied to Class 8 equipment rather than lighter commercial units.
Buy for the route the truck runs. Interstate miles, rural roads, weather, debris, and long gaps between repair facilities all punish a poor bumper choice. The right replacement protects uptime because it fits correctly, clears what it needs to clear, and goes back on without guesswork.
Material Choices - Carbon Steel vs Stainless Grades
A front bumper is not just a shiny panel hanging off the nose. The material under that finish affects impact behavior, corrosion pattern, repairability, and how well the bumper keeps its shape around lights, brackets, and mounting points after real road use. On a truck, that matters for appearance and for the front-end geometry that has to stay where the truck builder intended.
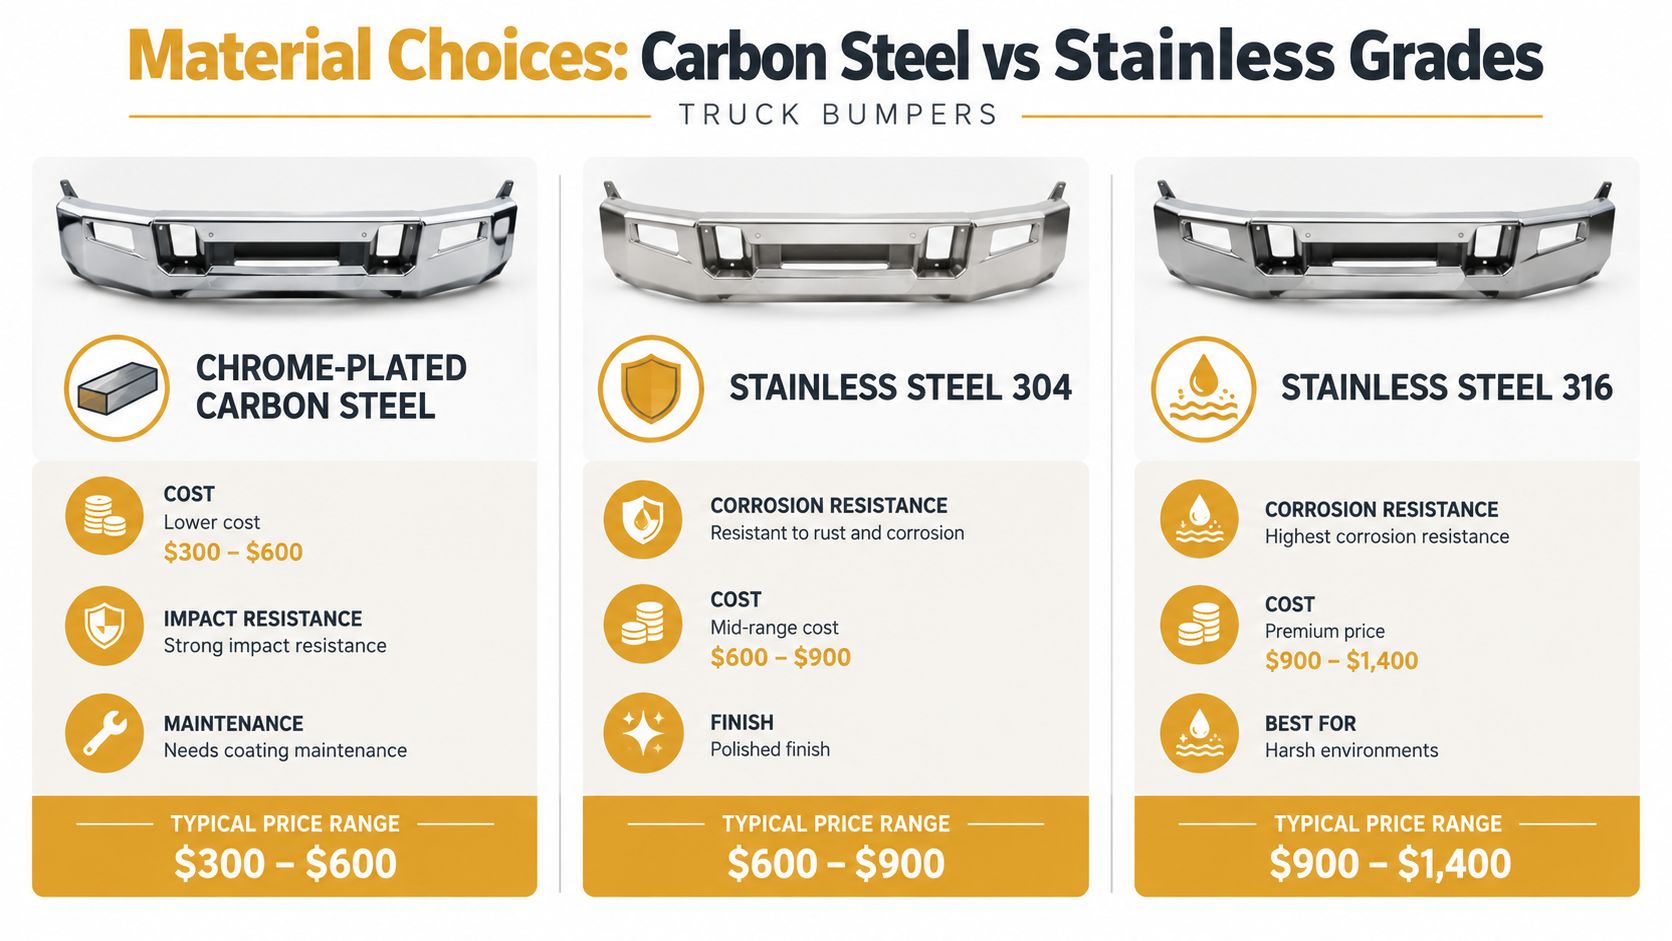
Chrome-plated carbon steel
Chrome-plated carbon steel still has a place. It gives the traditional look many owner-operators want, it is usually easier on the purchase price, and it offers a lot of configuration flexibility. The trade-off is simple. Once the plating gets chipped by stones, scraped in yard contact, or opened up around edges and fasteners, the base steel can start rusting under the finish. What looks like a cosmetic issue at first can turn into pitting, swelling, and a bumper that no longer sits as cleanly against the truck.
A current Steel chrome bumper example is built from 10-gauge chrome-plated steel with a mirror-polished finish. It uses a triple-layer hexavalent chrome process with 35 microns of nickel, offers direct bolt-on installation, and is available with standard or blind mounting. Those are product specifications for that bumper, not proof that every chrome unit on the market is built the same way.
Type 430 stainless steel
Type 430 is a ferritic stainless grade with approximately 17% chromium. The 430 stainless steel technical data sheet describes good resistance to atmospheric, freshwater, steam, and petroleum-product corrosion. The same sheet notes only moderate resistance to salt spray and limited resistance to seawater.
That puts 430 in a practical middle ground. For inland work, regular washing, and trucks that are watched closely, it can hold up well and keep a clean appearance. On winter roads, though, salt gets into folded edges, around brackets, at lamp openings, and behind hardware. The face can still look polished while crevice corrosion starts where you do not see it during a quick walk-around.
Type 304 stainless steel
Type 304 usually handles chloride exposure better than 430, which makes it a better candidate for coastal service, heavy deicing routes, persistent humidity, or fleets that cannot rinse often. It still needs attention. Weld quality, surface finish, contamination from other metals, trapped moisture, and dissimilar-metal contact all affect how long it stays presentable and structurally sound.
Grade alone does not decide the outcome. Substrate plus finish plus environment plus maintenance determine service life.
| Material | Practical advantage | Main concern | Best fit |
|---|---|---|---|
| Chrome-plated carbon steel | Traditional shine and flexible configuration options | Plating damage can expose the substrate | Controlled maintenance and appearance-focused applications |
| 430 stainless steel | Good general atmospheric corrosion resistance | Salt spray and seawater are tougher environments | Inland routes with regular washing |
| 304 stainless steel | Better tolerance of chloride exposure | Still vulnerable at crevices and contaminated interfaces | Salt, humidity, and coastal service |
Buying on sticker price alone usually costs more later. Cleaning time, polishing, freight, installation labor, repair work, replacement timing, and downtime all belong in the decision. A practical comparison of stainless steel and carbon steel helps frame the material trade-offs, but the right choice comes from the route, the weather, and how disciplined the maintenance routine really is.
Using the Configurator for Perfect Fitment
A bumper can be strong, polished, and completely wrong for the truck. Peterbilt, Kenworth, Freightliner, and International models may use different frame-hole patterns, lamp openings, tow-hook locations, grille relationships, and mount styles. The model badge alone isn't enough.
Select the truck before the finish
Use the vehicle information in this order:
- Choose the manufacturer. Start with Peterbilt, Kenworth, Freightliner, International, or the correct truck brand.
- Select the model. A Peterbilt 389 bumper isn't automatically correct for every Peterbilt hooded truck. The same applies to a Kenworth W900 chrome bumper.
- Confirm the model year. Grille shape, frame details, lamp design, and mounting points can change across production years.
- Identify the frame and mount configuration. Standard and blind mounts can place hardware differently.
- Choose cutouts. Verify tow holes, fog lights, headlamps, marker lamps, and other openings before adding the part to the order.
- Select material and finish. Decide between chrome-plated carbon steel, chrome-plated 430 stainless, chrome-plated 304 stainless, polished stainless, or another listed configuration.
A 3D tool helps because it turns hidden fitment choices into visible selections. Why a 3D configurator can be better than traditional online shopping comes down to reducing guesswork before the bumper reaches the shop.
What “direct bolt-on” should mean
A genuine direct-bolt-on design should align with the intended frame holes and preserve the truck's original working relationships. It shouldn't require cutting the bumper to clear a lamp, drilling new frame holes, forcing a bracket into place, or using a homemade spacer to correct a measurement error.
That doesn't remove the need for an installer. Heavy bumpers can be awkward to support and align, and existing collision damage may have bent the truck-side bracket. Check the frame and brackets before installation. If the truck's mounting structure is damaged, a correctly made bumper can't correct the underlying problem.
Use the video as a visual reference for the configuration process and product selection:
Before ordering, record the truck's exact model year, mount type, desired drop, lamp layout, tow-point openings, finish, and material. That information prevents the most expensive fitment mistake, ordering a beautiful bumper for the wrong chassis.
Safety, Compliance, and Federal Standards
A heavy chrome bumper isn't automatically a safety device, and a direct-bolt-on bumper isn't automatically compliant with every federal requirement. The front of a tractor interacts with lamps, reflectors, tow points, sensors, grille openings, approach angle, and crash geometry. Those relationships deserve a real inspection before the truck returns to service.
The federal bumper rule most often misunderstood by Class 8 buyers is 49 CFR Part 581. The federal Part 581 text establishes low-speed bumper impact requirements for passenger motor vehicles, not a universal construction standard for heavy-duty truck tractor bumpers. Its test uses two front impacts and two rear impacts, with the impact line positioned between 16 and 20 inches above the ground, and impacts separated by at least 30 minutes.
That means Part 581 doesn't tell you which steel grade, thickness, finish, or drop height to buy for a Peterbilt, Kenworth, Freightliner, or International tractor. Don't treat a passenger-vehicle bumper label as proof that a heavy-truck replacement is suitable.
Front and rear protection are different jobs
Federal rear-impact-guard rules also have a specific boundary. Under 49 CFR 393.86, each trailer and semitrailer generally must have a rear impact guard or another device that prevents a vehicle from riding underneath. The rule lists tractors, pole trailers, and driveaway-towaway vehicles among the exceptions.
A stylish front bumper on a tractor doesn't replace the rear-underride equipment required on a covered trailer. Trailer guards need their own inspections after dock impacts, crashes, and severe corrosion.
NHTSA describes front underride protection as a structure intended to reduce the consequences of a passenger vehicle striking the front of a heavy truck. Its response on truck conspicuity and underride protection also addresses geometric compatibility and federal lighting requirements.
Installation checks that protect the truck
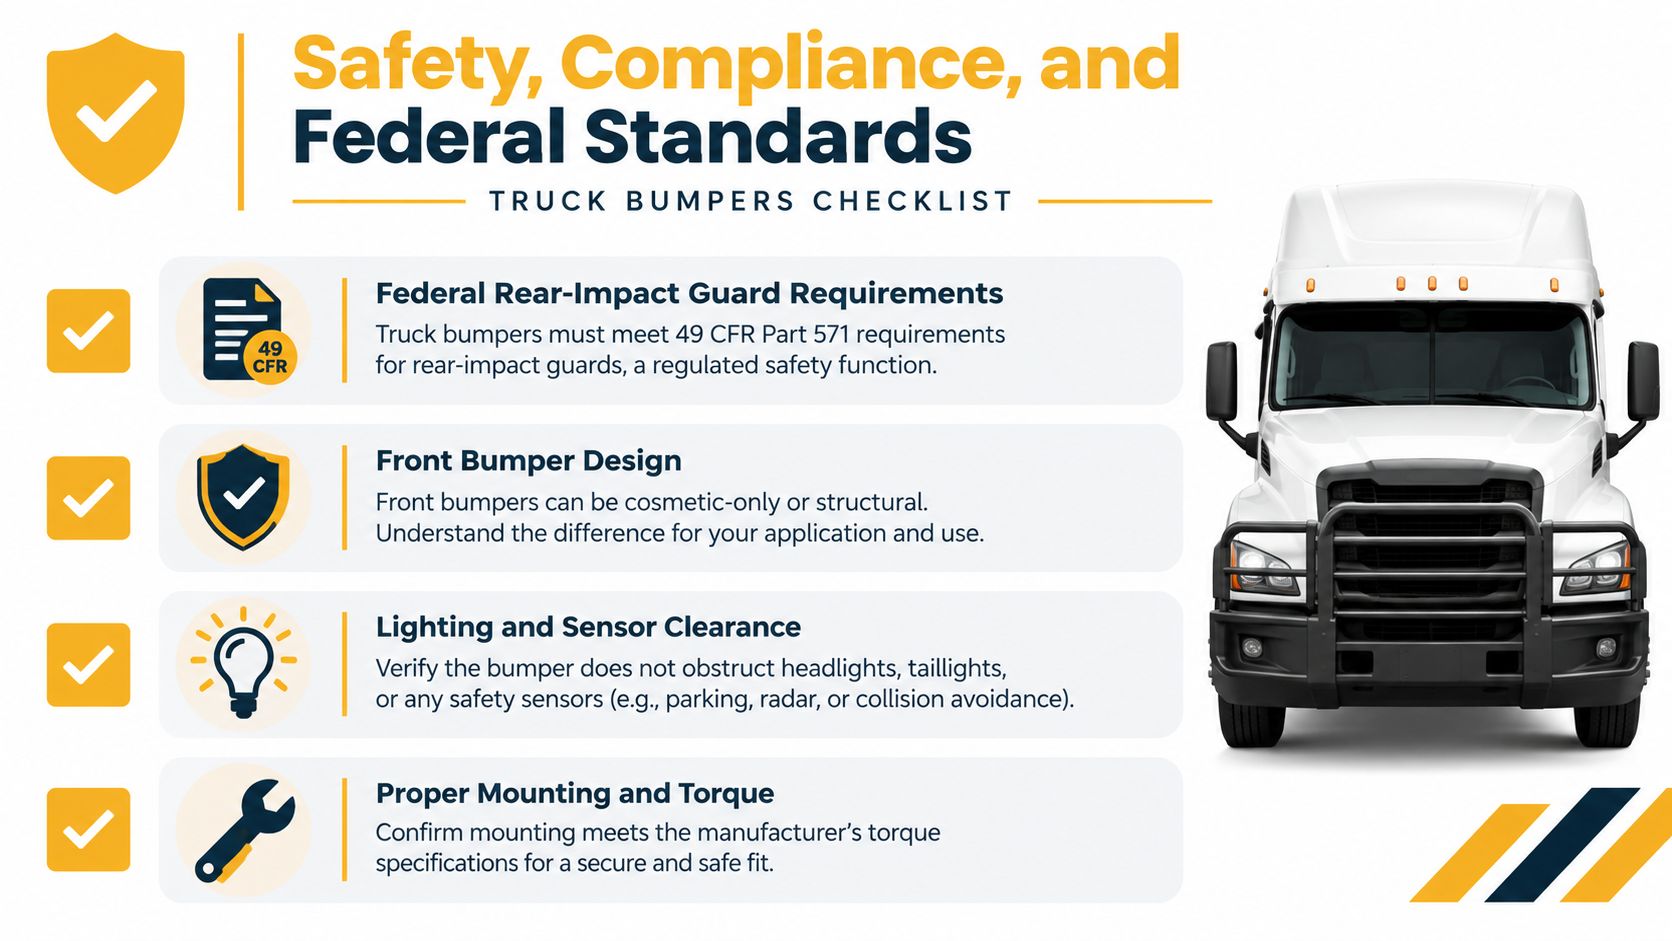
Before releasing the truck, verify:
- Lamp visibility: Required lamps and reflective materials remain visible from the intended angles.
- Sensor clearance: Cameras, radar, and other equipment aren't blocked or moved from their designed position.
- Tow access: Tow hooks and recovery points remain usable without contacting the bumper.
- Suspension clearance: The bumper doesn't contact tires, steering components, or bodywork through suspension movement.
- Mounting integrity: Brackets sit flat, holes align, and fasteners are tightened according to the vehicle or component instructions.
- Height and geometry: An 18 inch drop bumper changes approach angle and may alter front-end relationships. Review route conditions before choosing a lowered design.
The bumper safety standards overview reinforces the point that visual bulk isn't the same as engineered protection. Geometry and retained functions matter more than a bumper that merely looks heavy.
Finish Durability and Corrosion Protection
Chrome is a finish system, not a substitute for sound steel, proper fabrication, or maintenance. A mirror surface starts with a clean substrate and depends on preparation, plating layers, nickel coverage, and the way the bumper is handled after installation.
For the truck owner, three finish questions matter:
- What material is underneath the finish?
- How was the surface plated or polished?
- Where can salt, water, and dissimilar metals collect?
A triple-layer hexavalent chrome process with 35 microns of nickel can produce a deep mirror appearance when the underlying preparation is consistent. The nickel layer supports the visual depth and corrosion barrier, but stone impacts, scratches, trapped salt, and damaged edges still need attention. No finish can seal away poor mounting interfaces forever.
Match the finish to the work
| Operating condition | Sensible direction | Maintenance focus |
|---|---|---|
| Dry or mostly inland routes | Chrome-plated carbon steel or 430 stainless | Wash debris off the face and inspect chips |
| Regular winter salt | 430 with disciplined rinsing, or 304 for more exposure tolerance | Clean brackets, cutouts, folds, and fasteners |
| Coastal or persistently wet routes | 304 stainless with a suitable finish | Control deposits and inspect crevices often |
| Show appearance with working mileage | Mirror-polished chrome or stainless | Use safe wash products and address damage early |
Chrome-plated carbon steel can be the right value where the truck receives regular care and the owner wants a traditional show-truck look. Stainless can reduce concern about exposed substrate, but it doesn't eliminate staining or crevice corrosion. Contamination from road grime, iron particles, harsh cleaners, and trapped moisture can still mark the surface.
Avoid judging corrosion by the front face alone. Look behind the bumper, around the brackets, inside cutouts, along folded edges, and at bolt interfaces. If the bumper uses dissimilar metals, inspect those contact points for deposits and wear.
Polishing should restore a clean surface, not hide structural damage. A deep dent, torn mount, cracked weld, or shifted lamp opening calls for repair or replacement, not another round of compound.
Installation, Maintenance, and Warranty
The truck is back from a front-end hit, the replacement bumper is on the floor, and the pressure is to hang it fast and get the unit rolling. That is where rushed installs create expensive problems. A direct-fit bumper can save labor, but it still has to match the truck and sit where the factory geometry expects it to sit.
Start with the truck before you touch the new part. Check frame horns, brackets, tow points, lamp mounts, grille supports, and wiring for collision damage or twist. Then compare the replacement bumper to the one that came off. Verify the overall shape, mount locations, cutouts, drop, material, and finish. Front bumper replacement is not only about looks. If the bumper sits off-center, low, or under tension, you can end up with poor lamp aim, blocked access points, rubbing panels, or ground-clearance issues that show up the first time the truck hits a ramp or yard entrance.
Installation checklist
- Inspect the truck first: Check frame horns, brackets, tow points, lamps, grille supports, and wiring for collision damage.
- Confirm the part: Match the bumper to the model, year, frame configuration, mount type, and cutout selection.
- Protect the finish: Use clean lifting equipment and padding. Do not drag a polished bumper across concrete or set hardware on the visible face.
- Test alignment: Install fasteners loosely first so the bumper can settle into position.
- Avoid field modifications: A true direct bolt-on part should not need drilling or cutting. Stop if holes do not align.
- Check the openings: Confirm that lamps, fog lights, tow holes, sensors, and reflectors sit correctly.
- Tighten correctly: Follow the bumper and truck manufacturer's torque requirements. Do not guess with an impact gun.
- Inspect after loading: Recheck fasteners, clearance, wiring, and lamp operation before the truck leaves the shop.
Check alignment from more than one angle. Sight along the top edge, compare both sides, and look at the gap relationship to the grille and hood. On a drop design, test the truck where it works. A bumper that clears the shop floor can still scrape on docks, steep aprons, or uneven yard entrances.
Cleaning starts the day the bumper goes into service. Rinse off salt and deicing residue from the face, underside, brackets, and cutouts. Pay special attention to 430 stainless, which, as noted earlier in the material section, has more limited resistance to salt spray and seawater than ordinary atmospheric exposure.
Use a simple inspection routine:
- After salt exposure: Rinse the face, underside, brackets, and cutouts.
- During wash days: Look for chips, dull spots, trapped grit, and new staining.
- At service intervals: Check bolt interfaces, welds, folded edges, lamp openings, and tow-point areas.
- After an impact: Inspect mounting alignment even if the chrome looks fine.
- Before long trips: Confirm lamp operation and tow-point access.
Warranty terms also need a close read. Coverage for defects in workmanship or materials does not usually cover collision damage, installation mistakes, poor cleaning practices, freight damage, or corrosion caused by neglected deposits. Photograph the bumper and packaging when it arrives, inspect it before installation, and report visible shipping damage through the seller's process.
Before you book the repair bay, confirm whether the bumper is ship-ready or made to order, and ask how LTL freight will be handled. That detail can add more downtime than the install itself.