

Kenworth T680 Chrome Bumper Buyer's Guide for 2026
You're at a Petro stop, looking at a new Kenworth T680 chrome bumper that won't line up with the brackets already on your truck. The part looked right online, but the bolt holes, fog-light openings, or bumper height don't match. Now the truck is waiting on another shipment instead of hauling a load.
That mistake is avoidable. A Kenworth T680 chrome bumper isn't a universal accessory. Generation, bumper style, bracket geometry, material, gauge, and cutouts all affect whether the part bolts on and works with the truck's safety equipment. Use the checklist below before you spend money, and treat fitment as seriously as the finish.
Table of Contents
- What Every T680 Driver Needs Before Buying a Chrome Bumper
- How the T680 Platform Shapes Bumper Fitment
- Chrome-Plated Steel vs SS 430 vs SS 304
- Cutouts and Style Options That Actually Fit the T680
- Bolt-On Installation and Bracket Fitment
- Lead Times, Shipping, Warranty, and Long-Term Care
- Ordering Through the 3D Configurator Step by Step
What Every T680 Driver Needs Before Buying a Chrome Bumper
The first check is the truck's build year. A 2013–2021 T680 belongs to the classic platform, while a 2022+ T680 Next Gen uses a different front-end architecture. Aftermarket listings commonly separate these generations because the mounting footprint and body packaging aren't interchangeable. One documented listing, for example, fits 2013 through 2021 trucks but excludes 2022 and newer models, so the model name alone isn't enough. See the Kenworth T680 corrosion-resistance guide before choosing a finish for a truck that works in salt, rain, or coastal air.
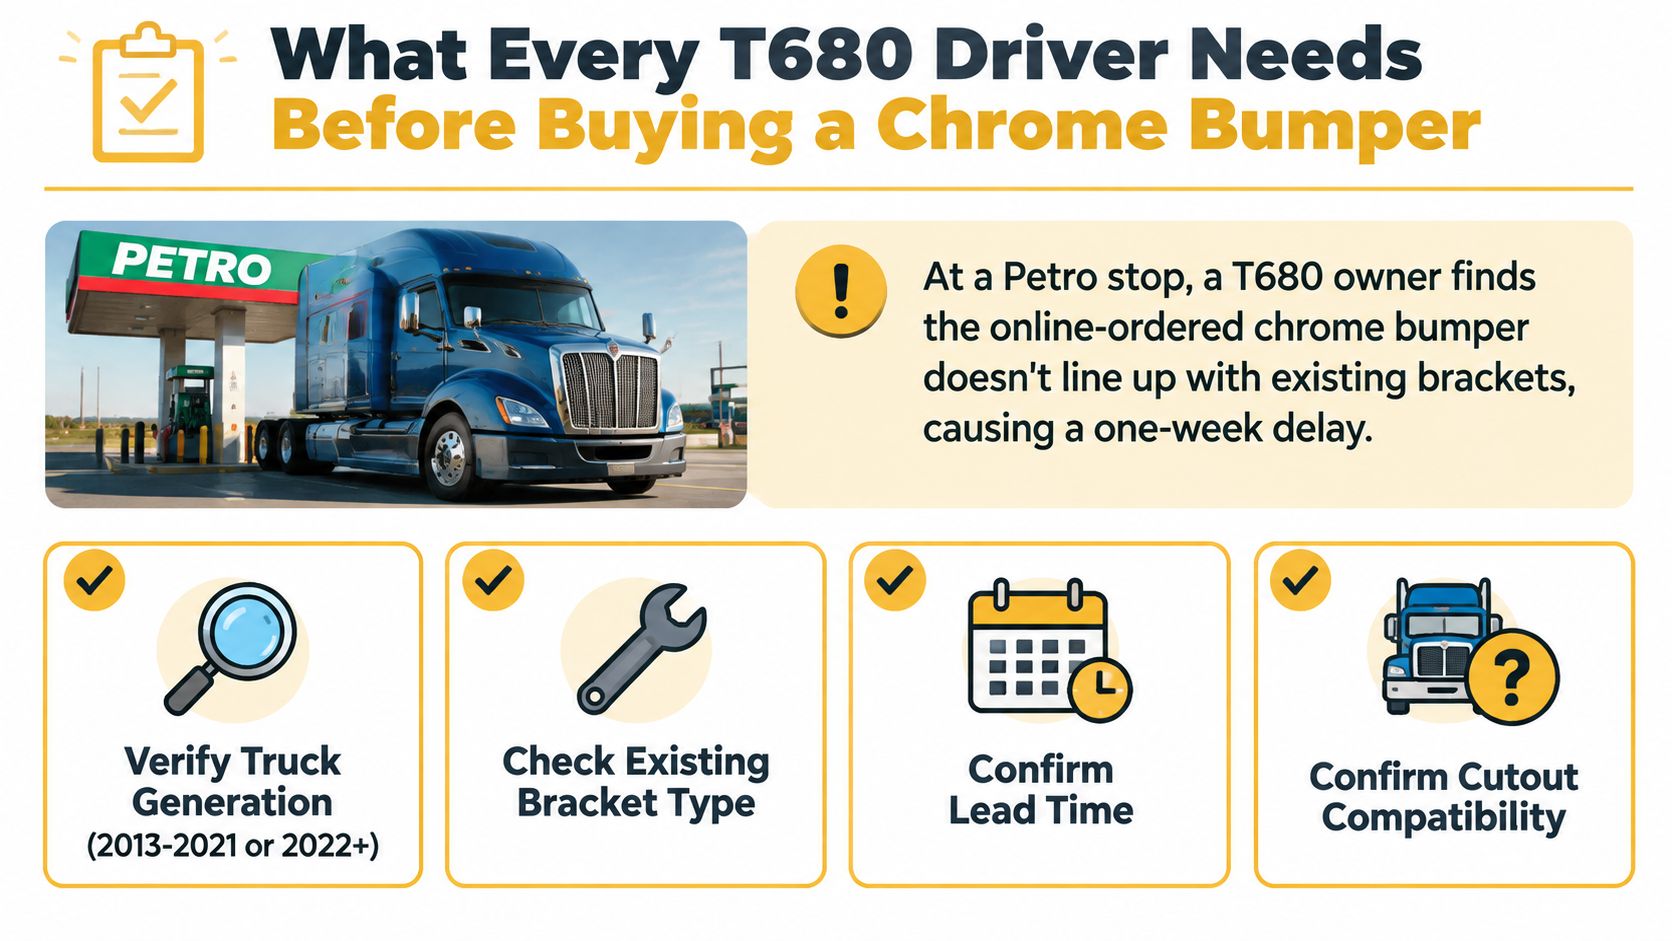
Use this counter checklist
- Confirm the build year: Check the VIN plate and registration, then classify the truck as 2013–2021 classic or 2022+ Next Gen. Don't rely on a seller's generic “T680” label.
- Identify the current bumper: Look at the truck's existing bumper before ordering. Set-back-axle, standard, and aerodynamic styles use different shapes and reliefs.
- Measure the brackets and openings: Check the existing mounting brackets, bumper height, fog-light spacing, tow-hole position, and any light openings. A clean-looking bumper still fails if the hardware doesn't align.
- Choose material for the route: Chrome-plated steel gives you a bright appearance and a traditional heavy-duty build. Stainless options make more sense when salt and moisture are constant.
The T680 platform has used aerodynamic bumper designs as part of its broader front-end packaging, not as decorative trim. Kenworth's 2013 introduction of an aerodynamic steel bumper option shows that the bumper was developed around the T680 hood and engine package, while the T680 data book documents model-specific bumper and frame dimensions. That history is why you need the correct bracket and body configuration.
Counter rule: If you can't confirm the generation, bumper style, bracket type, and cutout spacing, don't check out yet.
How the T680 Platform Shapes Bumper Fitment
Kenworth introduced the T680 aerodynamic steel bumper as an available option on August 29, 2013, according to the Kenworth T680 data book. The option fit both the then-new three-piece T680 hood at 119-inch BBC, optimized for the PACCAR MX-13 engine, and the standard-length 125-inch BBC hood. That detail matters because the bumper was engineered with the truck's hood, frame, and body layout in mind.
The same data book lists aerodynamic bumper configurations and notes a shared full-frame insert-length dimension of 21.26 inches for the T660, T680, T800, and T880. Shared platform dimensions don't make every bumper universal. They show that Kenworth builds around controlled mounting geometry, while the finished bumper still has to match the exact truck configuration.
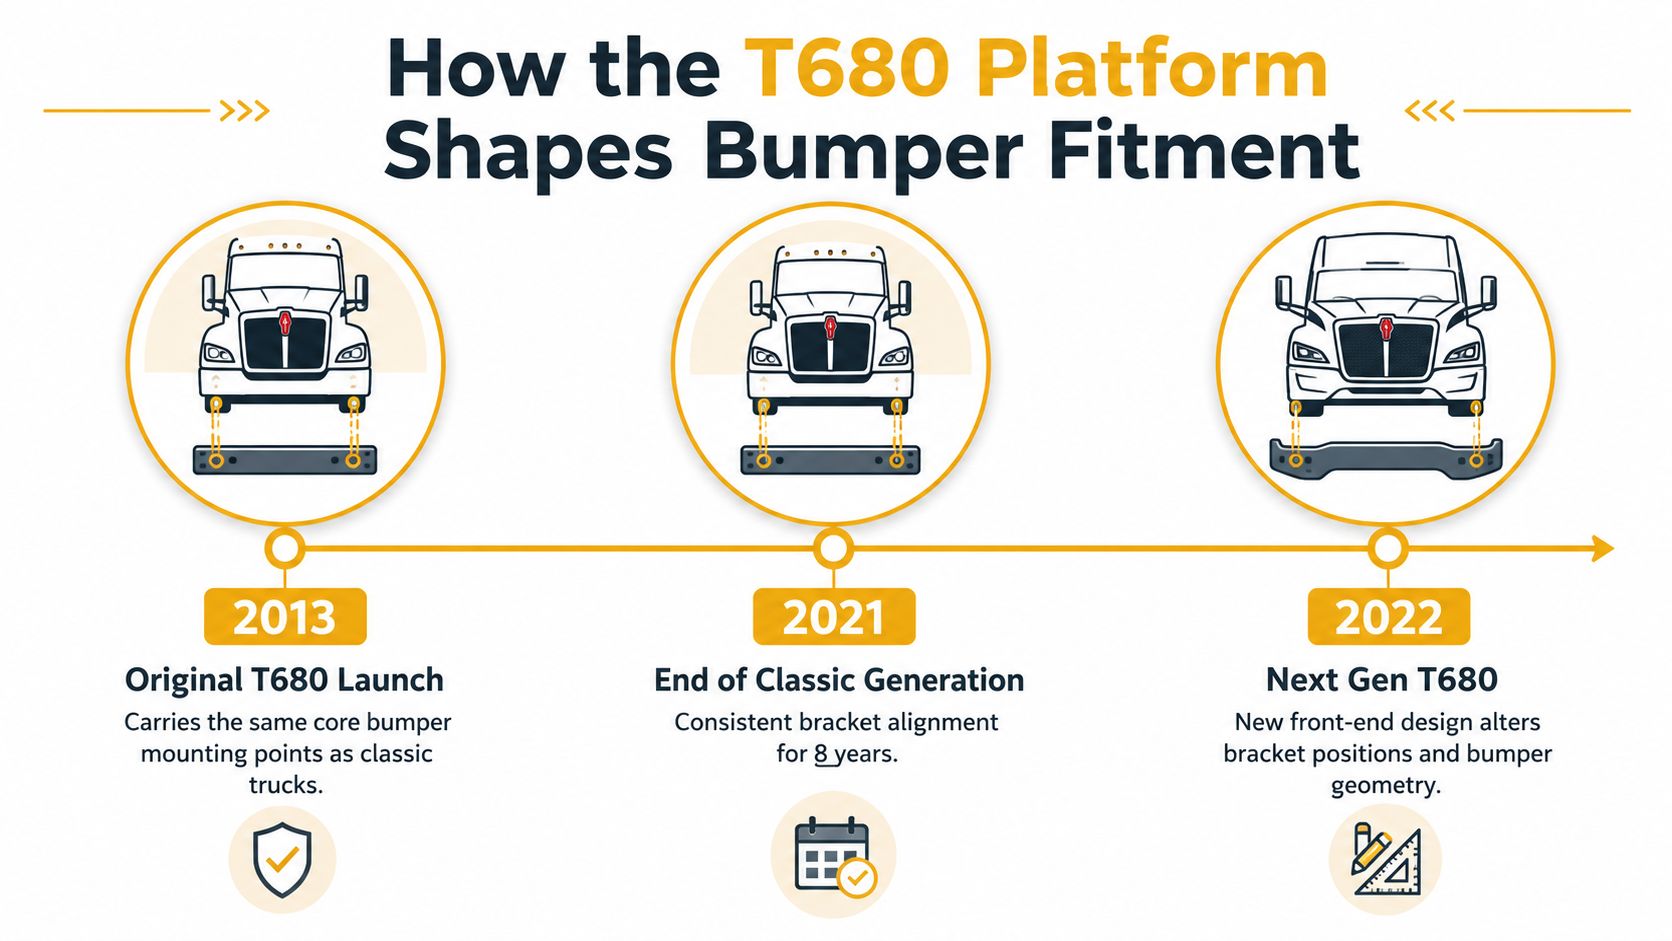
Verify the truck before selecting a part
Start with the VIN and build information. Then inspect the truck from below the cab. Look at where the side brackets meet the frame, how the center support sits behind the bumper, and whether the current face has tow, fog, radar, or light openings.
Aftermarket catalogs commonly split 2013–2021 T680 bumpers from 2022+ Next Gen parts. Newer listings identify separate Next Gen body styling, which is a warning against ordering from a single broad “T680” category. If the bumper face, valance, or bracket pattern looks different from your truck, stop and verify before ordering.
For a Next Gen truck, use a generation-specific product such as the Kenworth T680 Next Gen chrome bumper, then confirm the sensor and bracket options with the seller. For older applications, the Chrome bumper for Kenworth T680 (2008–2017) is listed as a direct bolt-on design with 10-gauge chrome-plated steel, an 11-gauge 430 stainless steel option, a Gauge-7 mounting bracket, and configuration-based tow, fog, and light cutouts.
If you can't prove whether the truck is a 2013–2021 classic or a 2022+ Next Gen, don't order. That one check prevents the most expensive fitment mistake.
Chrome-Plated Steel vs SS 430 vs SS 304
Choose the bumper material in the configurator before you choose the shine. Galhor's catalog lists chrome-plated carbon steel, 430 stainless steel, and 304 stainless steel. For a T680 running through salt, rain, and wash bays, those choices carry different maintenance and corrosion risks.
Chrome-plated steel delivers the familiar mirror finish and a traditional heavy-duty bumper structure. The plating remains the weak point. A stone chip that reaches the base metal can let moisture start corrosion beneath the finish. Order it for mostly regional or dry routes if you will rinse, inspect, and polish the bumper regularly.
430 stainless steel is the practical middle option. It provides moderate-to-good corrosion resistance in normal atmospheric exposure, but road salt and coastal air challenge it sooner than 304, as explained in Essentra's 304 versus 430 comparison. Use the 430 vs 304 stainless steel comparison while configuring the order. Choose 430 when you need a bright stainless appearance for mixed routes without selecting the higher corrosion resistance of 304.
304 stainless steel is the right order for harsh route exposure. It typically contains about 18% chromium and 8% nickel, while 430 typically contains about 16% chromium and no nickel, according to thyssenkrupp Materials. The nickel content improves resistance in salty and wet conditions. Guidance from Aoxing Metal describes 304 as offering roughly three to five times greater corrosion resistance than 430 in chloride or acidic conditions.
| Material | Corrosion Resistance | Finish & Polish | Best For | Price Tier |
|---|---|---|---|---|
| Chrome-plated carbon steel | Good until plating is breached | Bright mirror chrome, regular care required | Dry or regional routes with frequent polishing | Lower |
| 430 stainless steel | Better than plated steel in normal exposure, weaker than 304 around salt | Polishes well and keeps a stainless appearance | General owner-operator and fleet service | Mid |
| 304 stainless steel | Strongest choice for salty, wet, and coastal duty | Long-term polished appearance with less corrosion risk | Northern, coastal, and harsh-weather routes | Premium |
In the 3D configurator, set the material after confirming your T680 generation and before reviewing cutouts or gauge. For a 2013–2021 truck, plated steel suits controlled routes and frequent maintenance, 430 handles mixed service, and 304 earns its premium on salt-heavy routes. For a 2022+ Next Gen, apply the same material rule only after selecting the Next Gen bumper profile.
Decision rule: choose plated steel for lower initial cost and close maintenance, 430 for mixed routes, and 304 when salt exposure or long-term appearance matters more than purchase price.
Cutouts and Style Options That Actually Fit the T680
Cutouts decide whether the bumper works with the equipment already mounted behind it. A tow-hole opening, fog-light pocket, radar window, daytime-running-light opening, camera provision, or set-back-axle relief must match the truck's hardware and generation. A wrong opening can leave a sensor blocked, a lamp unsupported, or a bracket unable to seat.
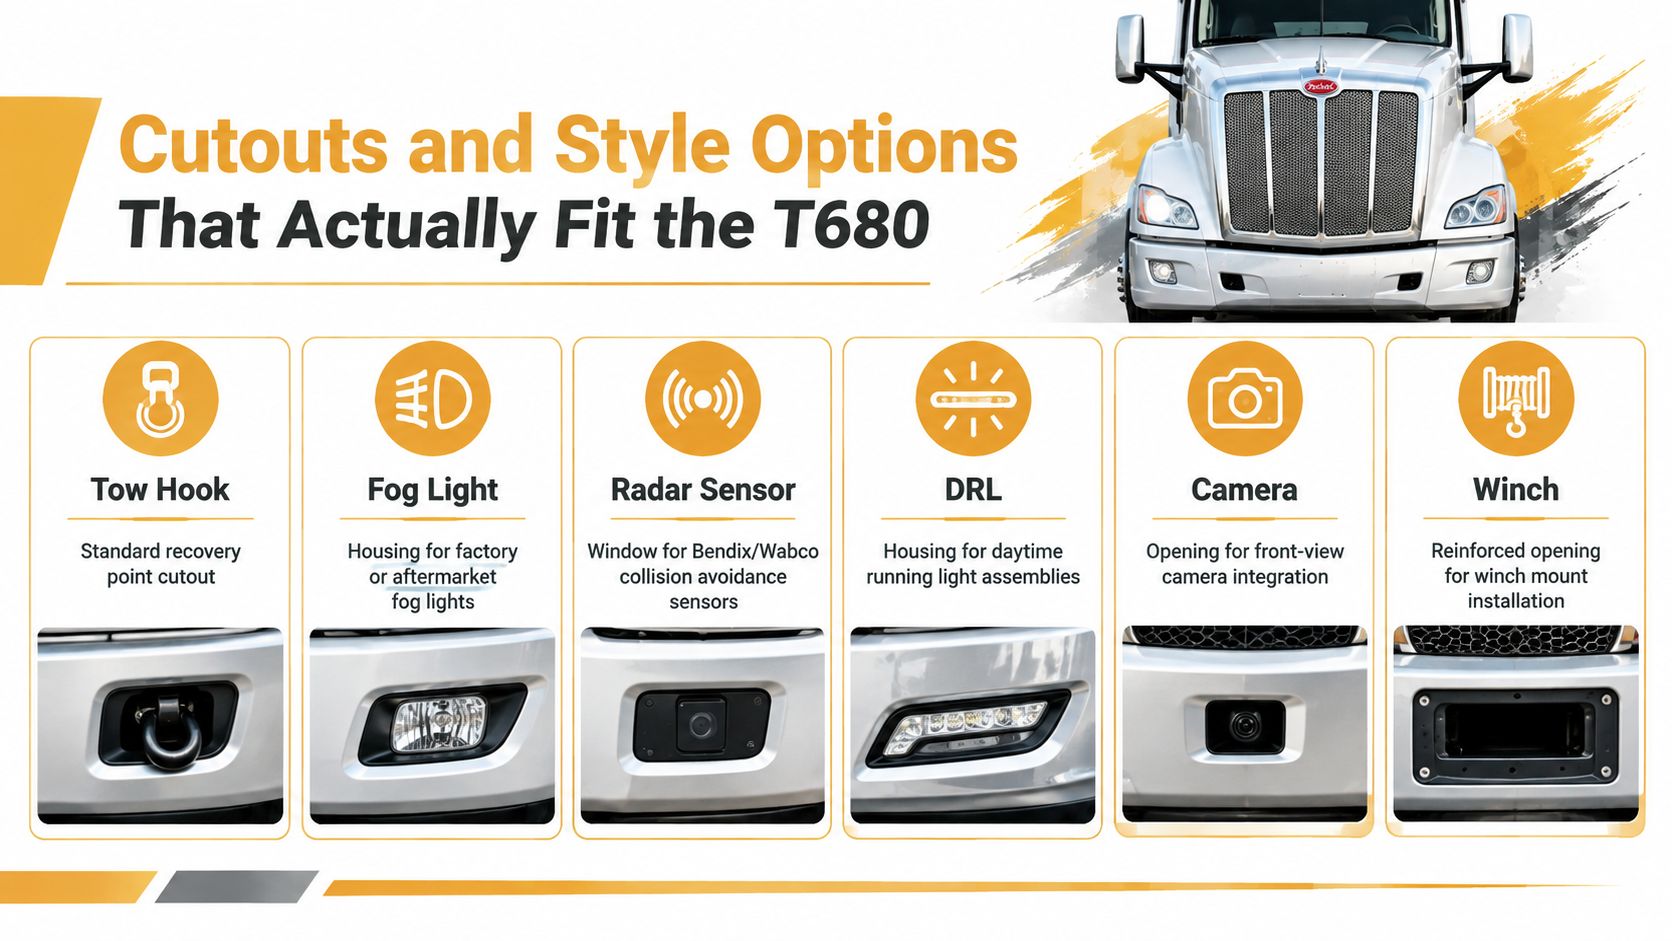
Match each opening to the truck
- Tow hooks: Select these when the truck needs a standard recovery-point opening. A day cab that works in yards, construction areas, or winter conditions benefits from keeping recovery access available.
- Fog lights: Choose fog-light pockets only when the lamps and their brackets match the bumper design. Measure the existing openings instead of assuming every T680 fog-light layout is identical.
- Radar sensor window: Trucks using Bendix or Wabco collision-avoidance hardware need the correct radar aperture and mounting position. Blocking or shifting the sensor can interfere with driver-assistance operation.
- DRL or marker-light openings: These are for the truck's existing daytime-running-light or marker-light assemblies. Order the opening only when the lamp style and location are confirmed.
- Camera opening: A front-view camera needs a clear, correctly placed window. Don't substitute a similar-looking light cutout.
- Set-back-axle relief: This shape gives the bumper clearance around the axle and front-end layout. A standard bumper face may contact or sit incorrectly on a set-back-axle truck.
A blank face is often the cleanest fleet specification when the truck doesn't need extra openings. It reduces the chance of ordering an unused cutout, but it still has to match the correct generation and bracket package.
Galhor pre-cuts configuration-based openings, but the buyer must select them at order time. Don't mix a classic-generation bracket with a Next Gen cutout pattern, or add a radar opening without confirming the sensor position. The bumper may look close while the hardware forces a return or a shop modification.
For common specifications, use these rules:
- Day cab with recovery work: Choose tow holes and the confirmed radar opening.
- Sleeper with fog lamps and a set-back axle: Choose fog pockets plus the correct set-back relief.
- Fleet replacement truck: Use a blank face unless factory lamps, radar, or tow access require openings.
Bolt-On Installation and Bracket Fitment
“Direct bolt-on” describes the installation method, not universal compatibility. A bolt-on Kenworth T680 chrome bumper still needs the correct generation, cab configuration, bracket face, and bolt pattern. A Next Gen bracket won't properly seat on a classic truck because both trucks carry the T680 badge.
Install it in shop order
- Park on level ground and secure the truck. Set the brakes, chock the wheels, and disconnect the batteries before working around lighting or sensor wiring.
- Remove the existing bumper. Unbolt the side and center brackets, supporting the bumper so it doesn't twist or fall against the fenders.
- Inspect the mounting hardware. Replace damaged bolts, bent brackets, cracked welds, and distorted shim points. Don't assume the old hardware is reusable.
- Dry-fit the replacement. Install the bumper loosely and check the reveal against the fenders, grille, hood, and valance before tightening anything.
- Align the cutouts. Confirm that tow equipment, fog lamps, marker lights, radar, and camera openings sit where the truck's components need them.
- Tighten evenly. Use the manufacturer's torque specification for the supplied M14 hardware. Don't guess, and don't over-torque into plastic trim.
Check the bumper on arrival before the shop removes the old one. Confirm the advertised gauge, inspect weld quality around the bracket returns, and look at whether the bracket face is stamped or welded. Aftermarket listings show T680 assemblies in 10-gauge and 11-gauge stainless, while a separate bumper-brace listing identifies 7-gauge stamped steel with dimensions of 17 9/16 inches by 1 1/2 inches by 7.8 inches, supporting the point that the bumper system includes structural pieces, not just a decorative skin. The dimensional reference comes from the Kenworth T680 bumper assembly listing.
Installation warning: Reusing bent hardware, skipping shim washers, or tightening against plastic trim can damage the finish before the truck leaves the bay.
Lead Times, Shipping, Warranty, and Long-Term Care
A bumper purchase includes more than the part. You're also paying with shop time, freight handling, storage space, and downtime if the order arrives with the wrong generation or a damaged finish.
Lead times vary by configuration. Stocked options may run roughly three to four weeks, while custom cutouts or 304-grade builds may take six to eight weeks, based on the provided manufacturing guidance. Made-to-order carbon steel units may also show a longer production window, so get the written lead time before approving the order. A rush request can shorten scheduling, but it may affect warranty coverage and should be confirmed in writing.
Plan the freight before the bumper ships
Most heavy bumpers move by LTL freight on a pallet. The expected shipment can weigh roughly 150 to 250 pounds, so a shop without a forklift should request liftgate service. Residential delivery can add a fee, and the receiver needs to inspect the pallet for crushed corners, torn wrapping, bent brackets, or exposed chrome before signing.
Use this receiving process:
- Photograph the pallet: Take pictures before opening it.
- Inspect every edge: Look for dents, plating damage, and distorted mounting faces.
- Compare the build sheet: Verify material, gauge, cutouts, bracket style, and generation.
- Report damage quickly: Keep packaging until the carrier and seller finish the claim review.
Warranty terms depend on material and seller policy. The supplied guidance describes a one-year limited warranty for chrome peeling, weld failure, and bracket cracking on 430 and 304 builds, and a six-month limited warranty for chrome-plated carbon steel. Confirm the written warranty before payment, especially if you request custom work or expedited handling.
Keep the finish from becoming a repair bill
Rinse road salt off the bumper weekly during winter service. Use a non-abrasive polish on 430 and 304 stainless, and touch up chips in plated steel before moisture reaches the base metal. Harsh abrasives, aggressive compounds, and neglected salt residue shorten the useful life of any finish.
| Material | Lead Time | Warranty | Expected Service Life | Maintenance |
|---|---|---|---|---|
| Chrome-plated carbon steel | Confirm with seller, especially for made-to-order builds | Six-month limited coverage described in the supplied guidance | Roughly two to three years in the stated ownership comparison | Frequent rinsing, polishing, and prompt chip repair |
| 430 stainless steel | Confirm by configuration | One-year limited coverage described in the supplied guidance | Roughly five to seven years in the stated ownership comparison | Rinse salt and use non-abrasive stainless or chrome polish |
| 304 stainless steel | Custom builds may require a longer lead time | One-year limited coverage described in the supplied guidance | Roughly five to seven years in the stated ownership comparison | Routine washing and non-abrasive polishing |
The ownership math favors stainless for trucks that stay on the road in corrosive conditions. A cheaper plated bumper can make sense for a dry-route truck with disciplined maintenance, but 304 is usually the more rational long-term choice for salt-heavy service.
Ordering Through the 3D Configurator Step by Step
Open the T680 product configurator and start with the only choice that can't be corrected by polishing later, the truck generation. Select 2013–2021 classic or 2022+ Next Gen. If that field is wrong, the bracket alignment and body fit can be wrong even when every other option looks correct.
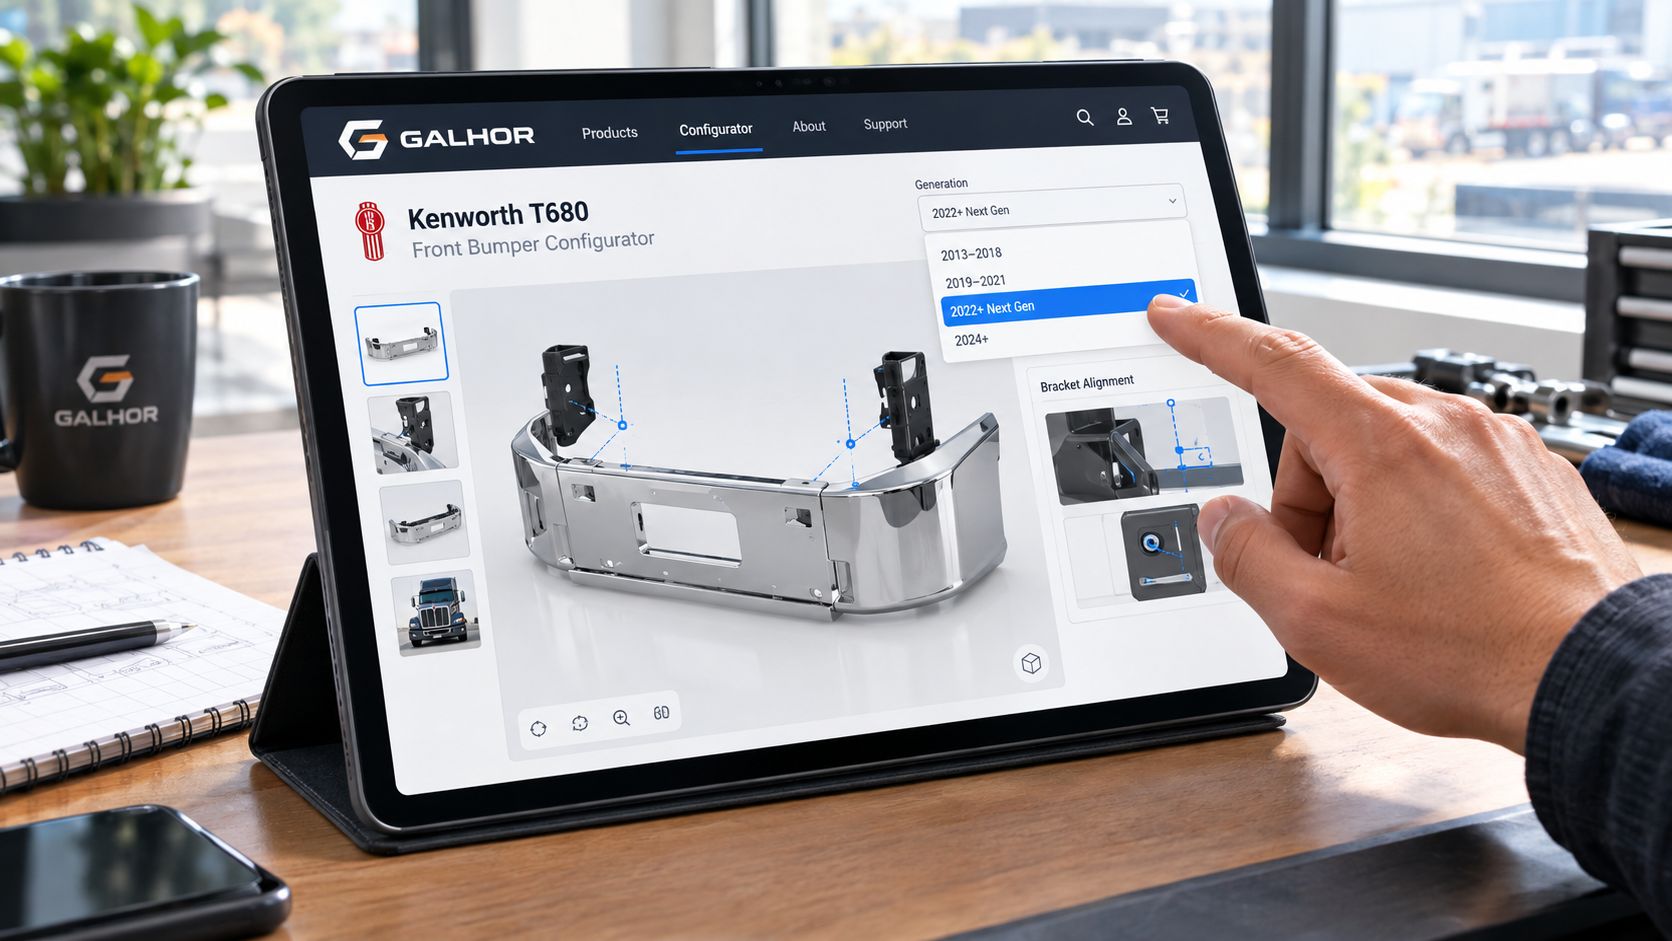
Build the bumper in this order
- Select the platform: Choose the classic or Next Gen T680 range based on the VIN and physical truck.
- Pick the base material: Compare chrome-plated carbon steel, 430 stainless, and 304 stainless against your climate and cleaning routine.
- Choose the gauge: The proposed configuration includes 11-gauge standard and 1/4-inch heavy options. Select the heavier construction when the truck's work demands more front-end protection, but confirm the resulting weight with the seller.
- Add the cutouts: Work through tow holes, fog-light pockets, radar sensor openings, cab marker lights, and set-back-axle relief. Only select openings that match installed equipment.
- Confirm the bracket package: Check the bracket style and bolt pattern against the OEM T680 mounting points. Don't rely on the bumper face alone.
- Rotate the 3D render: View the bumper from multiple angles. Look for clearance at the fenders, grille, hood, valance, lamps, and sensor windows.
- Enter the VIN and shop notes: Add the truck identification, current bumper style, lighting details, axle position, and any radar or camera equipment.
- Request a fitment-checked quote: Get the material, gauge, cutouts, lead time, freight method, and warranty in writing.
- Approve the proof: Review the final build sheet before paying the deposit. Confirm the listed shipping weight and pallet dimensions so the receiving shop is ready.
The live render helps you catch an obvious style mistake, but it doesn't replace VIN and bracket verification. Use the configurator to make the choices visible, then have the fitment details checked before production.
Galhor Inc. offers configurable chrome bumpers for Class 8 trucks, including Kenworth T680 applications, with generation, material, gauge, bracket, and cutout choices built into the order flow. Visit Galhor Inc. to configure the right Kenworth T680 chrome bumper, confirm fitment before checkout, and arrange freight delivery for your shop or fleet.