

Stainless Steel Truck Bumper: The Complete Buyer's Guide
You're pushing through a Michigan I-75 salt run in March, and brine mist is glazing every chrome surface near the curb. The truck still looks sharp from the fuel island, but the question is what sits under that shine. A bumper is exposed to road debris, winter de-icers, summer UV, bug residue, moisture, and repeated vibration for the life of the truck.
Choosing a stainless steel truck bumper is a working decision, not just a styling choice. The right grade, thickness, finish, and mounting pattern can protect uptime and keep a Peterbilt, Kenworth, Freightliner, or Volvo looking professional through long hauls. The wrong combination can leave you paying for coating repairs, fitment fixes, or an early replacement.
Table of Contents
- Why a Stainless Steel Truck Bumper Matters on a Working Rig
- The Three Material Options Galhor Builds With
- Comparing 304 and 430 Stainless for Real-World Routes
- Fitment and Compatibility for Peterbilt, Kenworth, Freightliner, and Volvo
- Using the 3D Configurator to Lock In Fitment
- Maintenance, Shipping, Warranty, and Lead Times
- Ordering the Right Bumper and Maximizing Uptime
Why a Stainless Steel Truck Bumper Matters on a Working Rig
A Class 8 truck bumper has to do more than fill the space under the grille. Federal rules for vehicles over 10,000 pounds GVWR require the rear bumper or rear frame to be permanently attached, no wider than the truck, no more than 30 inches above the highway when moving, and made of heavy-gauge steel, as summarized in this technical comparison of 430 and 304 stainless steel. Those requirements explain why mounting strength and material durability matter more than a polished appearance alone.
A working rig takes punishment from three directions:
- Road debris: Gravel, tire rubber, rainwater, and minor contact can chip or bend exposed surfaces.
- Winter chemistry: Salt and de-icing fluids sit in seams, around brackets, and inside cutouts, where corrosion can start.
- Summer exposure: Sunlight, bugs, heat, and repeated washing can wear down a neglected finish.
Plain carbon steel depends heavily on its plating or coating for rust protection. Once a chip reaches the substrate, corrosion can spread beneath the finish. Stainless steel starts with a corrosion-resistant alloy, so it gives the bumper a stronger base for fleets that run through wet, salty, or humid conditions.

Why the ownership window matters
Owner-operators covering heavy annual mileage can't treat bumper corrosion as a detail. A peeling finish may force an unscheduled shop visit, while a bent bumper can delay a load, interrupt a delivery schedule, or require a replacement before the truck's planned trade cycle.
A heavy-gauge bumper also needs reinforcement that matches the truck's use. A thin decorative shell may look good in a showroom but can flex around tow-hook pockets, light openings, and bracket interfaces. Galhor's catalog includes a Steel chrome bumper made from 10-gauge chrome-plated steel, with a mirror-polished finish, direct bolt-on installation, and standard or blind mount options.
The practical build choices are chrome-plated carbon steel, chrome-plated 430 stainless, and chrome-plated 304 stainless. Each can deliver a polished truck appearance, but they don't offer the same corrosion margin or lifecycle value.
The Three Material Options Galhor Builds With
The material under the finish determines how a bumper behaves after the first scratch, wash, or salt season. Galhor builds with three common tiers, and each one fits a different operating budget and route profile.
Chrome-plated carbon steel
This is the traditional OE-style replacement choice. Carbon steel provides a solid structural base, while the chrome system supplies the visible finish and the first barrier against moisture. It can make sense for a truck that spends less time in aggressive weather or for a buyer focused on initial material cost.
The weak point is underneath the plating. If corrosion reaches exposed carbon steel through a chip, seam, or damaged edge, the substrate doesn't have stainless steel's built-in resistance. Cleaning and inspection matter more, especially around mounting holes and lower edges.
Chrome-plated 430 stainless
Grade 430 is a ferritic stainless steel with about 16–18% chromium and little to no nickel, according to this 304 versus 430 materials comparison. It adds a corrosion-resistant stainless substrate while keeping material cost below 304. That makes it a practical middle tier for many regional and long-haul applications.
430 resists ordinary atmospheric exposure, fresh water, steam, many petroleum products, and organic materials. Its resistance is lower in chloride-heavy environments, and Grade 430 technical data notes that it reaches maximum corrosion resistance in a highly polished or buffed condition.
Chrome-plated 304 stainless
Grade 304 is the stronger choice for severe exterior exposure. It generally contains about 18–20% chromium and 8–10.5% nickel, an alloy balance that improves resistance to chloride and acidic environments. The added nickel raises material cost, but it gives northern, coastal, and high-wash fleets more protection against pitting and rust creep.
Galhor's chrome process adds another barrier. The hexavalent triple-layer system uses copper for leveling, nickel for hardness and corrosion protection, and chrome for the mirror surface and tarnish resistance. The process includes 35 microns of electrolytic nickel, which helps separate the stainless substrate from the outside environment.
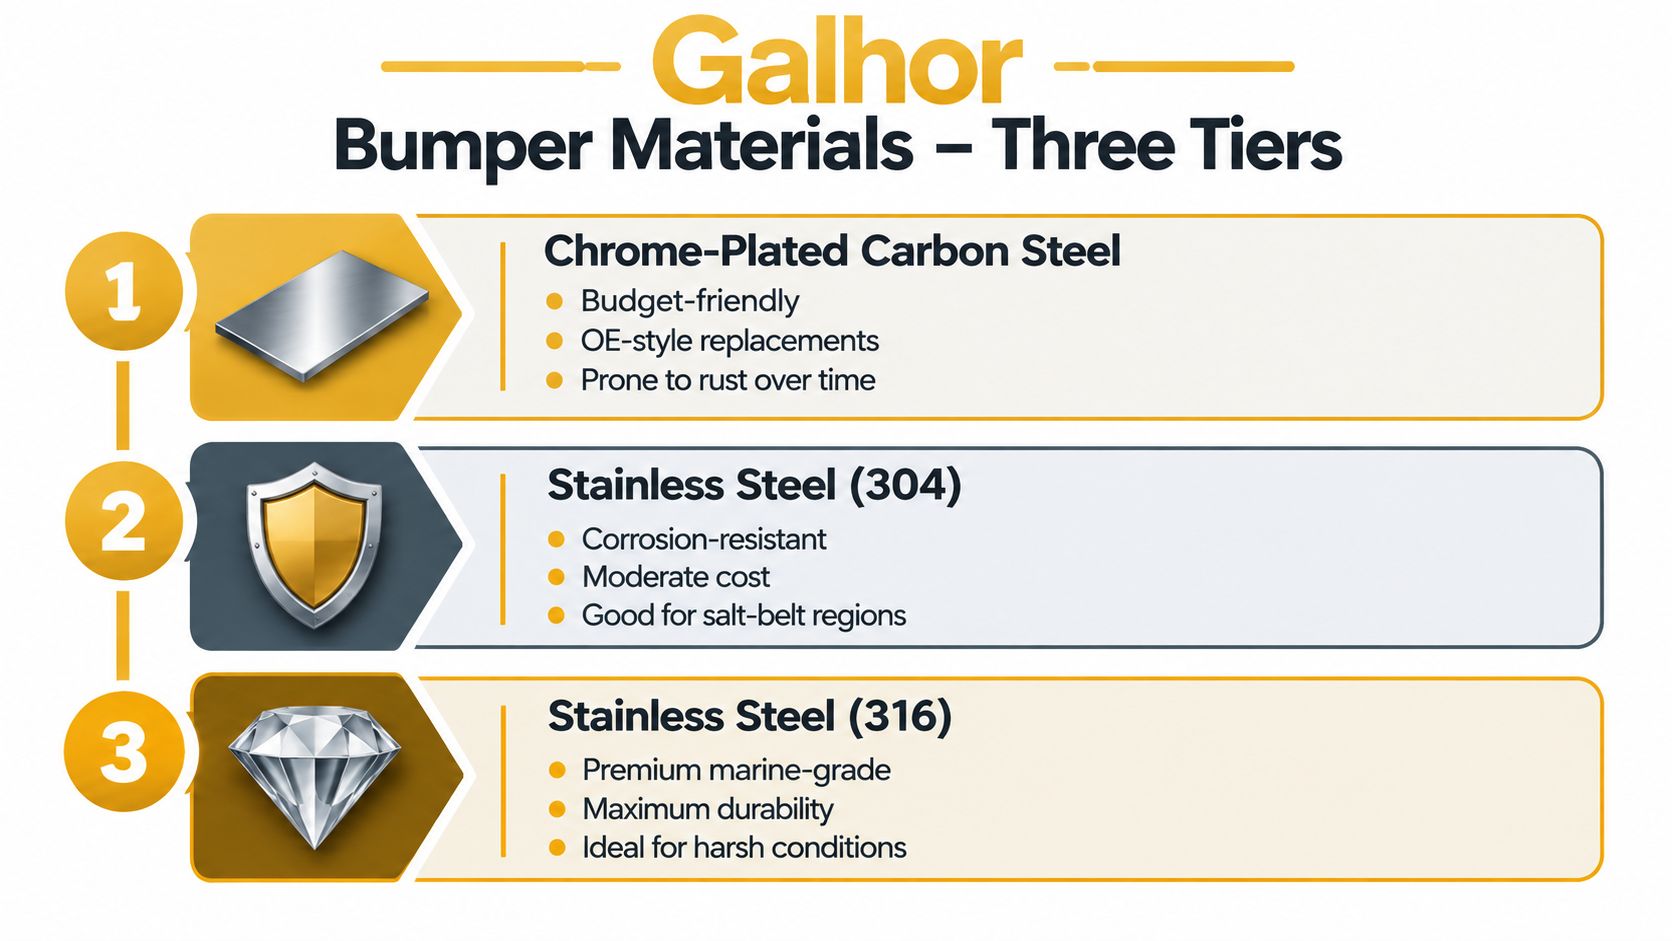
The difference between stainless and carbon steel is covered in this stainless steel versus carbon steel bumper guide. The key point is simple. Chrome gives every option its appearance, but the substrate determines how much margin you have after the finish is damaged.
Comparing 304 and 430 Stainless for Real-World Routes
A truck that runs winter salt, coastal air, or chemical splash needs a different bumper grade than one working mostly in dry, moderate weather. The 304 versus 430 decision rests on alloy chemistry, chloride exposure, and lifecycle cost. Grade 430 contains about 16–18% chromium with little to no nickel, while 304 generally contains about 18–20% chromium and 8–10.5% nickel. That added nickel helps 304 resist pitting and crevice corrosion in chloride and acidic service, as explained in this 304 stainless plate resource.
| Property | 304 Stainless | 430 Stainless |
|---|---|---|
| Chromium content | About 18–20% | About 16–18% |
| Nickel content | About 8–10.5% | Little to none |
| Chloride exposure | Better resistance to pitting and crevice corrosion | More vulnerable in aggressive salt service |
| Typical fit | Coastal, northern, chemical, and all-weather routes | Milder atmospheric exposure and cost-sensitive builds |
| Material cost | Higher | Lower than 304 |
| Maintenance risk | Lower corrosion risk in severe service | Greater need for cleaning and inspection in salt |
Match the grade to the route
A Midwest dry van operating in moderate weather may be a sound 430 application. The owner still needs to wash the bumper, inspect the finish, and address chips before moisture reaches vulnerable areas. 430 keeps the initial material cost lower, but it leaves less margin when salt exposure becomes routine.
A Northeast reefer running winter routes has a stronger case for 304. Repeated road salt and de-icing chemicals can expose weaknesses in a lower-cost grade, especially around seams, cutouts, and damaged finish areas.
Gulf Coast chemical haulers deal with humid air, frequent wash cycles, and potentially aggressive splash. For that work, 304 provides a safer corrosion choice. Mountain Western routes vary by elevation and season. Evaluate the truck by its worst regular exposure, including treated passes and wet coastal runs, rather than by the conditions at its home yard.
Route rule: Regular road salt, de-icing chemicals, coastal air, or repeated wet service point toward 304. Mild exposure and a tighter budget can make 430 a reasonable compromise.
Compare the material upcharge with the labor and downtime involved in removing, refinishing, or replacing a bumper later. Exact pricing varies with configuration, thickness, cutouts, and finish, so the difference between grades is not identical on every build. Choose by route exposure and expected service life, not the lowest purchase invoice.
Fitment and Compatibility for Peterbilt, Kenworth, Freightliner, and Volvo
A universal bumper is usually a poor plan for a Class 8 truck. The bumper has to meet the hood, grille, fenders, brackets, lights, tow hooks, and chassis geometry without forcing the installer to improvise.
Peterbilt 379, 389, and 567 trucks can differ in hood shape, fender cut, and front-end layout. A Peterbilt 389 bumper must match the specific front-end package, not just the badge on the hood. Kenworth W900, T680, and T880 applications can vary in bracket spacing and tow-hook position.
Freightliner Cascadia and Coronado bumpers need attention around air dams, chassis fairings, and lower clearance. Volvo VNL and VNX installations can be affected by headlight bezels, washer routing, and sensor locations. The same brand can use different bumper skins, reinforcement bars, or mounting points across model years.
What direct bolt-on really means
A proper direct bolt-on bumper copies the truck's original mounting points. The installer shouldn't need to cut the bumper, drill new holes, or stack shims to correct a poor fit. Correct geometry reduces stress at the brackets and helps prevent vibration-related cracks.
Before ordering, verify:
- Truck identity: Confirm brand, model, model year, and cab or hood style.
- Mounting pattern: Check standard mount, blind mount, bracket spacing, and reinforcement requirements.
- Front-end options: Identify fog lights, parking sensors, air horns, washer nozzles, and lighting cutouts.
- Road equipment: Make sure added lighting, reflectivity, height, and dimensions remain compliant with applicable rules.
FMVSS 581 focuses on low-speed bumper performance, including 2.5 mph barrier impacts for front and rear testing and 1.5 mph corner pendulum impacts, with contact in the 16–20 inch bumper-height zone. The current Part 581 regulation shows why bumper design isn't only about appearance.
| Brand | Models | Typical model years | Mount style | Option package notes |
|---|---|---|---|---|
| Peterbilt | 379, 389, 567 | Verify exact year | Direct bolt-on geometry | Confirm hood, fender, tow-hook, fog-light, and sensor options |
| Kenworth | W900, T680, T880 | Verify exact year | Model-specific brackets | Check bracket spacing, tow hooks, lights, and air-horn clearance |
| Freightliner | Cascadia, Coronado | Verify exact year | Chassis-specific mounting | Check air dam, fairing, fog-light, and sensor clearance |
| Volvo | VNL, VNX | Verify exact year | Platform-specific mounting | Confirm headlight bezel, washer routing, and sensor cutouts |
Using the 3D Configurator to Lock In Fitment
The safest way to order a custom bumper is to settle the geometry before the production slot is assigned. Galhor's 3D configurator gives the buyer a visual way to confirm the truck platform, bumper profile, openings, and finish in one order path. This 3D configurator guide explains why that approach is more precise than choosing from a generic product photo.
Build the bumper in the right order
- Select the brand. Start with Peterbilt, Kenworth, Freightliner, or Volvo.
- Choose the model and exact year. This narrows the base geometry and helps prevent a bumper from being assigned to the wrong hood or chassis.
- Pick the bumper style. Options can include full wraparound, butterfly, set-back, or dock-height designs.
- Add the required cutouts. Select openings for tow hooks, air horns, fog lights, washer nozzles, and OEM parking sensors.
- Choose the material and finish. Compare chrome-plated carbon steel, chrome-plated 430 stainless, and chrome-plated 304 stainless.
- Add supporting features. Reinforcement bars, polished accents, and lighting brackets should match the truck's actual equipment.
- Review the render and specification sheet. Check model year, mount style, cutouts, and finish before submitting the order.
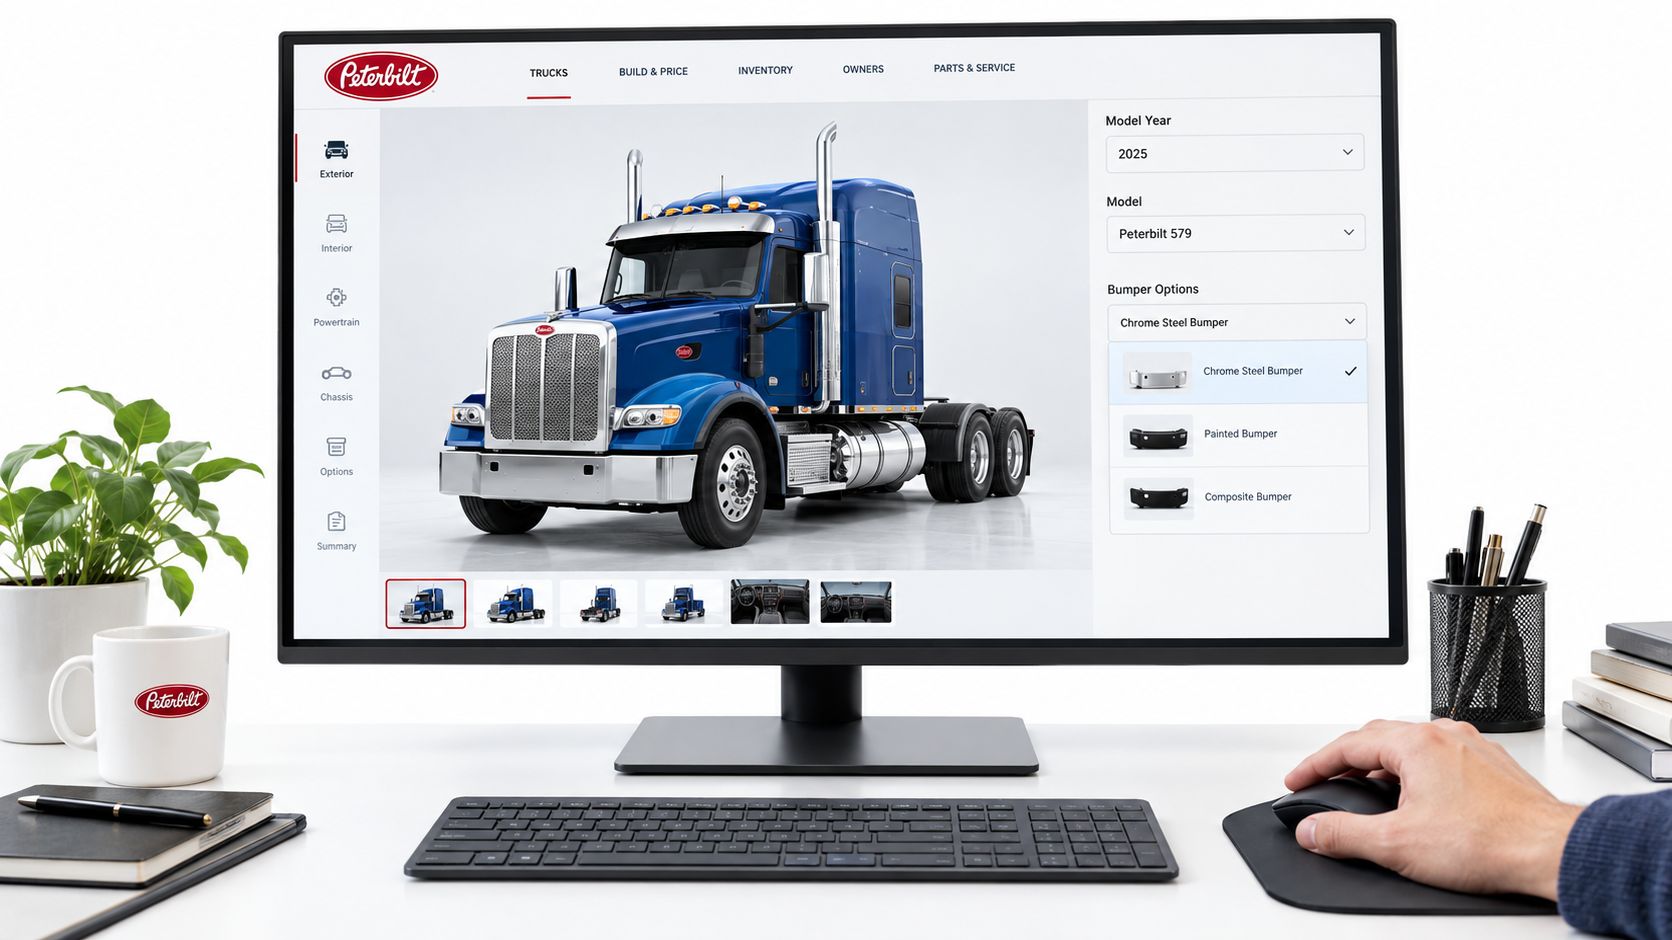
The visual preview won't replace a careful truck inspection, but it gives the buyer and installer a shared reference. That matters when a bumper includes integrated LEDs, sensors, air horns, or unusual tow-hook pockets.
Before approval: Compare the rendered configuration with the truck in the yard. A photo of the front end, VIN information, and confirmed option package can prevent a costly fitment mistake.
Locking the configuration before shipping can reduce return freight problems, avoid order changes, and put the correct bumper into production without back-and-forth corrections. For a fleet, it also creates a repeatable specification for the next truck on the same platform.
Maintenance, Shipping, Warranty, and Lead Times
A stainless or chrome-plated bumper still needs scheduled care. Stainless handles corrosion better than plain carbon steel, but road salt, magnesium chloride, grime, and trapped moisture can stain or attack damaged spots. Chrome also holds its finish longer when contamination is removed before it sits on the surface.
Keep the surface service-ready
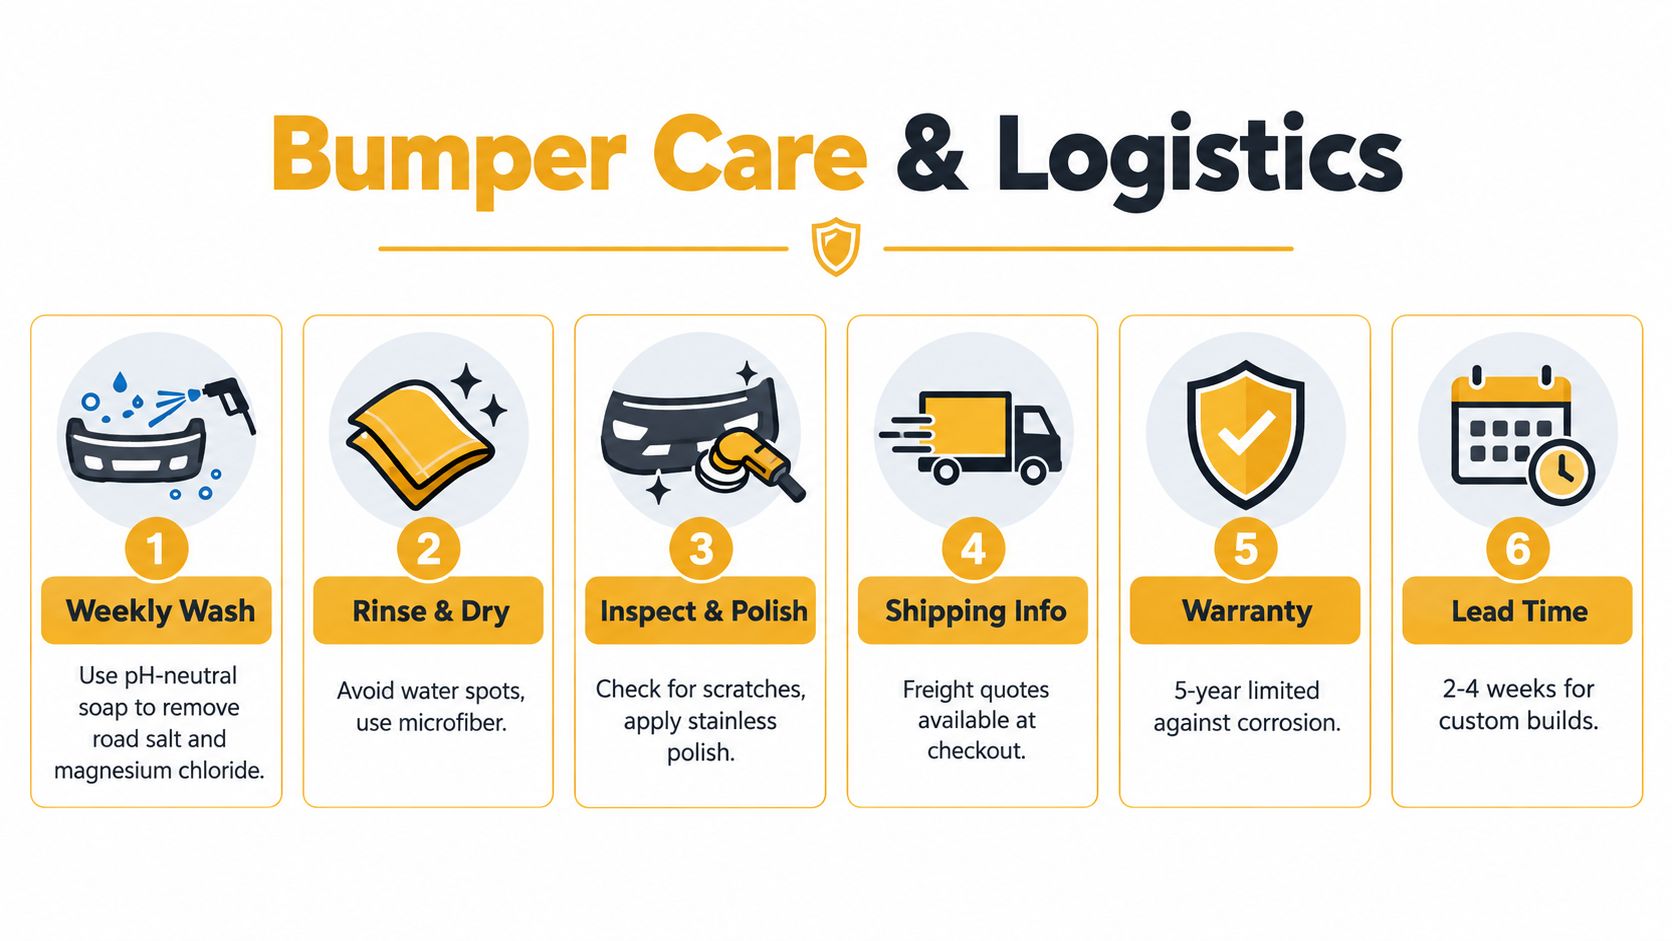
Wash the bumper with pH-neutral soap, especially after exposure to salt or magnesium chloride. Rinse thoroughly and dry with a microfiber cloth to prevent water spots around seams and cutouts.
Check these areas during routine service:
- Cutout edges: Look for chips around fog-light, sensor, and washer openings.
- Tow-hook pockets: Remove trapped debris and check for impact damage.
- Bracket interfaces: Inspect fasteners, mounting surfaces, and breaks in the coating.
- Lower corners: Watch for road spray and accumulated debris.
A non-abrasive chrome sealant can help protect the finish. Galhor's maintenance guidance specifies application every 90 days on 430 builds and every 120 days on 304 builds, so match the service interval to the selected grade. Avoid aggressive compounds and abrasive pads, which can haze a mirror finish.
Plan freight before the truck enters the shop
Galhor states that its warranty is a 12-month limited warranty covering plating adhesion, weld integrity, and bracket fitment. Impact damage and chemical exposure are excluded, which makes regular inspection and proper cleaning part of the ownership plan.
Galhor's published lead-time guidance lists standard 430 builds at 4–6 weeks and 304 builds at 6–8 weeks, reflecting plating cycles and quality control. The same information says in-stock stainless flat bumpers may ship within 48 hours, while made-to-order carbon steel units typically ship in 4–6 weeks.
Bumpers ship triple-stacked in custom A-frame crates through LTL freight, FOB Galhor Texas. Confirm freight class, commercial or residential delivery, and liftgate requirements when ordering. Missing dock details can delay the appointment even when the bumper is ready.
Ordering the Right Bumper and Maximizing Uptime
The best bumper purchase combines three decisions: the material grade must match the route, the mounting geometry must match the truck, and the configuration must match the equipment installed on the front end. A polished finish won't compensate for the wrong bracket pattern, and a low material cost won't look economical after repeated corrosion repairs.
For an owner-operator, the ordering path should be straightforward:
- Configure the bumper by brand, model, year, style, cutouts, and finish.
- Confirm the model-year information against the truck in the yard.
- Review and approve the render and generated specification.
- Lock the production slot and request freight information.
- Prepare the shop for a direct bolt-on installation using the existing mounting points.
Choose 304 stainless for regular chloride exposure, coastal air, harsh winter routes, or frequent wet service. Choose 430 stainless when exposure is milder and the lower material cost fits the maintenance plan. Choose chrome-plated carbon steel when budget and OE-style appearance lead the decision, but understand that the plating carries more of the corrosion-protection burden.
Fleet manager checklist
- Standardize by platform: Record the correct bumper specification for each Peterbilt, Kenworth, Freightliner, or Volvo model and year.
- Coordinate deliveries: Stagger freight arrivals so trucks keep rotating through the shop.
- Confirm cores: Ask about core return logistics before scheduling installation.
- Review freight needs: Set commercial delivery, dock access, and liftgate requirements early.
- Protect the install window: Have brackets, lights, sensors, and fasteners ready before the bumper arrives.
A direct-fit bumper reduces installation uncertainty and helps the truck return to service with less disruption. Configure the right material and geometry first, then request the freight quote so the dock date and shop schedule are clear before the truck is parked.
Galhor Inc. offers model-specific Class 8 bumpers in chrome-plated carbon steel, chrome-plated 430 stainless, and chrome-plated 304 stainless, with 3D configuration for fitment and cutouts. Visit Galhor Inc. to configure your Peterbilt, Kenworth, Freightliner, or Volvo bumper and request freight details before you order.