

Heavy Duty Bumper Replacement: Owner-Operator Guide
You hit a piece of road debris on the last run. The bumper is bent, the chrome is peeling, and one corner now sits closer to the tire than it should. Your heavy duty bumper replacement can't wait, especially if the damage affects the mounting points, lights, or front-end clearance.
A bumper is part of the truck's working front end. The right replacement must match the exact make, model year, cab setup, cutouts, mount style, material, thickness, and finish. A direct-fit part can save shop time, but only if the structure behind the old bumper is still sound.
Table of Contents
- Why Heavy Duty Bumper Replacement Is Critical for Uptime
- Understanding the Heavy-Duty Truck Aftermarket
- Pre-Installation Checks and Safety Protocols
- Selecting the Right Galhor Bumper Material
- Removing the Old Bumper and Installing the New One
- Troubleshooting and Post-Installation Care
Why Heavy Duty Bumper Replacement Is Critical for Uptime
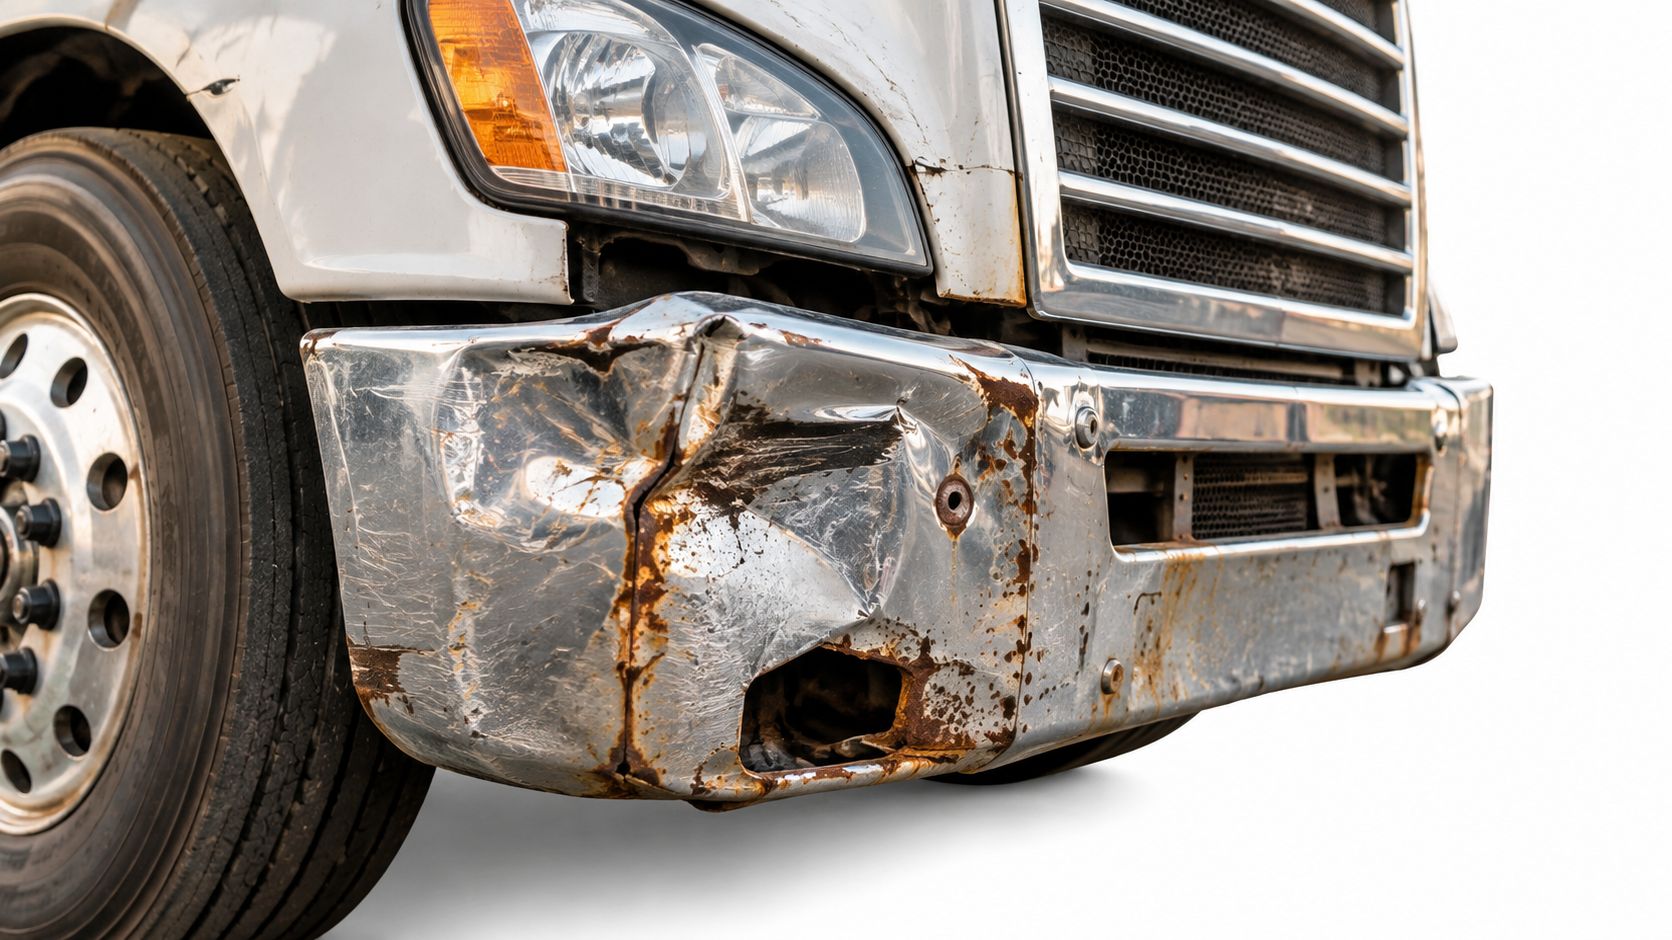
A damaged bumper isn't only a cosmetic problem. A twisted face bar can interfere with lighting, expose front-end components, rub against a tire, or place stress on brackets that were already weakened by rust. Those issues can turn a simple repair into a roadside delay or an out-of-service inspection problem.
Class 8 trucks take abuse at the front. Gravel, road debris, wildlife, parking lot impacts, rain, and winter chemicals all reach the bumper and its hardware. The splash-zone areas around the front and underside of a tractor are especially vulnerable to corrosion, and chloride exposure can damage truck components in as little as one winter season, according to heavy-duty bumper fitment guidance on corrosion and mounting hardware.
Uptime starts with the correct fit
Many replacement bumpers are built as direct bolt-on units. That means the mount pattern is designed to match the truck, with no fabrication, drilling, or cutting when the correct configuration is ordered. Direct bolt-on installation can reduce labor and keep the truck moving, but it doesn't eliminate the need to verify the frame, brackets, fasteners, and cutouts first.
A Peterbilt 389 bumper isn't automatically correct for every Peterbilt. A Kenworth W900 chrome bumper needs the right year, mount style, width, and light openings. Freightliner Cascadia and International configurations also vary by model and front-end layout. Order by the complete truck configuration, not by a photograph or a general brand name.
Shop rule: A bumper should bolt to a healthy mounting structure. It shouldn't be used to hide a weak bracket or stretched frame hole.
The finish matters, too. Chrome, polished stainless, and drop bumper styles affect the truck's appearance, but they also face different cleaning and corrosion demands. A professional-looking front end helps the truck present well to customers, carriers, and other drivers. More important, a properly fitted bumper keeps the repair focused on restoring safe clearance and reliable service.
Before scheduling the job, use a detailed truck maintenance checklist to record damage around the front end. Note cracked brackets, missing hardware, damaged fog-light openings, and any contact with the grille or hood. That record helps you order the right part the first time.
Understanding the Heavy-Duty Truck Aftermarket
A bumper job often starts with a damaged face bar and ends with a larger repair bill. Fleets keep Class 8 trucks working for long service lives, so impacts, corrosion, and ordinary wear continue driving demand for replacement parts. The heavy-duty truck aftermarket was forecast at USD 67.4 billion globally in 2025, with a projection of USD 96.8 billion by 2034 at a 4.2% CAGR, according to market background on aftermarket semi-truck parts.
The broader U.S. parts market is substantial. Parts serving Class 6 through Class 8 trucks, trailers, and container chassis were estimated at USD 31.6 billion in 2019, with one forecast projecting USD 37 billion in 2024. Another summary placed the U.S. heavy-duty automotive aftermarket at USD 39.3 billion in 2024. These figures cover far more than bumpers, but they explain why replacement bumpers remain a durable commercial product.

Why replacement demand keeps moving
North American protection parts show the same pattern. The North America bumper protection market was valued at USD 0.98 billion in 2025 and projected to reach USD 1.86 billion by 2034, representing a 7.4% CAGR, according to North American Freightliner bumper market coverage. The report identifies the United States as the largest country market and projects replacement bumpers to record the fastest CAGR during the forecast period.
For an owner-operator, the takeaway is practical. A replacement bumper is a service part tied to uptime, vehicle age, parts availability, and material costs. Price matters, but fit and mounting condition matter more. A new face bar cannot correct a corroded bracket, weakened frame horn, or stretched mounting hole.
Salt-belt trucks deserve extra scrutiny. Before comparing finishes or delivery times, inspect the hidden structure behind the bumper. Road salt can reduce bracket thickness and damage fasteners while leaving the visible face bar looking serviceable. That inspection separates a lasting repair from a cosmetic swap that shifts or fails later.
Trade policy can affect the order
Supply and pricing can change with trade policy. An October 17, 2025 presidential proclamation extended Section 232 tariffs to medium- and heavy-duty vehicles and parts, effective November 1, 2025. The measure applied a 25% duty to Class 4 through Class 8 truck components, including bumper and front-end protection systems, as described in the same market report.
Ask about stock status, manufacturing location, freight, warranty coverage, and expected delivery before approving the repair. Prices and lead times can differ between suppliers. Fleets should also replace a damaged bumper during planned service when fitment is known, rather than waiting for an emergency roadside repair.
Pre-Installation Checks and Safety Protocols
The safest bumper job begins before the first fastener comes out. A Class 8 bumper is large, awkward, and often under tension from damaged brackets. Park on a level surface, set the parking brake, chock the wheels, shut down the truck, and remove the keys.
Use equipment rated for the truck's weight. Support the vehicle with properly placed stands if anyone needs to work beneath it. Never rely on a jack alone. Wear eye protection when cleaning rust or cutting seized hardware, and use gloves that still allow a firm grip on sockets and wrenches.
Inspect the hidden structure first
Look behind the face bar. Clean mud and loose scale from the mounting area so you can see the brackets, frame horns, bolt heads, washers, and holes.
Check for:
- Bent brackets: A bracket that leans, twists, or has a visible crack won't hold a new bumper correctly.
- Elongated holes: A stretched mounting hole can let the bumper shift after installation.
- Seized fasteners: Rusted bolts may break inside the bracket or damage the threaded section during removal.
- Heavy scale: Flaking corrosion can reduce the usable thickness of a bracket even when the outside looks solid.
- Previous repairs: Welds, drilled holes, spacer stacks, and mixed hardware may show that the truck has already had an imperfect repair.
- Cab and frame alignment: Measure the bumper position against the grille, hood, fenders, and tire clearance before removal.
Chloride exposure attacks more than the visible chrome or paint. Rust can start at brackets and fasteners, then spread into the parts that hold the bumper in position. A new face bar won't correct a weak support structure.
A shiny replacement on a rusty mount is still a risky repair.
Decide what gets replaced
If the brackets are straight, the holes remain round, and the hardware can be removed without damage, a bumper-only replacement may be reasonable. Replace compromised bolts, washers, nuts, or spacers rather than reusing hardware that has lost its shape or threads.
If a bracket is cracked, thin from corrosion, bent from an impact, or pulling away from the frame, stop and repair that structure first. Don't force a direct bolt-on bumper onto a mount that no longer holds the original geometry. If the frame itself is damaged, have a qualified heavy-duty repair shop inspect it before ordering the replacement.
Confirm the truck's:
- Make and model.
- Model year.
- Cab configuration.
- Bumper width and style.
- Standard or blind mount.
- Fog-light, tow-hook, sensor, and other cutouts.
- Finish and material.
- Hardware requirements.
Direct bolt-on bumpers still depend on an exact frame, cutout, and hardware match. Class 8 bumper fitment information explains why the mount style alone isn't enough to confirm compatibility.
Selecting the Right Galhor Bumper Material
Material choice comes down to the route, the weather, the truck's exposure, and how much downtime costs your operation. The three relevant options are chrome-plated carbon steel, chrome-plated stainless steel 430, and chrome-plated stainless steel 304.
All three can deliver a chrome appearance when properly finished, but they don't offer the same balance of corrosion resistance, weight, repair cost, and availability. A cross-country truck working through salted mountain passes faces a different problem than a regional tractor that returns to a dry yard every night.
Compare the three choices
| Material | Gauge | Best For |
|---|---|---|
| Chrome-plated carbon steel | 10-gauge construction is listed for the steel chrome bumper configuration | Buyers focused on impact durability and a lower material cost, with regular finish maintenance |
| Chrome-plated stainless steel 430 | Confirm the gauge for the selected configuration | Regional and long-haul use where corrosion resistance and appearance both matter |
| Chrome-plated stainless steel 304 | Confirm the gauge for the selected configuration | Severe weather exposure, salt-belt routes, and owners prioritizing corrosion resistance |
The 10-gauge carbon steel option provides a substantial base for a working bumper. It makes sense when the truck sees repeated low-speed contact, rough yards, or conditions where impact resistance carries more weight than minimum mass. Carbon steel can also be a practical budget choice, but damaged chrome and exposed steel require prompt attention.
Stainless steel 430 offers a useful middle position. It supports a bright finished appearance and improved corrosion resistance compared with ordinary carbon steel, while still being selected for fit-for-purpose heavy-duty service. It can suit an owner-operator who wants a polished truck without choosing the highest corrosion-resistance option.
Stainless steel 304 is the choice to examine closely for trucks that spend long periods in wet, salty, or chemically treated environments. It costs more in many configurations, but the value comes from reducing corrosion concerns and protecting appearance over a demanding route. It isn't automatically the right choice for every truck. A regional operator who washes often and avoids winter salt may place more value on purchase price and delivery time.
Finish and thickness still matter
Galhor's listed chrome process uses a triple-layer hexavalent chrome finish with 35 microns of nickel, designed to support a deep mirror polish and corrosion resistance. The finish won't save a bumper from neglected road salt, abrasive cleaners, or damaged mounting hardware. It gives the base material a better starting point, but the owner still has to maintain it.
Use the chrome-plated steel and chrome-plated stainless steel comparison to compare the construction trade-off before you order.
For a Peterbilt 389 bumper or Kenworth W900 chrome bumper, choose the material after answering three questions:
- Where does the truck run? Salt-belt and cross-border routes increase corrosion exposure.
- What causes most of the damage? Repeated yard impacts favor a sturdy steel choice, while chemical exposure favors stainless.
- How costly is downtime? A fleet with no spare tractor may value corrosion resistance and fast availability more than the lowest purchase price.
A polished bumper can improve the truck's appearance, but the actual return comes from matching the material to the work. Don't pay for a feature your route doesn't need, and don't choose a low-cost finish for a truck that lives in winter chemicals.
Removing the Old Bumper and Installing the New One
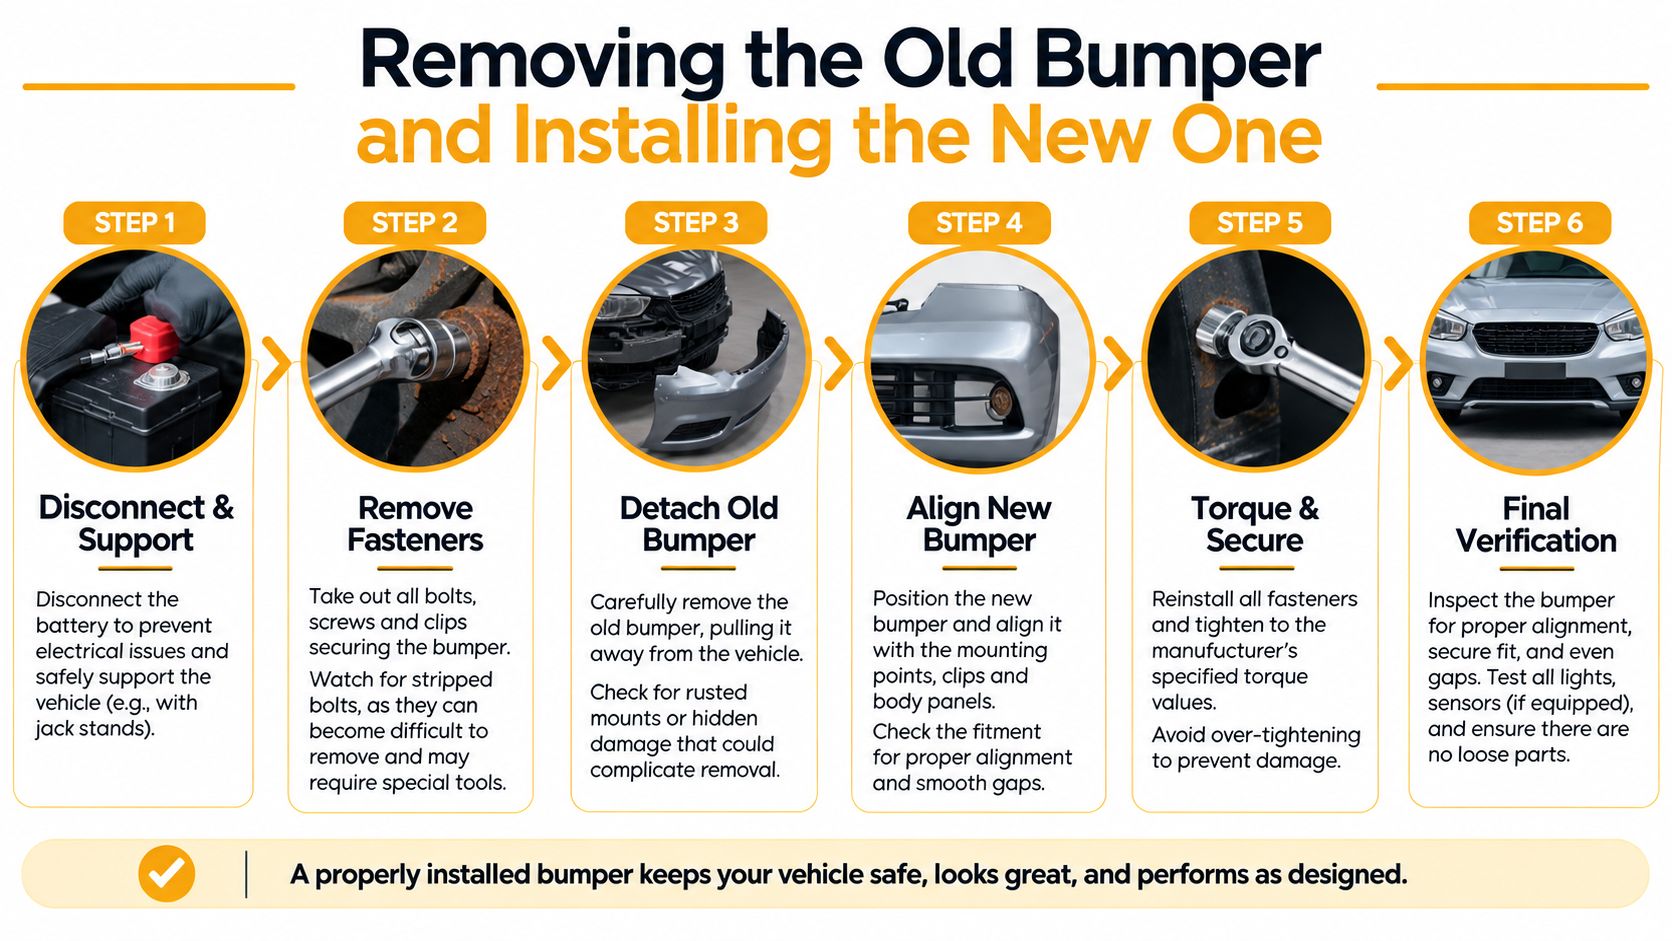
Removal gets difficult when the truck has spent years on wet roads. Rusted bolts can snap, spin inside a cage nut, or round off before the bumper moves. Give yourself time to clean the hardware and support the old assembly before it drops.
Disconnect lights, fog lamps, sensors, and any wiring attached to the bumper. Label connectors instead of relying on memory. Place a transmission jack, wide support, or another suitable lifting aid under the bumper so the assembly can't fall when the final fasteners come out.
Remove the old assembly
Start with a visual record. Photograph the bumper's position, spacer locations, wiring routes, and cutouts. These images help when the old unit is too damaged to use as a reliable reference.
Work through the fasteners in a controlled order:
- Clean the threads. Remove dirt and loose scale with a wire brush.
- Apply penetrant. Give seized hardware time to release instead of using immediate force.
- Use the correct socket. A tight six-point socket is less likely to round a rusted bolt.
- Support the load. Keep the bumper supported while loosening the final bolts.
- Cut only as a last resort. Protect wiring, frame surfaces, tires, and painted components if a fastener must be removed with a cutting tool.
- Save usable spacers. Identify every spacer before discarding damaged hardware.
Do not keep turning a bolt that is spinning a hidden nut or cage. Stop and expose the mount so you can hold the back side or replace the damaged hardware. Stripped fasteners are common, but rushing them often creates more work.
Prepare the new bumper
Before lifting the replacement, place it beside the old unit and compare the major details. Check mounting holes, center position, wing shape, light openings, fog-light holes, tow-hook openings, sensor provisions, and the relationship between the bumper and grille.
A direct bolt-on design should install without drilling or cutting when the truck configuration is correct. If the holes don't line up, don't enlarge them immediately. A mismatch can indicate the wrong model year, cab configuration, mount style, or bumper width.
The bumper installation guide provides a useful reference for the basic sequence. The truck's service information remains the authority for torque specifications, fastener grades, wiring, and any model-specific safety requirements.
Align before tightening
Lift the bumper into position with support under the center and outer sections. Start all fasteners by hand. Leave them loose enough to allow adjustment, but don't leave the assembly unsupported.
Set the main gaps first:
- Center alignment: The bumper should sit square to the grille and frame.
- Cab clearance: Check the relationship to the hood, fenders, and lower grille.
- Tire clearance: Turn the wheels through their range if the bumper wings sit near the tires.
- Cutout position: Confirm lights, fog lamps, tow hooks, and sensors sit in their intended openings.
- Vertical attitude: A drop bumper should maintain the ordered drop without twisting from side to side.
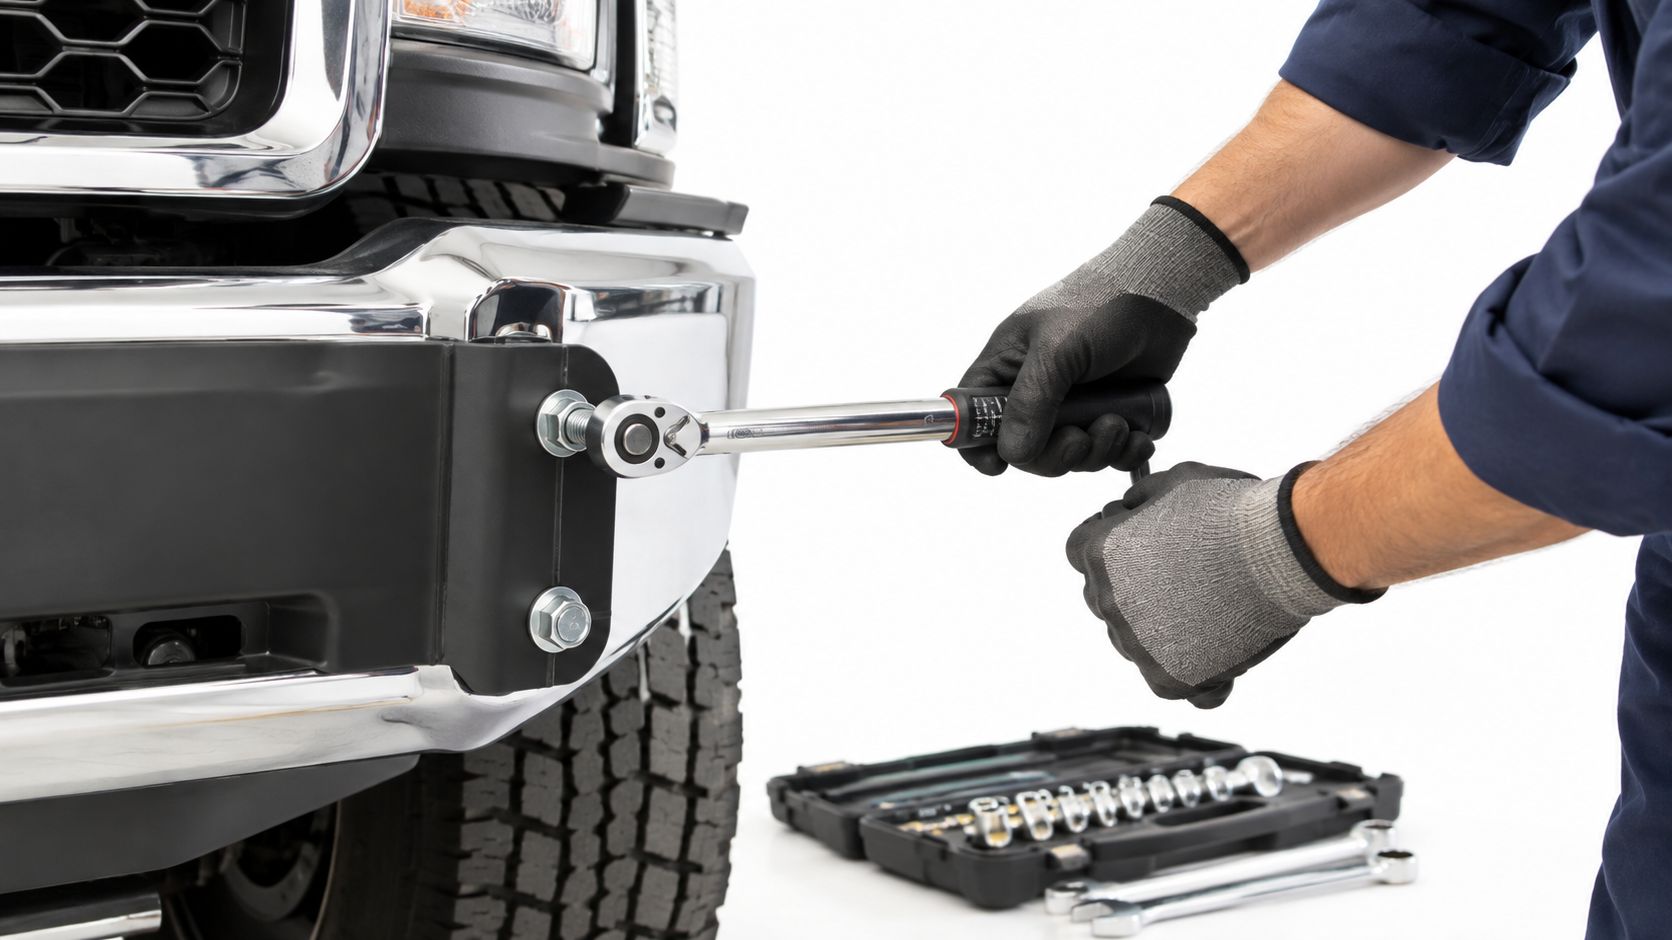
Once the fit looks correct, tighten the fasteners in stages. Use the truck manufacturer's torque specification and the correct hardware. Don't guess at torque, especially on frame-mounted fasteners. A bolt that is too loose allows movement. A bolt that is too tight can damage threads or distort the mount.
Reconnect wiring after the bumper is secure. Keep harnesses away from sharp edges, heat, moving parts, and pinch points. Test every lamp and sensor before the truck leaves the bay.
Troubleshooting and Post-Installation Care
A small fitment problem should be diagnosed, not forced. If a light opening is off, verify the model year, cab type, bumper style, and ordered cutouts. If one side sits high, inspect the bracket, spacer, frame horn, and fastener stack before bending the bumper or enlarging a hole.
Loose mounting points usually point to damaged threads, missing spacers, stretched holes, or a bracket that wasn't sound before installation. Remove the load, correct the mount, and retorque the hardware to the applicable specification. Recheck the bumper after the first loaded run and after the truck has faced rough roads.
Wash salt, mud, and chemical residue from the finish with clean water and a truck-safe soap. Avoid harsh abrasives that can mark polished stainless or chrome. Dry the bumper, inspect seams and edges, and touch up any exposed base metal before corrosion spreads.
Availability can affect the repair plan. In-stock stainless steel 430 and 304 flat bumpers may ship within 48 hours, while made-to-order carbon steel units typically ship in 4 to 6 weeks. Confirm stock, freight timing, warranty coverage, and return conditions before removing a working bumper. LTL delivery also requires a careful inspection for shipping damage before signing.
Galhor Inc. offers configurable direct bolt-on bumpers for Freightliner, Peterbilt, Kenworth, Volvo, and other Class 8 applications, with chrome-plated carbon steel, 430 stainless steel, and 304 stainless steel options. Review the fitment, cutouts, finish, stock status, and shipping details, then visit Galhor Inc. to order the right heavy duty bumper replacement for your truck.